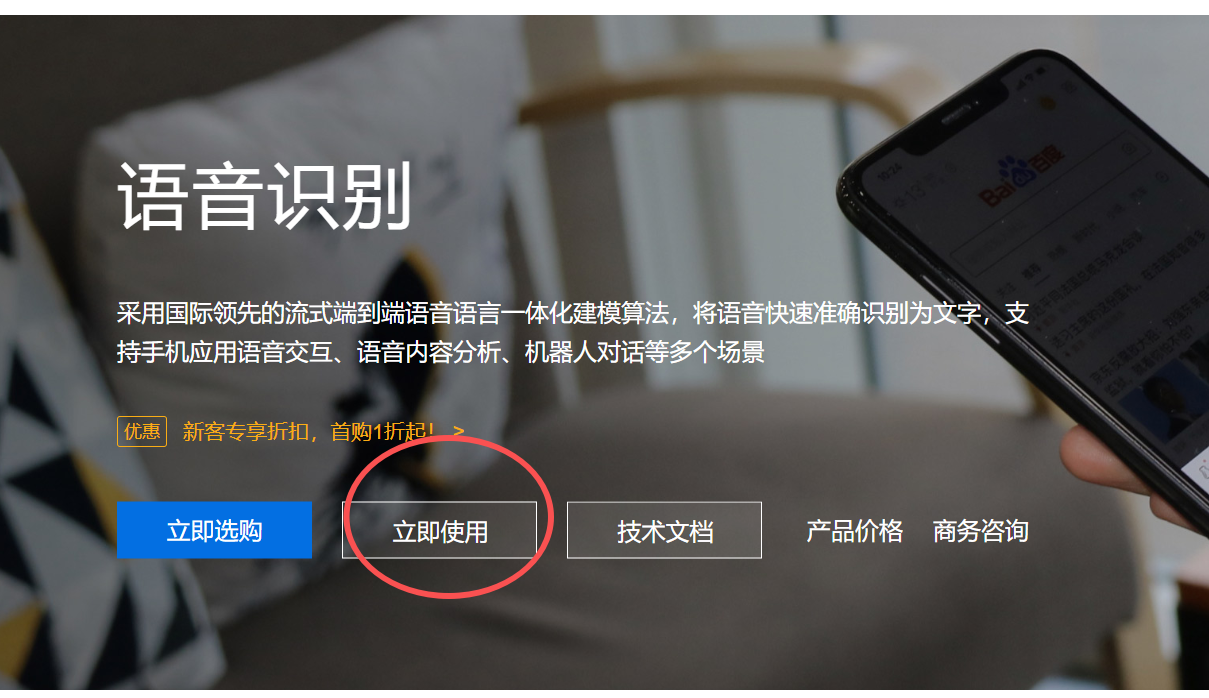
ESP如何接入百度的语音识别
access_token对应的值就是可用的token了,每次申请的token有效期为30天,过期需要重新申请,可以申请多个。不用每次都调用获取token的程序,申请一个可以用30天,定时更新就可以吧。只需要按照图中的数据类型和内容这个格式打包好数据然后发送就行,下面是ESP32的具体实现代码。如果电脑出现乱码需要改用UTF-8编码方式,返回的语音识别结果是UTF-8 方式编码。(3) 采集音频数据
1.连接wifi
#include <WiFi.h>
// WiFi credentials
const char* ssid = "vivoX200s";
const char* password = "lyt123456";
// Connect to WiFi
WiFi.begin(ssid, password);
while (WiFi.status() != WL_CONNECTED) {
delay(1000);
Serial.println("Connecting to WiFi...");
}
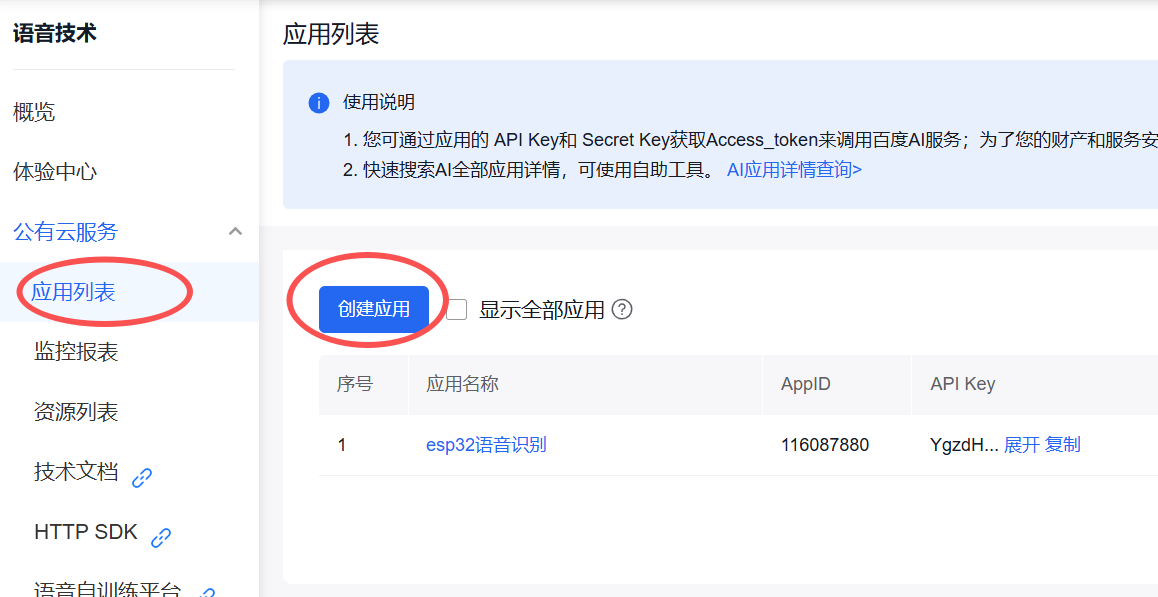
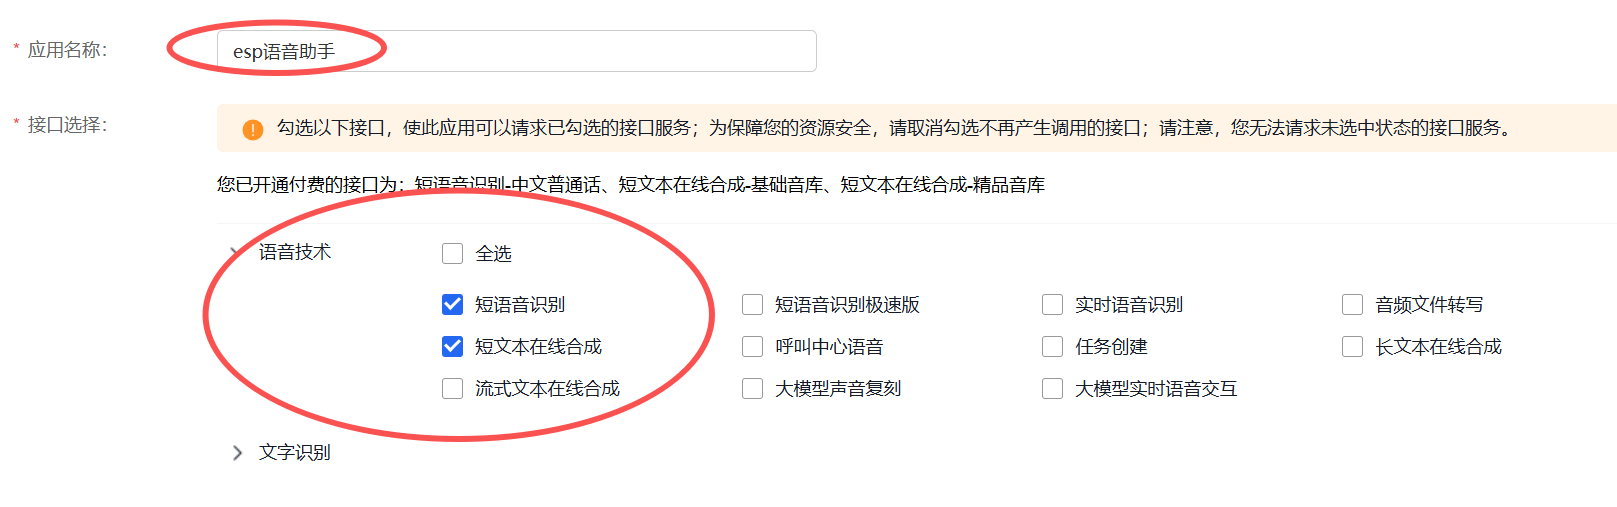
Serial.println("Connected to WiFi");2.创建百度云语音识别应用获取API Key和Secret Key
(3) 采集音频数据,将数据打包成规定的格式,POST发送到请求API
(4) 接收返回的数据


3.根据创建应用生成的API Key和Secret Key来获取token
#include <HTTPClient.h>

// Baidu API credentials
const char* baidu_api_key = "YgzdHayYkUb4rgodJGrkuf1c";
const char* baidu_secret_key = "KSs8dJec6RH5TxgJei62Dq4Dec3Mohpd";

String getAccessToken(const char* api_key, const char* secret_key) {
  String access_token = "";
  HTTPClient http;

  // 创建http请求
  http.begin("https://aip.baidubce.com/oauth/2.0/token?grant_type=client_credentials&client_id=" + String(api_key) + "&client_secret=" + String(secret_key));
  int httpCode = http.POST("");

  if (httpCode == HTTP_CODE_OK) {
    String response = http.getString();
    DynamicJsonDocument doc(1024);
    deserializeJson(doc, response);
    access_token = doc["access_token"].as<String>();

    Serial.printf("[HTTP] GET access_token: %s\n", access_token);
  } else {
    Serial.printf("[HTTP] GET... failed, error: %s\n", http.errorToString(httpCode).c_str());
  }
  http.end();

  return access_token;
}
请求成功会返回如下数据
{
  "refresh_token": "25.b55fe1d287227ca97aab219bb249b8ab.315360000.1798284651.282335-8574074",
  "expires_in": 2592000,
  "scope": "public wise_adapt",
  "session_key": "9mzdDZXu3dENdFZQurfg0Vz8slgSgvvOAUebNFzyzcpQ5EnbxbF+hfG9DQkpUVQdh4p6HbQcAiz5RmuBAja1JJGgIdJI",
  "access_token": "24.6c5e1ff107f0e8bcef8c46d3424a0e78.2592000.1485516651.282335-8574074",
  "session_secret": "dfac94a3489fe9fca7c3221cbf7525ff"
}
access_token对应的值就是可用的token了,每次申请的token有效期为30天,过期需要重新申请,可以申请多个。不用每次都调用获取token的程序,申请一个可以用30天,定时更新就可以吧。
4.采集音频数据,将数据打包成规定的格式(JSON),POST发送到请求API
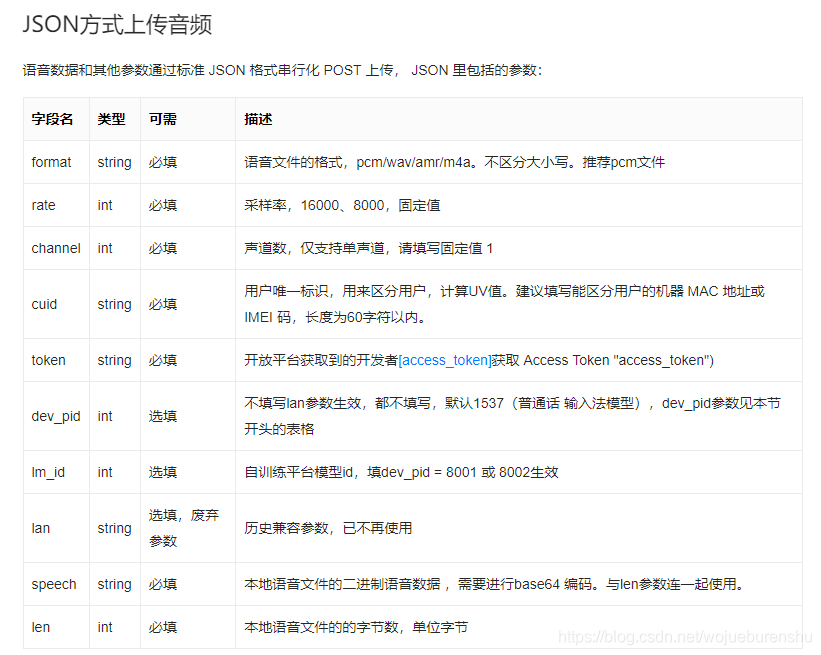
只需要按照图中的数据类型和内容这个格式打包好数据然后发送就行,下面是ESP32的具体实现代码。
#include <ArduinoJson.h>
#include <base64.hpp>

/*access_token   上面生成的Token
  audiodata		 采集的音频数据
  audioDataSize	 音频数据大小*/
String baiduSTT_Send(String access_token, uint8_t* audioData, int audioDataSize) {
  String recognizedText = "";	//返回识别出的内容

  if (access_token == "") {
    Serial.println("access_token is null");
    return recognizedText;
  }

  // 原始音频数据进行Base64编码,数据量会增大1/3
  int audio_data_len = audioDataSize * sizeof(char) * 1.4;//存储Base64编码数据所需的内存大小
  unsigned char* audioDataBase64 = (unsigned char*)ps_malloc(audio_data_len);//分配Base64缓冲区
  if (!audioDataBase64) {
    Serial.println("Failed to allocate memory for audioDataBase64");
    return recognizedText;
  }

  // json请求体缓冲区大小,json包大小,由于需要将audioData数据进行Base64的编码,数据量会增大1/3
  int data_json_len = audioDataSize * sizeof(char) * 1.4;
  char* data_json = (char*)ps_malloc(data_json_len);
  if (!data_json) {
    Serial.println("Failed to allocate memory for data_json");
    return recognizedText;
  }

  // 将原始音频数据转换为Base64编码
  encode_base64(audioData, audioDataSize, audioDataBase64);

  memset(data_json, '\0', data_json_len);//将数组清空
  strcat(data_json, "{");
  strcat(data_json, "\"format\":\"pcm\",");
  strcat(data_json, "\"rate\":16000,");//采样率    如果采样率改变了,记得修改该值,只有16000、8000两个固定采样率
  strcat(data_json, "\"dev_pid\":1537,");//中文普通话
  strcat(data_json, "\"channel\":1,");//单声道
  strcat(data_json, "\"cuid\":\"57722200\",");//识别码    随便打几个字符,但最好唯一
  strcat(data_json, "\"token\":\"");//token		这里需要修改成自己申请到的token
  strcat(data_json, access_token.c_str());
  strcat(data_json, "\",");
  sprintf(data_json + strlen(data_json), "\"len\":%d,", audioDataSize);//数据长度  如果传输的数据长度改变了,记得修改该值,该值是ADC采集的数据字节数,不是base64编码后的长度
  strcat(data_json, "\"speech\":\"");
  strcat(data_json, (const char*)audioDataBase64);//base64编码数据   这里使用的base64编码的库,在base.h头文件中
  strcat(data_json, "\"");
  strcat(data_json, "}");

  // 创建http请求
  HTTPClient http_client;

  http_client.begin("http://vop.baidu.com/server_api");//请求API
  http_client.addHeader("Content-Type", "applica//POST请求tion/json");//设置固定头部:Content-Type:application/json
  int httpCode = http_client.POST(data_json);//POST请求

  if (httpCode > 0) {
    if (httpCode == HTTP_CODE_OK) {
      // 获取返回结果
      String response = http_client.getString();
      Serial.println(response);

      // 从json中解析对应的result
      DynamicJsonDocument responseDoc(2048);
      deserializeJson(responseDoc, response);
      recognizedText = responseDoc["result"].as<String>();
    }
  } else {
    Serial.printf("[HTTP] POST failed, error: %s\n", http_client.errorToString(httpCode).c_str());
  }

  // 释放内存
  if (audioDataBase64) {
    free(audioDataBase64);
  }

  if (data_json) {
    free(data_json);
  }

  http_client.end();

  return recognizedText;
}
在上一步的代码中实现了接收数据,列一下返回的数据
{"corpus_no":"6990616182318679817","err_msg":"success.","err_no":0,"result":["天气真好。"],"sn":"440339165021627629665"}
{"corpus_no":"6990616203881655850","err_msg":"success.","err_no":0,"result":["中午吃什么?"],"sn":"204332180621627629670"}
{"corpus_no":"6990616272746191297","err_msg":"success.","err_no":0,"result":["开灯。"],"sn":"657868059871627629686"}
如果电脑出现乱码需要改用UTF-8编码方式,返回的语音识别结果是UTF-8 方式编码
相关链接:
百度语音识别文档: https://ai.baidu.com/ai-doc/SPEECH/Vk38lxily.
token申请说明文档: https://ai.baidu.com/ai-doc/REFERENCE/Ck3dwjhhu.
一个在线HTTP请求模拟工具:https://www.jsonla.com/http/test.html.
ESP32 JSON库说明: https://blog.csdn.net/qq_36347513/article/details/116481167.

火山引擎开发者社区是火山引擎打造的AI技术生态平台,聚焦Agent与大模型开发,提供豆包系列模型(图像/视频/视觉)、智能分析与会话工具,并配套评测集、动手实验室及行业案例库。社区通过技术沙龙、挑战赛等活动促进开发者成长,新用户可领50万Tokens权益,助力构建智能应用。
更多推荐
 21
21 0
0- 0


 已为社区贡献1条内容

所有评论(0)