(一)基于云平台微调大模型,以deepseek-coder-6.7b为例
如下图,我们进入jupyter界面,然后创建笔记本。
一、租借rtx4090卡并创建示例
如下图,我们进入jupyter界面,然后创建笔记本

二、提前下载好模型到本地
为了节省时间,我们需要提前下好模型deepseek-ai/deepseek-coder-6.7b-instruct,然后再上传到autodl上直接本地加载。
下载方法推荐用命令行下载,比浏览器一个个下载快:
步骤 1:安装 CLI 工具
在你本地电脑的终端运行(需要 Python 环境,推荐用虚拟环境):
pip install huggingface_hub
步骤 2:登录 Hugging Face(可选,如果模型需要认证)
huggingface-cli login
会提示你输入你的 Hugging Face Token,在这里获取。
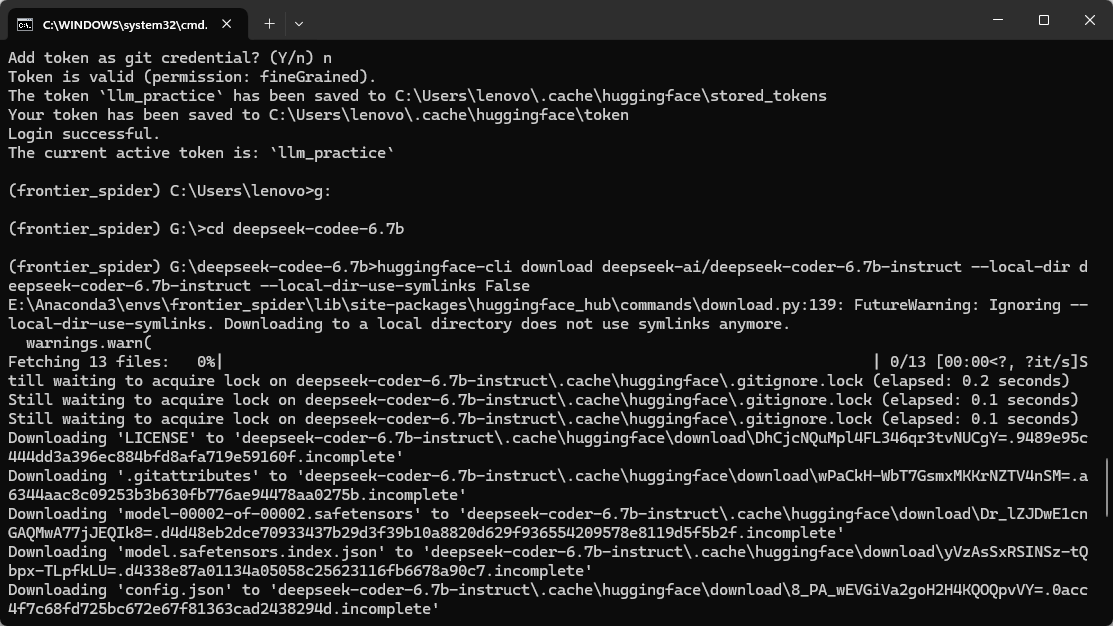
步骤 3:下载整个模型文件夹
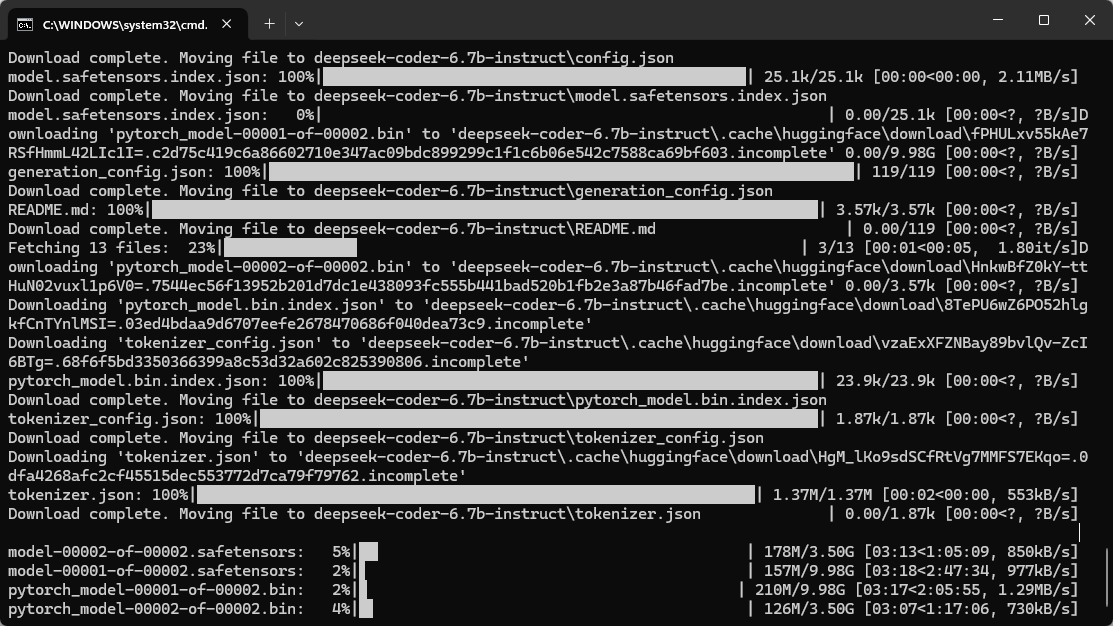
huggingface-cli download deepseek-ai/deepseek-coder-6.7b-instruct --local-dir deepseek-coder-6.7b-instruct --local-dir-use-symlinks False
这条命令会把模型完整下载到你当前目录下的 deepseek-coder-6.7b-instruct/ 文件夹中。完整模型大约 13GB,请确保磁盘空间充足。
当然从本地上传到autodl是很慢的,所以推荐使用kaggle里面有的模型,用下面的方式直接下载到autodl的实例中。
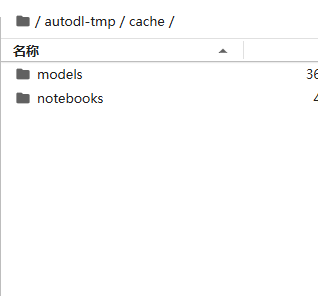
我们指定缓存路径,这样下载的时候就会下载到我们的数据盘了
import os
import kagglehub

# 设置缓存路径
os.environ["KAGGLEHUB_CACHE"] = '/root/autodl-tmp/cache'
model_path = kagglehub.model_download("deepseek-ai/deepseek-r1/Transformers/deepseek-r1-distill-qwen-7b/1")

print("模型保存路径:", model_path)
可以看到都保存到数据盘了
那么接下来我们就可以加载模型了,下面详细讲解每个步骤(这里我加载模型用于生成svg代码)
三、加载模型用于生成svg代码
首先我们给出完整代码,然后讲解每个步骤。
import concurrent
import io
import logging
import re
import re2

import cairosvg
import kagglehub
import torch
from lxml import etree
from transformers import AutoTokenizer, AutoModelForCausalLM, BitsAndBytesConfig

svg_constraints = kagglehub.package_import('metric/svg-constraints')

DEVICE = torch.device("cuda" if torch.cuda.is_available() else "cpu")


class Model:
    def __init__(self):
         # 模型量化相关配置
        quantization_config = BitsAndBytesConfig(
            load_in_4bit=True,
            bnb_4bit_quant_type="nf4",
            bnb_4bit_use_double_quant=True,
            bnb_4bit_compute_dtype=torch.float16,
        )
        self.model_path = '/root/autodl-tmp/cache/models/deepseek-ai/deepseek-r1/Transformers/deepseek-r1-distill-qwen-7b/1'
        self.tokenizer = AutoTokenizer.from_pretrained(self.model_path)
        self.model = AutoModelForCausalLM.from_pretrained(
            self.model_path,
            device_map="auto",
            quantization_config=quantization_config,
        )
        self.prompt_template = """Generate SVG code to visually represent the following text description, while respecting the given constraints.
<constraints>
* **Allowed Elements:** `svg`, `path`, `circle`, `rect`, `ellipse`, `line`, `polyline`, `polygon`, `g`, `linearGradient`, `radialGradient`, `stop`, `defs`
* **Allowed Attributes:** `viewBox`, `width`, `height`, `fill`, `stroke`, `stroke-width`, `d`, `cx`, `cy`, `r`, `x`, `y`, `rx`, `ry`, `x1`, `y1`, `x2`, `y2`, `points`, `transform`, `opacity`
</constraints>

<example>
<description>"A red circle with a blue square inside"</description>
```svg
<svg viewBox="0 0 256 256" width="256" height="256">
  <circle cx="50" cy="50" r="40" fill="red"/>
  <rect x="30" y="30" width="40" height="40" fill="blue"/>
</svg>
```
</example>


Please ensure that the generated SVG code is well-formed, valid, and strictly adheres to these constraints. Focus on a clear and concise representation of the input description within the given limitations. Always give the complete SVG code with nothing omitted. Never use an ellipsis.

<description>"{}"</description>
```svg
<svg viewBox="0 0 256 256" width="256" height="256">
"""
        self.default_svg = """<svg width="256" height="256" viewBox="0 0 256 256"><circle cx="50" cy="50" r="40" fill="red" /></svg>"""
        self.constraints = svg_constraints.SVGConstraints()
        self.timeout_seconds = 90

    # You could try increasing `max_new_tokens`
    def predict(self, description: str, max_new_tokens=512) -> str:
        def generate_svg():
            try:
                prompt = self.prompt_template.format(description)
                inputs = self.tokenizer(text=prompt, return_tensors="pt").to(DEVICE)

                with torch.no_grad():
                    output = self.model.generate(
                        **inputs,
                        max_new_tokens=max_new_tokens,
                        do_sample=True,
                    )

                output_decoded = self.tokenizer.decode(output[0], skip_special_tokens=True)
                logging.debug('Output decoded from model: %s', output_decoded)

                matches = re.findall(r"<svg.*?</svg>", output_decoded, re.DOTALL | re.IGNORECASE)
                if matches:
                    svg = matches[-1]
                else:
                    return self.default_svg

                logging.debug('Unprocessed SVG: %s', svg)
                svg = self.enforce_constraints(svg)
                logging.debug('Processed SVG: %s', svg)
                # Ensure the generated code can be converted by cairosvg
                cairosvg.svg2png(bytestring=svg.encode('utf-8'))
                return svg
            except Exception as e:
                logging.error('Exception during SVG generation: %s', e)
                return self.default_svg

        # Execute SVG generation in a new thread to enforce time constraints
        with concurrent.futures.ThreadPoolExecutor(max_workers=1) as executor:
            future = executor.submit(generate_svg)
            try:
                return future.result(timeout=self.timeout_seconds)
            except concurrent.futures.TimeoutError:
                logging.warning("Prediction timed out after %s seconds.", self.timeout_seconds)
                return self.default_svg
            except Exception as e:
                logging.error(f"An unexpected error occurred: {e}")
                return self.default_svg
    def enforce_constraints(self, svg_string: str) -> str:
        """Enforces constraints on an SVG string, removing disallowed elements
        and attributes.

        Parameters
        ----------
        svg_string : str
            The SVG string to process.

        Returns
        -------
        str
            The processed SVG string, or the default SVG if constraints
            cannot be satisfied.
        """
        logging.info('Sanitizing SVG...')
        try:
            parser = etree.XMLParser(remove_blank_text=True, remove_comments=True)
            root = etree.fromstring(svg_string, parser=parser)
        except etree.ParseError as e:
            logging.error('SVG Parse Error: %s. Returning default SVG.', e)
            return self.default_svg

        elements_to_remove = []
        for element in root.iter():
            tag_name = etree.QName(element.tag).localname

            # Remove disallowed elements
            if tag_name not in self.constraints.allowed_elements:
                elements_to_remove.append(element)
                continue

            # Remove disallowed attributes and check attribute values
            attrs_to_remove = []
            for attr, value in element.attrib.items():
                attr_name = etree.QName(attr).localname
                if (
                    attr_name not in self.constraints.allowed_elements[tag_name]
                    and attr_name not in self.constraints.allowed_elements['common']
                ):
                    attrs_to_remove.append(attr)
                else:
                    # Check if color attributes are valid CSS colors
                    if attr_name in ['fill', 'stroke'] and not self.is_valid_css_color(value):
                        attrs_to_remove.append(attr)
                    # Check if dimensions are positive numbers
                    if attr_name in ['width', 'height', 'r', 'x', 'y', 'cx', 'cy', 'rx', 'ry'] and not self.is_positive_number(value):
                        attrs_to_remove.append(attr)
                    # Check if opacity is within the valid range
                    if attr_name == 'opacity' and not self.is_valid_opacity(value):
                        attrs_to_remove.append(attr)

            for attr in attrs_to_remove:
                logging.debug('Attribute "%s" for element "%s" not allowed. Removing.', attr, tag_name)
                del element.attrib[attr]

        # Remove elements marked for removal
        for element in elements_to_remove:
            if element.getparent() is not None:
                element.getparent().remove(element)
                logging.debug('Removed element: %s', element.tag)

        try:
            cleaned_svg_string = etree.tostring(root, encoding='unicode')
            return cleaned_svg_string
        except ValueError as e:
            logging.error('SVG could not be sanitized to meet constraints: %s', e)
            return self.default_svg

    def is_valid_css_color(self, color: str) -> bool:
        # Implement a simple check for valid CSS color values
        return re.match(r'^#(?:[0-9a-fA-F]{3}){1,2}$', color) is not None or color in ['red', 'blue', 'green', 'black', 'white']

    def is_positive_number(self, value: str) -> bool:
        try:
            return float(value) > 0
        except ValueError:
            return False

    def is_valid_opacity(self, value: str) -> bool:
        try:
            return 0 <= float(value) <= 1
        except ValueError:
            return False
3.1 量化配置
下面的量化配置都是啥意思呢,我们在加载大模型的时候有一些策略是可以进行推理加速和显存优化的,让大模型回答的速度更快,使用显卡的效率更高,这就是量化的目的,具体怎么实现呢?
3.1.1 精度
BitsAndBytesConfig 是 HuggingFace 的 transformers 库中用于配置 bitsandbytes 量化加载的类,能以 4bit/8bit 精度加载模型,减少显存使用,同时保持尽量高的精度。这里就需要讲解一下什么是精度了。在深度学习中,精度指的是表示一个数时使用的bit数,有4,8,16等。
| 精度类型 | 每个数占用大小 | 举例 |
|---|---|---|
| float32 | 32 bit(4字节) | 标准浮点数,训练常用 |
| float16 | 16 bit(2字节) | 精度稍低,但更省资源 |
| bfloat16 | 16 bit | 精度类似float32,但范围大 |
| int8 | 8 bit(1字节) |
只表示整数,低精度 |
| 4 bit(nf4等) | 4 bit(0.5字节) | 极低精度,用于推理优化 |
需要注意,不同精度对显存的使用不同,数值越精确,占用的存储位数越多。举个例子:你要表示 3.1415926 这个数:
-
float32可以表示到 7 位有效数字 -
float16只能表示到 3~4 位 -
4bit可能只能表示成类似 3.1 或 3.0
所以:用 float32:一个参数占 4 字节;用 4bit:一个参数只占 0.5 字节(减少 8 倍 显存!)
假设一个模型有 10 亿个参数,则:
-
float32:≈ 4GB 显存
-
float16:≈ 2GB
-
4bit:≈ 0.5GB
而低精度虽然省显存,但容易影响模型效果(准确率、鲁棒性)。模型本身在训练时是用高精度 (float32) 完成的,转换为低精度时可能出现:参数失真(例如小数被截断)、数值不稳定(容易梯度爆炸或消失)、推理效果变差(回答不准确)等问题,所以有很多技术压缩精度又尽量不影响性能。
quantization_config = BitsAndBytesConfig(
            load_in_4bit=True,
            bnb_4bit_quant_type="nf4",
            bnb_4bit_use_double_quant=True,
            bnb_4bit_compute_dtype=torch.float16,
        )
上面代码4个参数分别表示:
1.load_in_4bit=True,表示使用4bit精度压缩存储模型参数,但是这个是只在存储的时候压缩使用,在训练和推理的时候说了,要用高精度。
2.bnb_4bit_quant_type,表示使用nf4, 代表normal float4,这个是一种专为量化设计的4bit浮点格式,比普通的浮点4和int4精度更好。
3.bnb_4bit_use_double_quant,表示使用二次量化,意思是先将模型权重分组,然后对每组的量化比例因子再次进行量化,可以理解为再一次压缩,减少存储空间
4.bnb_4bit_compute_compute_dtype,表示计算过程中使用的数据类型是float16,意思是在GPU上进行前向传播推理的时候,使用float16来还原并计算量化后的参数。这里注意的是,参数存储阶段用4bit精度将模型权重存储在显存中,极大节省显存空间;但是推理计算的时候,会动态的、逐层的把模型进行逐层加盟计算,在需要加载的时候加载成float16参与计算。
总结就是,这段代码告诉模型加载逻辑:“请用4bit的NF4量化方式加载模型参数,用双量化压缩进一步减少显存消耗,计算时用float16精度执行”。
3.1.2 量化基本概念
量化的核心思想是将原本连续的实数如32位浮点数映射到有限的离散数值如8位整数,从而减少数据占用的存储空间
在不同阶段,有不同的量化技术:
1.在训练阶段,有量化感知训练(QAT),是指在训练过程中模拟低精度量化的影响,以使得模型在训练时适应低精度计算。通过量化感知训练,模型可以适应低精度带来的误差,最大程度地保留精度。训练时的精度损失较少,推理时表现更加稳定。
2.在保存阶段,把训练好的模型进行压缩。权重量化(Weight Quantization):将模型的权重从 float32 转换为 int8 或其他低精度格式。激活量化(Activation Quantization):在推理时,输入和输出(激活)也会被量化为低精度格式。量化偏置(Bias Quantization):一般情况下,偏置保持为 float32,因为它对结果的影响相对较小。
3.在推理阶段,首先是量化保存到内存,减少对显存的需求,使得一些大模型可以在显存较小的GPU上面运行;然后在计算的时候还原成高精度推理。

中国智能体开发者社区,聚焦智能体与大模型开发,提供前沿资讯、实用工具链、开源项目及行业案例。通过技术沙龙、开发者大赛等活动,促进经验交流与协作,助力开发者快速构建创新智能应用。
更多推荐
 22
22 0
0- 0


 已为社区贡献2条内容

所有评论(0)