零基础LoRA本地微调+部署实践记录——基于Qwen2.5_0.5B的AI行为归纳模型
本文介绍了如何通过LoRA微调技术对Qwen2.5_0.5B模型进行本地微调,并实现AI面试中的行为归纳任务。文章首先分析了当前AIGC技术在上下文长度和生成一致性方面的限制,随后详细描述了从模型下载、数据预处理到微调和本地部署的完整流程。通过使用PEFT工具和llama.cpp项目,成功将微调后的模型转换为gguf格式,并在本地环境中进行部署。最后,文章还提供了批量推理的脚本示例,展示了如何在实
目录
前言
随着AIGC技术的不断发展,各行各业都在寻求AI转型的路径。目前这项技术的toC产品已经有了比较实质性的应用。而toB产品基本还处在探索阶段,例如近年兴起的AI agent、mcp服务器等技术,都在寻求围绕AI搭建一个完整工作流的方法。
当前AIGC产品的落地基本都受限于两大问题,一是上下文长度问题,即便当前的文本模型对于长文本的阅读能力在不断增强,但始终存在一个限制。对于数万字的超长文本或指令,模型通常难以记住所有细节,并且随着文本和对话次数的增加,出现幻觉的概率也会不断增加。二是生成一致性问题,AIGC模型都是概率模型,其对于同一段指令生成的多次结果很难保持一致,这使得它难以胜任需要规则输入输出的任务。也就是说,即便在工作流中统一员工给予AI指令的格式,我们基本也只能得出意思相近的输出结果,难以得出完全一致的输出结果。这两个问题使得当前落地的AI产品基本都是智能客服这类对上下文长度、生成一致性要求不高的产品。
AI面试,是人力资源管理领域在AI转型中比较火爆的研究方向,这也是AIGC比较容易实现落地的典型产品,本文在一个行为编码数据集上,尝试在本地对qwen2.5_0.5B模型使用LoRA微调,实现输入受试者在访谈中的原话,输出行为归纳的效果。行为编码数据集包含总计823条,分为两个部分,原始行为记录(访谈中受试者的原话),行为归纳(面试官给予受试者的常规行为或个性行为归纳)。
一、前期准备
电脑配置如下:
|
配置 |
具体型号或版本 |
|
操作系统 |
Windows 11 Version 24H2 |
|
CPU |
AMD Ryzen 7 6800H |
|
GPU |
NVIDIA GeForce RTX 3060 Laptop |
|
内存 |
16G DDR5 4800 |
|
编译环境 |
Python 3.8 |
对于6g显存的显卡,想要本地微调模型基本只能选用0.5B的模型,本人一开始选择的是Qwen2.5_1.5B的模型,在微调的时候显存需要占用大约10G左右,只能勉强微调完,但是后面部署的时候需要将safetensors格式的模型转化为gguf格式,这个过程需要占用32G以上的内存,少于32G就会崩,因此只能换用Qwen_0.5B。
1.模型下载
本文选用阿里推出的开源大模型Qwen2.5_0.5B,下载链接如下,全部文件都需要下载。
2.微调工具下载
使用PEFT工具进行LoRA微调,Github链接如下:
huggingface/peft: 🤗 PEFT: State-of-the-art Parameter-Efficient Fine-Tuning.
本文使用的是B站up主-大语言模型教程-整合的PEFT包,原视频链接如下:
二、数据预处理
微调所需的训练集格式为json格式,包含三个内容:
instruction:指令,也就是你需要指示模型做什么,例如“翻译以下这段话为中文”
input:你想交给模型处理的内容或者提问。
output:你希望模型对input内容给出的回答。
视实际情况而定,如果数据集是一问一答的形式,input可以为空。训练集示例如下:
[
{
"instruction": "根据以下访谈记录,归纳受试者的行为特征,总结核心能力。",
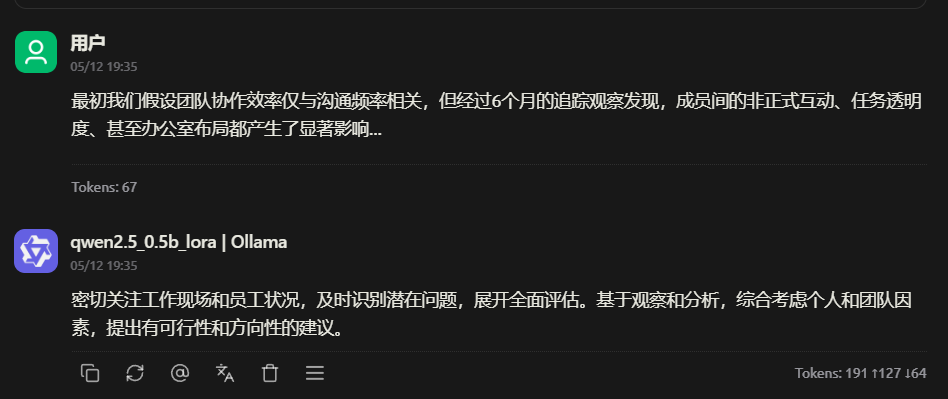
"input": "最初我们假设团队协作效率仅与沟通频率相关,但经过6个月的追踪观察发现,成员间的非正 式互动、任务透明度、甚至办公室布局都产生了显著影响...",
"output": "多维协同效应 - 在保持定期沟通的基础上,主动创造非正式交流机会,同步任务进度可视化看板,优化物理协作空间布局。"
},
...
]
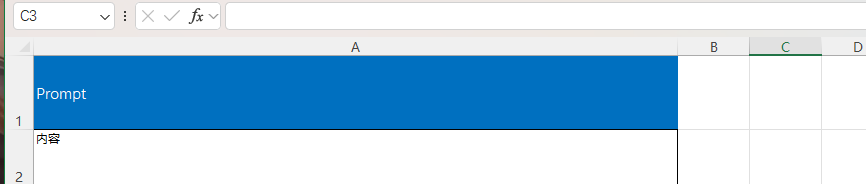
原始数据是xlsx表格格式的,将其整理成如下两列形式的xlsx表格。
1.数据集格式转换
编写一个python脚本,基于pandas库将数据处理成我们需要的json格式,处理结果参考上述训练集示例。
import pandas as pd
import json


def convert_excel_to_json(input_path, output_path):
    # 读取Excel文件
    df = pd.read_excel(input_path)

    # 检查必要的列是否存在
    if 'Prompt' not in df.columns or 'Completion' not in df.columns:
        raise ValueError("Excel文件中必须包含'Prompt'和'Completion'列")

    # 构建JSON数据
    json_data = []
    instruction = "根据以下访谈记录,归纳受试者的行为特征,总结核心能力。"

    for index, row in df.iterrows():
        # 跳过空行
        if pd.isna(row['Prompt']) or pd.isna(row['Completion']):
            continue

        entry = {
            "instruction": instruction,
            "input": str(row['Prompt']).strip(),
            "output": str(row['Completion']).strip()
        }
        json_data.append(entry)

    # 保存为JSON文件
    with open(output_path, 'w', encoding='utf-8') as f:
        json.dump(json_data, f, ensure_ascii=False, indent=4)

    print(f"转换完成,共处理 {len(json_data)} 条数据,结果已保存到 {output_path}")


# 使用示例
input_excel_path = r"C:\Users\27549\OneDrive - whcqadc\桌面\AI agent\Trainingdata.xlsx"
output_json_path = r"C:\Users\27549\OneDrive - whcqadc\桌面\AI agent\training_data.json"

try:
    convert_excel_to_json(input_excel_path, output_json_path)
except Exception as e:
    print(f"处理过程中出现错误: {str(e)}")
2.分割训练集与验证集
如果数据集比较大的话可以按照8:2的比例分割成训练集和验证集,比较小的话直接把训练集复制粘贴成验证集也行,以下是一个数据分割的脚本,可以打乱json格式的数据集,并随机抽取20%作为验证集:
import json
import random
import os


def split_train_val(input_json_path, output_train_path, output_val_path, val_ratio=0.2):
    """
    从训练数据中随机抽取一定比例作为验证集

    参数:
        input_json_path: 输入的JSON文件路径
        output_train_path: 输出训练集文件路径
        output_val_path: 输出验证集文件路径
        val_ratio: 验证集比例(默认0.2即20%)
    """
    # 读取原始数据
    with open(input_json_path, 'r', encoding='utf-8') as f:
        data = json.load(f)

    # 随机打乱数据
    random.shuffle(data)

    # 计算验证集数量
    val_size = int(len(data) * val_ratio)

    # 分割数据
    val_data = data[:val_size]
    train_data = data[val_size:]

    # 保存训练集
    with open(output_train_path, 'w', encoding='utf-8') as f:
        json.dump(train_data, f, ensure_ascii=False, indent=4)

    # 保存验证集
    with open(output_val_path, 'w', encoding='utf-8') as f:
        json.dump(val_data, f, ensure_ascii=False, indent=4)

    print(f"数据分割完成:")
    print(f"- 原始数据量: {len(data)}")
    print(f"- 训练集数量: {len(train_data)} (保存到 {os.path.abspath(output_train_path)})")
    print(f"- 验证集数量: {len(val_data)} (保存到 {os.path.abspath(output_val_path)})")


# 使用示例
input_json = r"C:\Users\27549\OneDrive - whcqadc\桌面\AI agent\training_data.json"
output_train = r"C:\Users\27549\OneDrive - whcqadc\桌面\AI agent\train.json"
output_val = r"C:\Users\27549\OneDrive - whcqadc\桌面\AI agent\val.json"

try:
    split_train_val(input_json, output_train, output_val)
except Exception as e:
    print(f"处理过程中出现错误: {str(e)}")
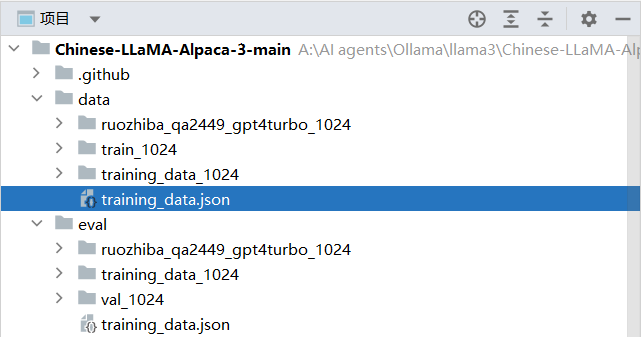
将处理好的json格式训练集放入/data文件夹,验证集放入/eval文件夹,前期的数据准备就完成了。
三、LoRA微调
使用项目中已经写好的脚本run_clm_sft_with_peft.py,如果想要详细了解执行微调的原理和方法,可以参考peft/examples/sft at main · huggingface/peft,该脚本路径如下:
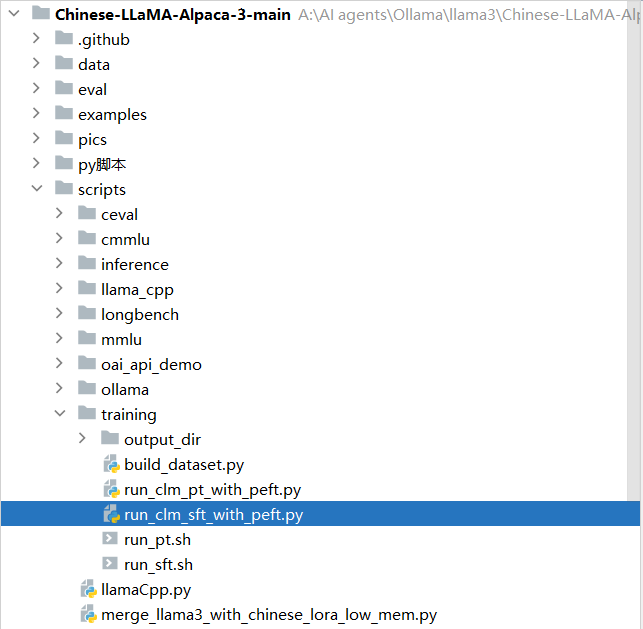
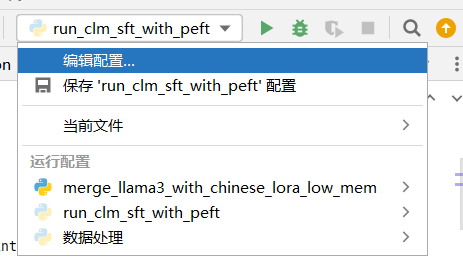
将微调指令粘贴到该脚本配置文件的形参当中,操作步骤如下:
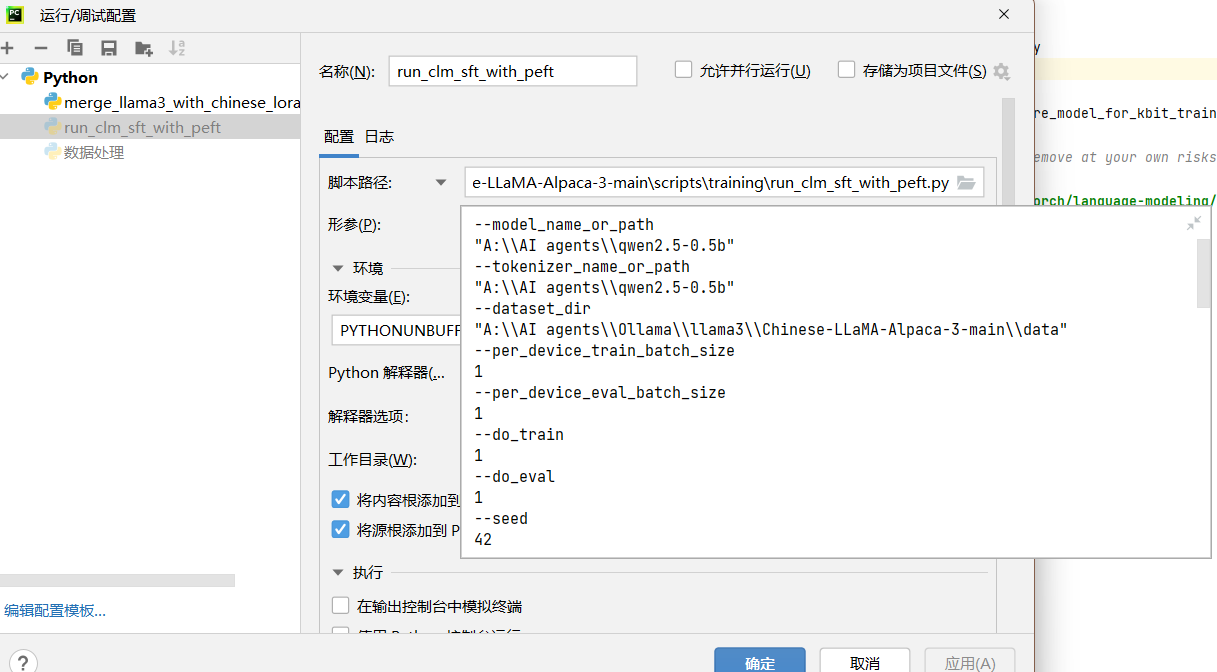
微调指令的格式如下,其中--model_name_or_path、和--tokenizer_name_or_path是下载Qwen2.5_0.5B时创建的文件夹;--dataset_dir是训练集的文件夹;--output_dir是自定义的文件夹,微调后的模型文件会保存在这里;--validation_file是验证集文件,注意!验证集需要指定具体的文件,其余指定的是文件夹。
--model_name_or_path
"A:\\AI agents\\qwen2.5-0.5b"
--tokenizer_name_or_path
"A:\\AI agents\\qwen2.5-0.5b"
--dataset_dir
"A:\\AI agents\\Ollama\\llama3\\Chinese-LLaMA-Alpaca-3-main\\data"
--per_device_train_batch_size
1
--per_device_eval_batch_size
1
--do_train
1
--do_eval
1
--seed
42
--bf16
1
--num_train_epochs
3
--lr_scheduler_type
cosine
--learning_rate
1e-4
--warmup_ratio
0.05
--weight_decay
0.1
--logging_strategy
steps
--logging_steps
10
--save_strategy
steps
--save_total_limit
3
--evaluation_strategy
steps
--eval_steps
100
--save_steps
200
--gradient_accumulation_steps
8
--preprocessing_num_workers
8
--max_seq_length
1024
--output_dir
"A:\\AI agents\\qwen2.5-0.5bW"
--overwrite_output_dir
1
--ddp_timeout
30000
--logging_first_step
True
--lora_rank
64
--lora_alpha
128
--trainable
"q_proj,v_proj,k_proj,o_proj,gate_proj,down_proj,up_proj"
--lora_dropout
0.05
--modules_to_save
"embed_tokens,lm_head"
--torch_dtype
bfloat16
--validation_file
"A:\\AI agents\\Ollama\\llama3\\Chinese-LLaMA-Alpaca-3-main\\eval\\training_data.json"
--load_in_kbits
16
形参设定完成后运行该脚本开始微调,微调完成后将会在你设定的--output_dir中输出微调后的模型文件,包含以下内容:
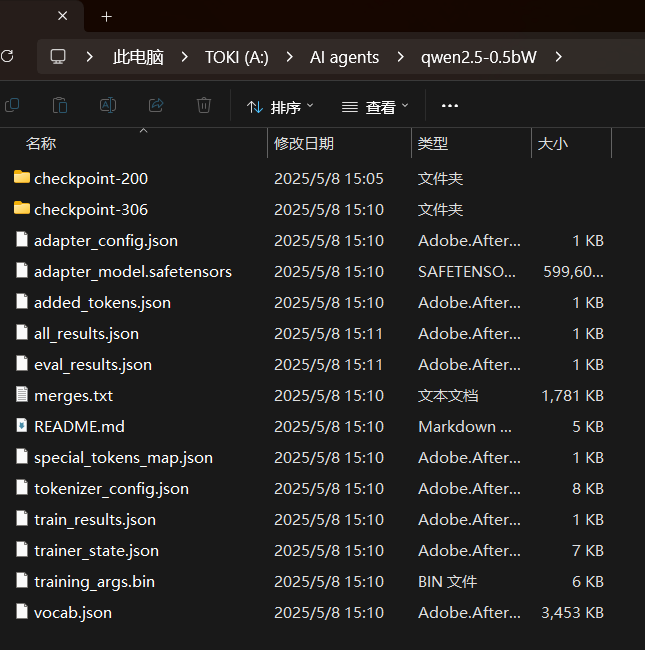
这里的adapter_model.safetensors就是微调后的模型权重文件,接下来我们需要将这个文件与原模型权重进行合并,整合的peft包中给出了一个合并脚本:
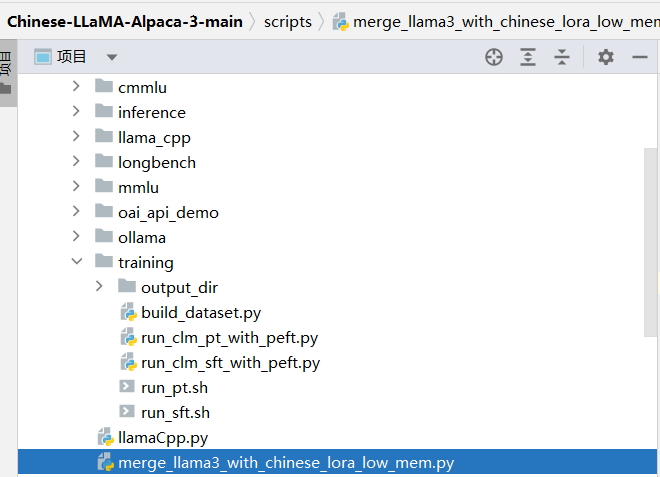
但是该脚本是为Llama模型合并设计的,在合并qwen2.5模型时会报错,我们可以自己写一个脚本调用peft官方库执行合并:
from transformers import AutoConfig, AutoModelForCausalLM

# 1. 加载配置
config = AutoConfig.from_pretrained("A:\\AI agents\\qwen2.5-0.5b")
config.vocab_size = 151665  # 修正 vocab_size

# 2. 初始化空模型(在 CPU 上)
base_model = AutoModelForCausalLM.from_config(config)
base_model.to_empty(device="cpu")  # 初始化空权重

# 3. 手动加载权重
from safetensors import safe_open
with safe_open("A:\\AI agents\\qwen2.5-0.5b\\model.safetensors", framework="pt") as f:
    for key in f.keys():
        tensor = f.get_tensor(key)
        if key == "model.embed_tokens.weight":
            tensor = tensor[:151665, :]  # 截断
        elif key == "model.lm_head.weight":
            tensor = tensor[:151665, :]  # 截断
        # 将权重复制到模型
        base_model.state_dict()[key].copy_(tensor)

# 4. 移动到 GPU(如果需要)
base_model.to("cuda")

# 5. 继续加载 LoRA
from peft import PeftModel
lora_model = PeftModel.from_pretrained(
    base_model,
    "A:\\AI agents\\qwen2.5-0.5bW",
    use_safetensors=True,
)

merged_model = lora_model.merge_and_unload()
merged_model.save_pretrained("A:\\AI agents\\qwen2.5-0.5b-lora", safe_serialization=True)
脚本中我们手动修改了模型的形状,这是因为执行时会报错:
ValueError: Trying to set a tensor of shape torch.Size([151936, 1536]) in "weight" (which has shape torch.Size([151665, 1536])), this looks incorrect.这个问题是由于Qwen2.5系列模型采用了特殊的词表设计,其原始词表大小与标准Transformer模型有所不同。在微调过程中,当使用Peft(Parameter-Efficient Fine-Tuning)技术时,特别是包含了modules_to_save参数(保存完整层而不仅仅是适配器)的情况下,系统会保存完整的lm_head层权重。具体问题根源和解决方案可以参考:blog.gitcode.com/5b9c47025cc326cc6dc45653d66a00df.html
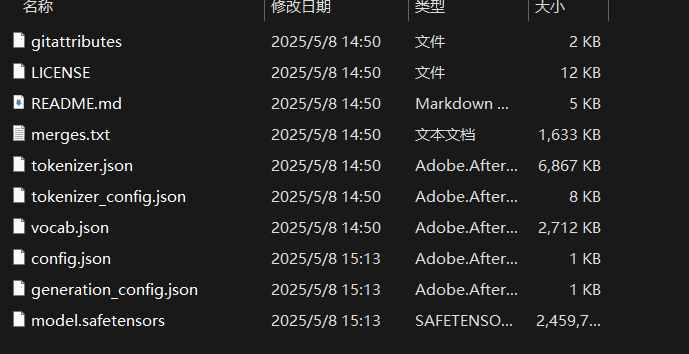
在这个脚本中我们直接强制修正权重形状,截断让模型强制匹配它实际的权重形状。执行脚本后我们会在输出文件夹得到合并后的三个文件:

因为在后面转换格式的时候还会再利用到其他参数文件,我们需要将原模型的其他文件复制粘贴进来:
微调后的模型文件格式与在huggingface下载的格式相同,都是.safetensors格式,我们想要本地部署就必须转换成.gguf格式。
四、将模型转化为.gguf格式
这个步骤需要使用到开源项目llama.cpp,链接如下:
ggml-org/llama.cpp: LLM inference in C/C++
该项目需要使用CMake编译才能运行,我们先使用pycharm打开该项目,在终端虚拟环境中执行环境安装命令:
pip install -r requirements-convert_hf_to_gguf.txt安装cmake:
pip install cmake
执行:
cmake -B build
执行后遇到报错:
(venv) A:\AI agents\llamacpp\llama.cpp-master>cmake -B build
-- Selecting Windows SDK version 10.0.22621.0 to target Windows 10.0.26100.
fatal: not a git repository (or any of the parent directories): .git
fatal: not a git repository (or any of the parent directories): .git
-- Warning: ccache not found - consider installing it for faster compilation or disable this warning with GGML_CCACHE=OFF
-- CMAKE_SYSTEM_PROCESSOR: AMD64
-- CMAKE_GENERATOR_PLATFORM:
-- Including CPU backend
-- x86 detected
-- Adding CPU backend variant ggml-cpu: /arch:AVX2 GGML_AVX2;GGML_FMA;GGML_F16C
fatal: not a git repository (or any of the parent directories): .git
fatal: not a git repository (or any of the parent directories): .git
CMake Warning at common/CMakeLists.txt:32 (message):
  Git repository not found; to enable automatic generation of build info,
  make sure Git is installed and the project is a Git repository.


-- Could NOT find CURL (missing: CURL_LIBRARY CURL_INCLUDE_DIR)
CMake Error at common/CMakeLists.txt:92 (message):
  Could NOT find CURL.  Hint: to disable this feature, set -DLLAMA_CURL=OFF


-- Configuring incomplete, errors occurred!
这个问题是因为 llama.cpp 默认启用 LLAMA_CURL用于网络请求,需要安装CURL 库,不过我们不需要网络功能,可以直接执行以下命令关闭它:
cmake -B build -DLLAMA_CURL=OFF
然后构建项目:
cmake --build build --config Release
构建后我们在终端执行以下命令执行格式转换脚本:
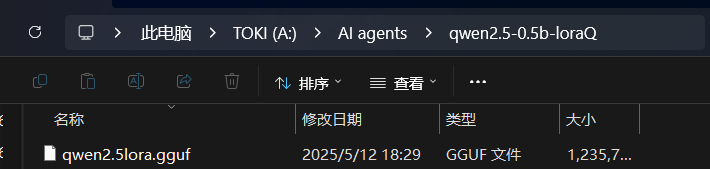
python convert_hf_to_gguf.py "A:\AI agents\qwen2.5-0.5b-lora" --outtype f16 --outfile "A:\AI agents\qwen2.5-0.5b-loraQ\qwen2.5lora.gguf"其中,"A:\AI agents\qwen2.5-0.5b-lora"是前文微调合并后的模型文件路径,"A:\AI agents\qwen2.5-0.5b-loraQ\qwen2.5lora.gguf"是自定义输出的.gguf模型文件,文件的名称可以自行定义。待执行完成后,可以指定的输出文件中找到格式转换后的.gguf格式的模型文件:
五、本地部署
使用Ollama本地部署微调后的模型,下载路径如下:Ollama
服务启动后,进入保存微调模型的文件夹,将以下参数保存为名称为文件类型,命名为:“Modelfile”![]()
FROM ./qwen2.5lora.gguf

TEMPLATE """{{- if .Messages }}
{{- if or .System .Tools }}<|im_start|>system
{{- if .System }}
{{ .System }}
{{- end }}
{{- if .Tools }}

# Tools

You may call one or more functions to assist with the user query.

You are provided with function signatures within <tools></tools> XML tags:
<tools>
{{- range .Tools }}
{"type": "function", "function": {{ .Function }}}
{{- end }}
</tools>

For each function call, return a json object with function name and arguments within <tool_call></tool_call> XML tags:
<tool_call>
{"name": <function-name>, "arguments": <args-json-object>}
</tool_call>
{{- end }}<|im_end|>
{{ end }}
{{- range $i, $_ := .Messages }}
{{- $last := eq (len (slice $.Messages $i)) 1 -}}
{{- if eq .Role "user" }}<|im_start|>user
{{ .Content }}<|im_end|>
{{ else if eq .Role "assistant" }}<|im_start|>assistant
{{ if .Content }}{{ .Content }}
{{- else if .ToolCalls }}<tool_call>
{{ range .ToolCalls }}{"name": "{{ .Function.Name }}", "arguments": {{ .Function.Arguments }}}
{{ end }}</tool_call>
{{- end }}{{ if not $last }}<|im_end|>
{{ end }}
{{- else if eq .Role "tool" }}<|im_start|>user
<tool_response>
{{ .Content }}
</tool_response><|im_end|>
{{ end }}
{{- if and (ne .Role "assistant") $last }}<|im_start|>assistant
{{ end }}
{{- end }}
{{- else }}
{{- if .System }}<|im_start|>system
{{ .System }}<|im_end|>
{{ end }}{{ if .Prompt }}<|im_start|>user
{{ .Prompt }}<|im_end|>
{{ end }}<|im_start|>assistant
{{ end }}{{ .Response }}{{ if .Response }}<|im_end|>{{ end }}
"""Ollama在更新版本后,modelfile文件中的TEMPLATE是必须写入的,可以在ollama官网中,找到你微调的原模型qwen2.5:0.5b,复制其中的template文件内容即可。如果本地部署的模型出现下图这种答非所问、循环回答一段话等问题,基本就是没写入template内容。参考本地部署LLM踩坑日记(二)——Ollama更新之后挂载gguf模型的坑_ollama安装gguf格式模型 无法运营-CSDN博客
接着在该文件夹中打开cmd命令行,输入命令:
ollama create 自定义模型名称 -f Modelfile部署完成后输入命令即可对话:
ollama run 自定义模型名称我们还可以在Charry studio中部署使用我们的模型,下载链接:Cherry Studio 官方网站 - 全能的AI助手
还可以编写python脚本执行批量推理,将需要批量推理的文段保存成如下格式的.xslx文件
编写脚本:
import pandas as pd
import requests
import time
from tqdm import tqdm

# Ollama配置
OLLAMA_URL = "http://localhost:11434/api/chat"
MODEL_ID = "qwen2.5_0.5b_lora"
TEMPERATURE = 0.7
TIMEOUT = 30  # 单次请求超时时间(秒)
MAX_RETRIES = 3  # 最大重试次数

# 全局系统提示词
SYSTEM_PROMPT = """根据以下访谈记录,归纳受试者的行为特征总结核心能力。"""


def read_excel(file_path):
    try:
        df = pd.read_excel(file_path)
        if "Prompt" not in df.columns:
            raise ValueError("Excel文件中没有'Prompt'列")
        return df
    except Exception as e:
        print(f"读取Excel文件出错: {e}")
        return None


def query_ollama_with_retry(prompt):
    messages = [
        {"role": "system", "content": SYSTEM_PROMPT},
        {"role": "user", "content": prompt}
    ]

    payload = {
        "model": MODEL_ID,
        "messages": messages,
        "stream": False,
        "options": {
            "temperature": TEMPERATURE,
            "num_ctx": 4096
        }
    }

    for attempt in range(MAX_RETRIES):
        try:
            response = requests.post(
                OLLAMA_URL,
                json=payload,
                timeout=TIMEOUT
            )
            response.raise_for_status()
            return response.json()["message"]["content"]

        except requests.exceptions.Timeout:
            print(f"\n请求超时,正在重试 ({attempt + 1}/{MAX_RETRIES})...")
            time.sleep(2)  # 等待2秒再重试

        except requests.exceptions.RequestException as e:
            print(f"\n请求出错: {str(e)}")
            if attempt == MAX_RETRIES - 1:
                return f"[错误] 请求失败: {str(e)}"
            time.sleep(2)

        except Exception as e:
            print(f"\n处理响应出错: {str(e)}")
            if attempt == MAX_RETRIES - 1:
                return f"[错误] 解析失败: {str(e)}"
            time.sleep(2)

    return "[错误] 达到最大重试次数"


def batch_process(df, output_path):
    if "Response" not in df.columns:
        df["Response"] = ""
    if "Status" not in df.columns:
        df["Status"] = "待处理"

    progress_bar = tqdm(df.iterrows(), total=len(df), desc="处理进度")
    for idx, row in progress_bar:
        prompt = row["Prompt"]
        if pd.isna(prompt) or not prompt.strip():
            df.at[idx, "Status"] = "跳过(空内容)"
            continue

        try:
            start_time = time.time()
            response = query_ollama_with_retry(prompt)
            elapsed = time.time() - start_time

            if response.startswith("[错误]"):
                df.at[idx, "Status"] = "失败"
                df.at[idx, "Response"] = response
                tqdm.write(f"❌ 第 {idx + 1} 条处理失败: {response}")
            else:
                df.at[idx, "Status"] = f"成功 ({elapsed:.1f}s)"
                df.at[idx, "Response"] = response
                if idx % 1 == 0:  # 每10条显示一次示例
                    tqdm.write(f"\n✅ 示例输出(第{idx + 1}条, {elapsed:.1f}s):")
                    tqdm.write(response[:200] + "...")  # 只显示前200字符

            # 实时保存进度(每处理10条或遇到失败时)
            if idx % 10 == 0 or response.startswith("[错误]"):
                df.to_excel(output_path, index=False)

        except Exception as e:
            df.at[idx, "Status"] = "异常"
            df.at[idx, "Response"] = f"[系统异常] {str(e)}"
            tqdm.write(f"⚠️ 第 {idx + 1} 条发生异常: {str(e)}")

        finally:
            # 确保即使出错也保存进度
            if idx == len(df) - 1:
                df.to_excel(output_path, index=False)
            time.sleep(1)  # 基础间隔

    # 最终保存
    try:
        df.to_excel(output_path, index=False)
        print(f"\n处理完成,结果已保存到: {output_path}")

        # 打印统计信息
        stats = df["Status"].value_counts()
        print("\n处理统计:")
        for status, count in stats.items():
            print(f"- {status}: {count}条")

    except Exception as e:
        print(f"最终保存出错: {e}")


if __name__ == "__main__":
    input_path = r"C:\Users\27549\OneDrive - whcqadc\桌面\AI agent\批量推理.xlsx"
    output_path = input_path.replace(".xlsx", "_PCI分析结果_带状态.xlsx")

    print("开始处理Excel文件...")
    df = read_excel(input_path)

    if df is not None:
        batch_process(df, output_path)
输出结果示例: 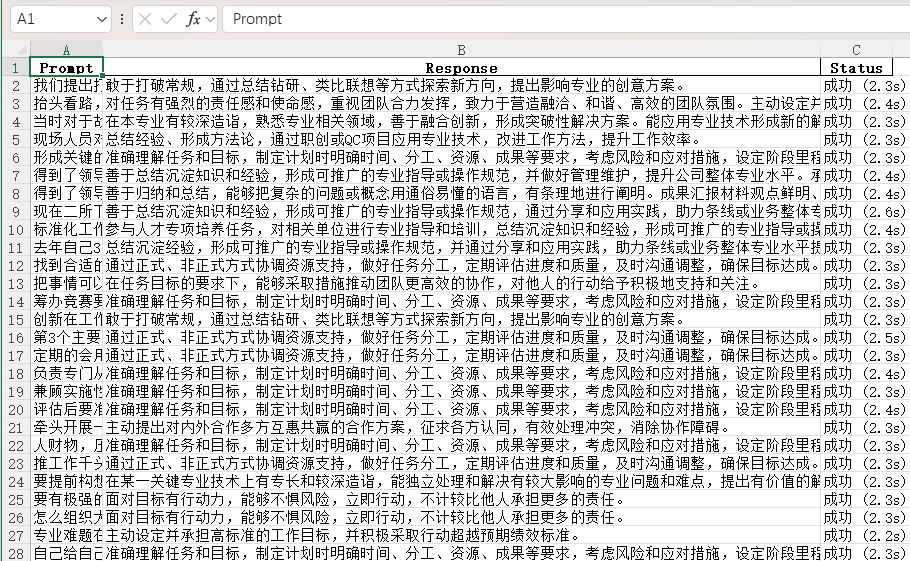
总结
本文介绍了如何通过LoRA微调技术对Qwen2.5_0.5B模型进行本地微调,并实现AI面试中的行为归纳任务。文章首先分析了当前AIGC技术在上下文长度和生成一致性方面的限制,随后详细描述了从模型下载、数据预处理到微调和本地部署的完整流程。通过使用PEFT工具和llama.cpp项目,成功将微调后的模型转换为gguf格式,并在本地环境中进行部署。最后,文章还提供了批量推理的脚本示例,展示了如何在实际应用中处理大规模数据。这一流程为AI面试等AIGC应用的落地提供了可行的技术路径。

火山引擎开发者社区是火山引擎打造的AI技术生态平台,聚焦Agent与大模型开发,提供豆包系列模型(图像/视频/视觉)、智能分析与会话工具,并配套评测集、动手实验室及行业案例库。社区通过技术沙龙、挑战赛等活动促进开发者成长,新用户可领50万Tokens权益,助力构建智能应用。
更多推荐
 44
44 0
0- 0


 已为社区贡献1条内容

所有评论(0)