Vue搭建chat对话模型,Springboot 调用deepseek api回答用户Chat
vue+springboot+tts+stt搭建人机对话网页应用
一、前言
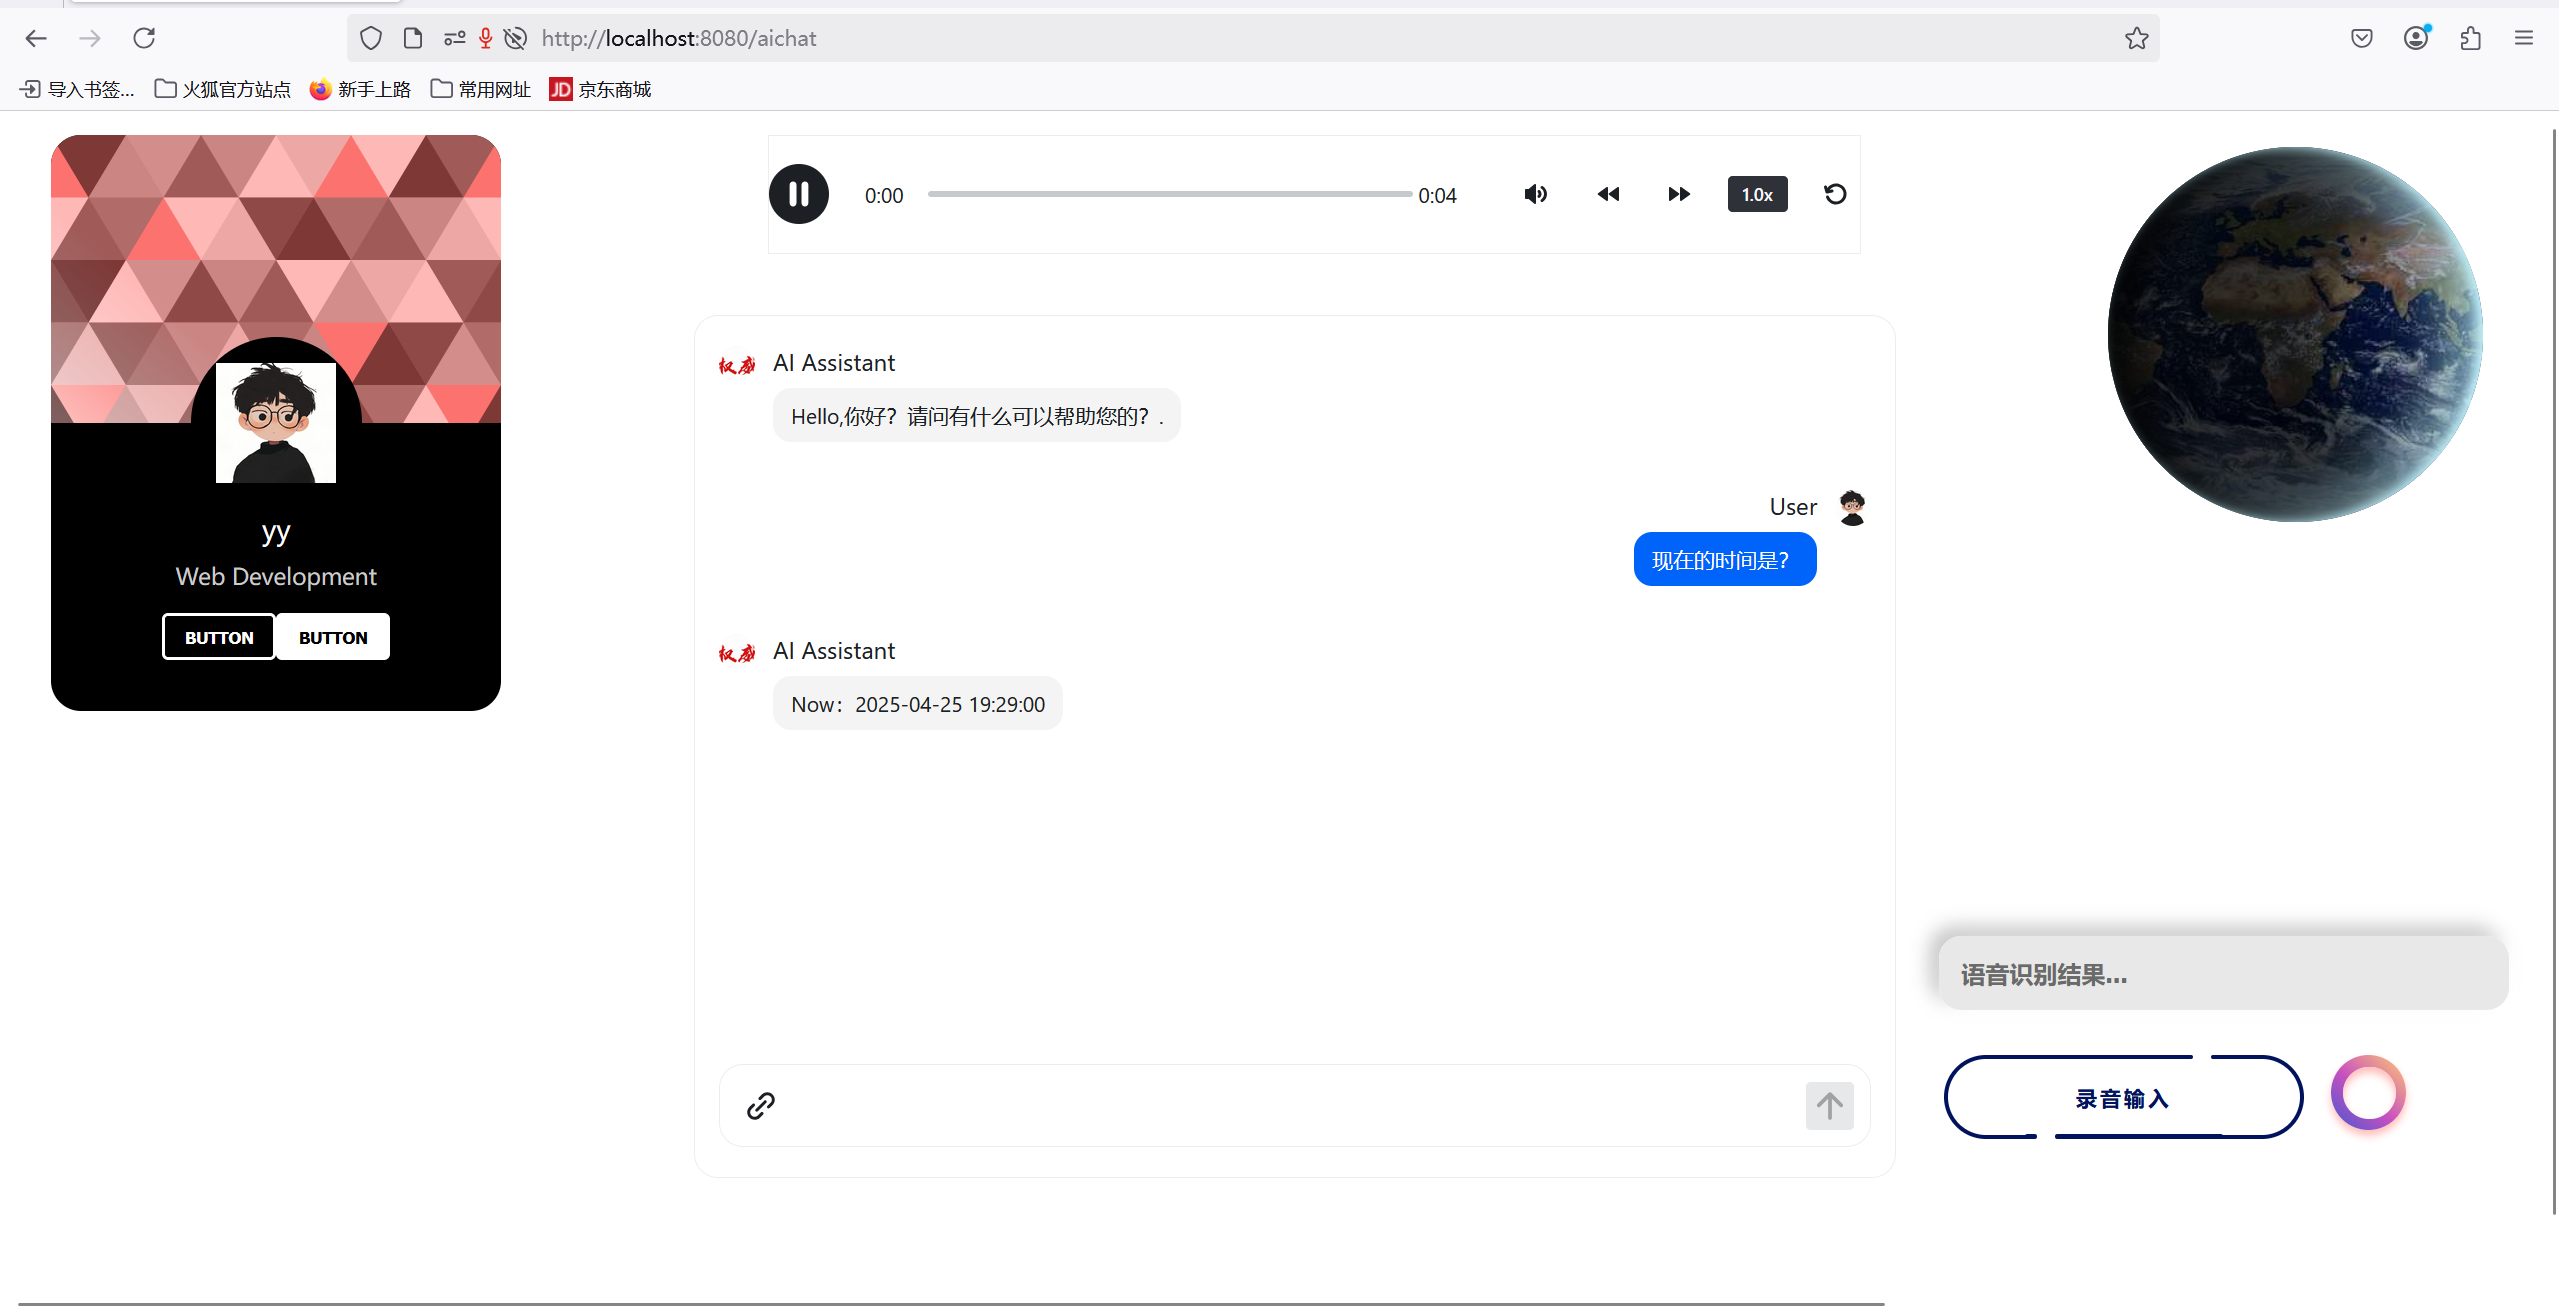
实验课要求搭建的Chat对话网页应用。先看结果:
二、Chat
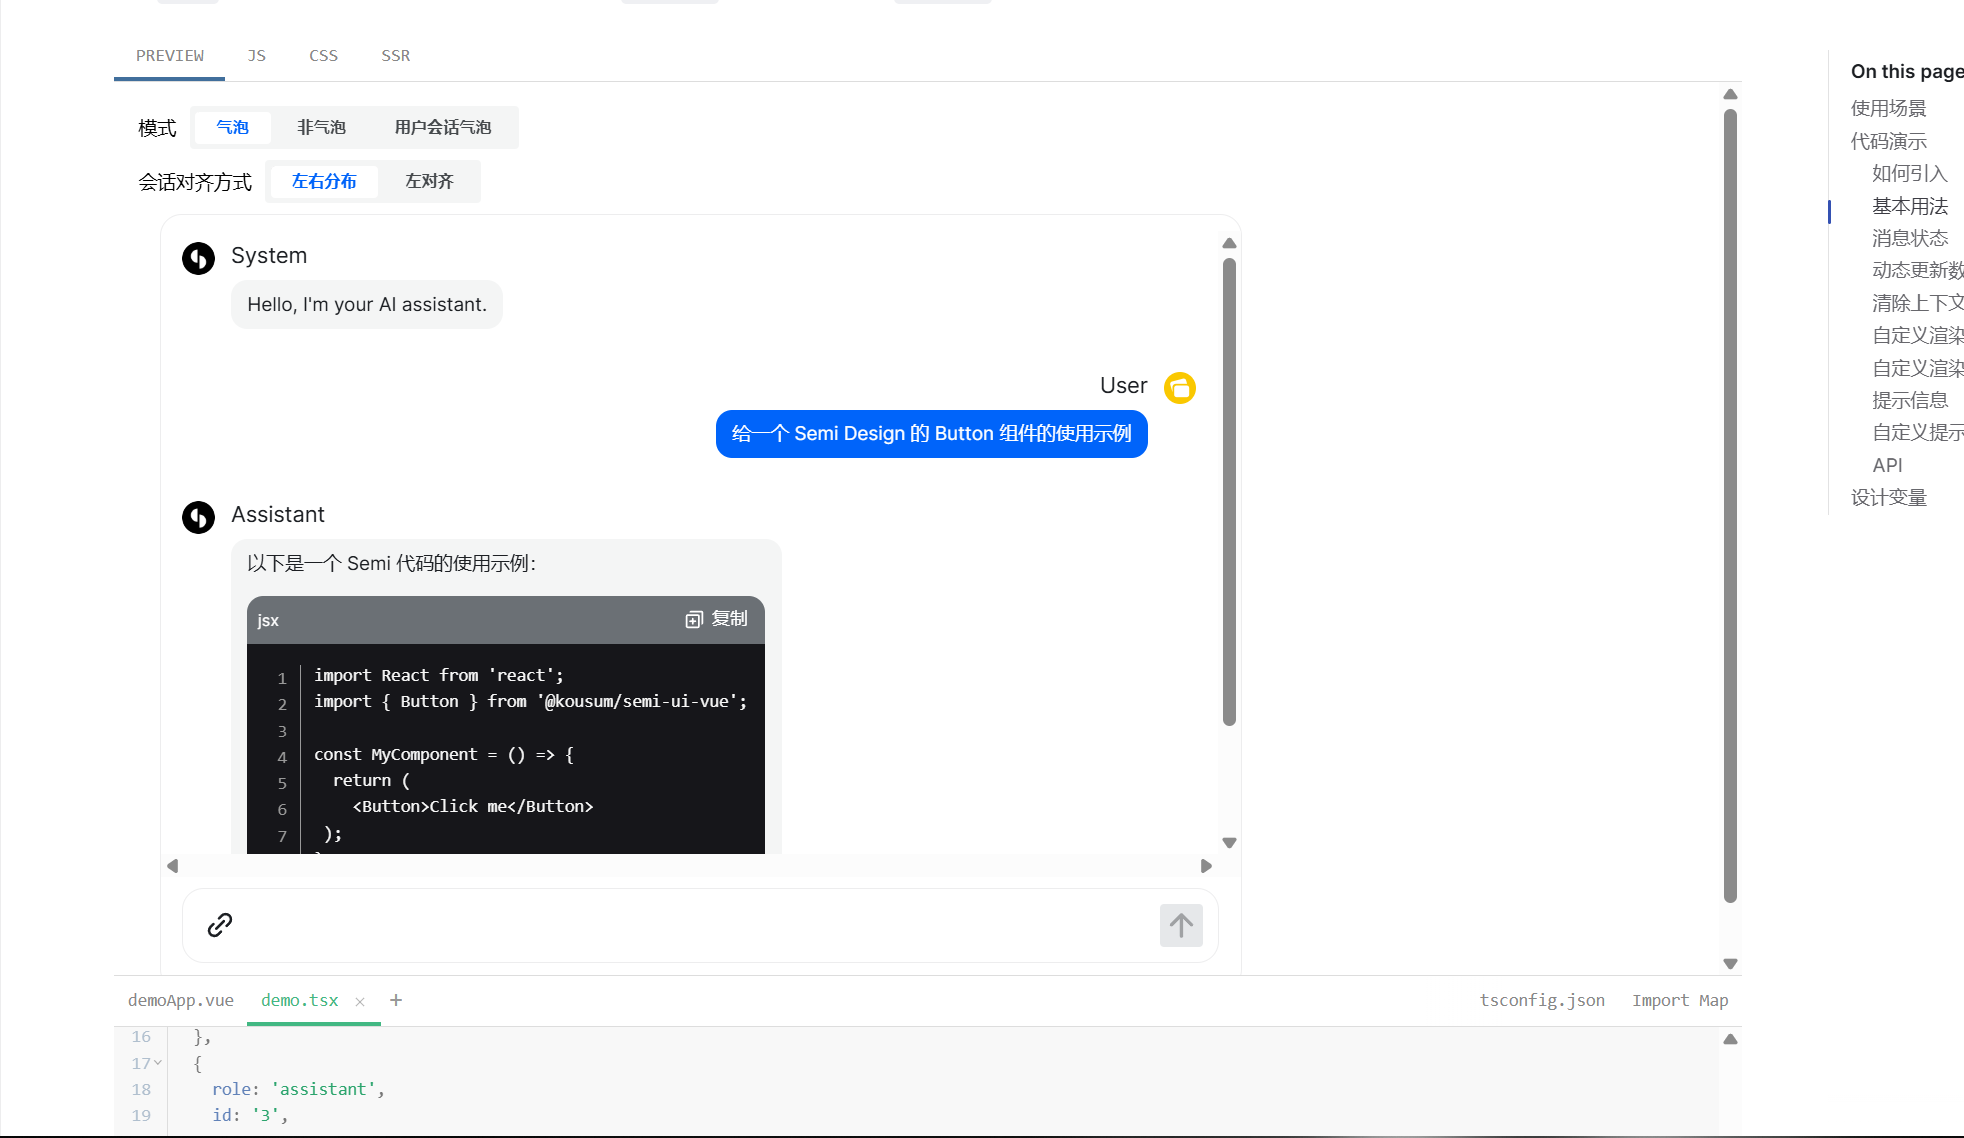
中间对话组件使用的Semi-ui-vue,非常方便,参考文档如下:
Introduction 介绍 | semi-design-vueVue3 UI components based on semi-design and Vue![]() https://semi-ui-vue.netlify.app/zh-CN/start/introduction/ 要使用chat组件,需要较高的semi版本,同时vue的版本也要很高,建议使用最新的,不然很多坑,安装semi-ui-vue:
https://semi-ui-vue.netlify.app/zh-CN/start/introduction/ 要使用chat组件,需要较高的semi版本,同时vue的版本也要很高,建议使用最新的,不然很多坑,安装semi-ui-vue:
npm i @kousum/semi-ui-vue找到chat组件,选择熟悉的代码 直接拷贝下来
接入APi调用deepseek重点是需要修改函数:
    const onMessageSend = (message) => {
    chats.value.push({
        role: 'system',
        id: count++,
        createAt: new Date().getTime(),
        content: '',
        status: 'loading',
    });
    const eventSource = new EventSource(
        `http://localhost:8081/aiapi/stream?message=${encodeURIComponent(message)}`
    );
    eventSource.onmessage = (event) => {
        let response = event.data;
        if (response == 'end') {
            chats.value[chats.value.length - 1].status = 'complete';
            SystemResult.value = chats.value[chats.value.length - 1].content
            uploadtexttotts(SystemResult.value)
            console.log(SystemResult.value);
        close();
        return;
        }
        response = JSON.parse(response).content;
        chats.value[chats.value.length - 1].status = 'incomplete';
        chats.value[chats.value.length - 1].content += response;
    };
        eventSource.onerror = (error) => {
        console.log(error);
        chats.value[chats.value.length - 1].status = 'error';
        close();
    };

    const close = () => {
        eventSource.close();
    };
    };
里面包含了服务请求地址,使用了 SSE(Server-Sent Events) 技术实现流式输出 GPT 对话内容。在前后端交互中,必须确保服务端返回的响应数据与用户原始请求正确绑定,以便前端能够正确显示对话内容,并维持会话的连贯性。
三、服务端Api
springboot调用deepapi,Api接口如下:
@RestController
@RequestMapping("/aiapi")
public class SeekController {
    private static final Logger logger = LoggerFactory.getLogger(SeekController.class);

    private static final String DONE = "[DONE]";
    private static final Integer timeout = 60;

    private static final String AI_URL = "https://api.deepseek.com/chat/completions";
//    private static final String AI_URL = "http://127.0.0.1/v1/chat-messages";

    @Value("${ai-api.password:}")
    private String apiPassword;

    @GetMapping(value = "/stream")
    public void handleSse(String message, HttpServletResponse response) {
        System.out.println(message);
        response.setContentType("text/event-stream");
        response.setCharacterEncoding("utf-8");
        try (PrintWriter pw = response.getWriter()) {
            getAiResult(pw, message);
            pw.write("data:end\n\n");
            pw.flush();
        } catch (IOException e) {
            throw new RuntimeException(e);
        } catch (InterruptedException e) {
            throw new RuntimeException(e);
        }
    }

    private void getAiResult(PrintWriter pw, String content) throws InterruptedException {
        Map<String, Object> params = new HashMap<>();
        params.put("model", "4.0Ultra");
        //result.put("user", "4.0Ultra");

        Map<String, String> message = new HashMap<>();
        message.put("role", "user");
        message.put("content", content);

        List<Map> messages = new ArrayList<>();
        messages.add(message);
        params.put("messages", messages);
        params.put("stream", true);
        params.put("model", "deepseek-chat");
        String jsonParams = JsonUtils.convertObj2Json(params);

        Request.Builder builder = new Request.Builder().url(AI_URL);
        builder.addHeader("Authorization", " Bearer " + apiPassword);
        builder.addHeader("Accept", "text/event-stream");
        RequestBody body = RequestBody.create(MediaType.parse("application/json; charset=utf-8"), jsonParams);
        Request request = builder.post(body).build();
        OkHttpClient client = new OkHttpClient.Builder().connectTimeout(timeout, TimeUnit.SECONDS).writeTimeout(timeout, TimeUnit.SECONDS).readTimeout(timeout,
                TimeUnit.SECONDS).build();

        // 实例化EventSource,注册EventSource监听器 -- 创建一个用于处理服务器发送事件的实例,并定义处理事件的回调逻辑
        CountDownLatch eventLatch = new CountDownLatch(1);

        RealEventSource realEventSource = new RealEventSource(request, new EventSourceListener() {
            @Override
            public void onEvent(EventSource eventSource, String id, String type, String data) {
                if (DONE.equals(data)) {
                    return;
                }
                String content = getContent(data);
                pw.write("data:" + JsonUtils.convertObj2Json(new ContentDto(content)) + "\n\n");
                pw.flush();
            }

            @Override
            public void onClosed(EventSource eventSource) {
                super.onClosed(eventSource);
                eventLatch.countDown();
            }

            @Override
            public void onFailure(EventSource eventSource, Throwable t, Response response) {
                logger.info("调用接口失败{}", t);
                if (eventLatch != null) {
                    eventLatch.countDown();
                }
            }
        });
        // 与服务器建立连接
        realEventSource.connect(client);
        // await() 方法被调用来阻塞当前线程,直到 CountDownLatch 的计数变为0。
        eventLatch.await();
    }

    private static String getContent(String data) {
        AiResult aiResult = JsonUtils.convertJson2Obj(data, AiResult.class);
        return aiResult.getChoices().get(0).getDelta().getContent();
    }
}
需要再application.yaml中配置好自己的api-key,配置完成后即可被用户端正常访问到。
四、前端语音输入
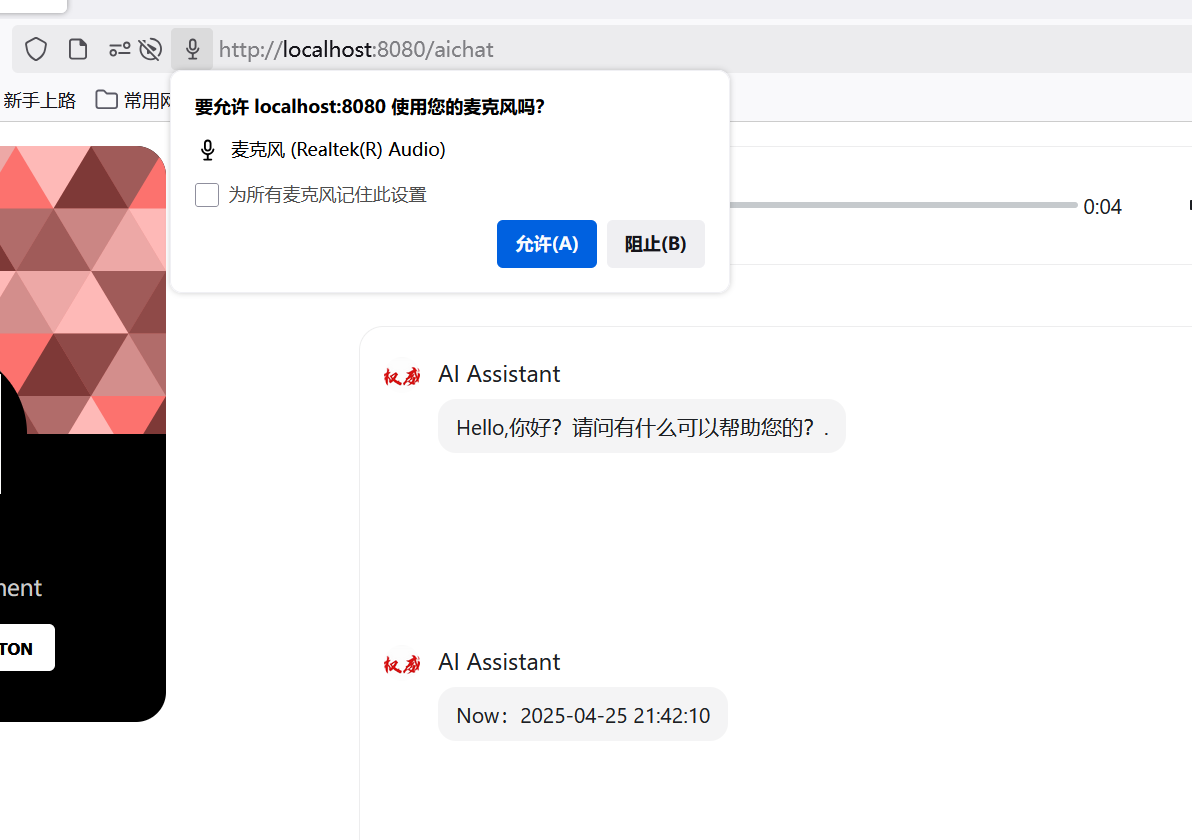
网页端调用麦克风语音输入使用了Recoder包,具体细节参考自博客:【Recorder】在 vue3 中使用 Recorder 实现录音并上传(mp3、wav)兼容 PC 和移动端_vue3 录音-CSDN博客
安装Recoder运行:
npm install recorder-core
需要写好自己的utils.js,以正常调用语音录入功能,下面三个函数是我主要使用到的,recOpen请求打开麦克风,recStart开始录音,recStop停止录音,Stop函数中调用了Upload,这个函数会直接将录到的语音上传服务端,调用SenseVoice模型,识别为中文。
// 使用模块化的全局变量
let rec = null;
let recBlob = null;
let ChatResult = null;


// 打开录音

function recOpen() {
    return new Promise((resolve, reject) => {
        // 创建录音对象
        rec = Recorder({
            type: 'wav',
            sampleRate: 16000,
            bitRate: 16,
        });

        if (!rec) {
            reject(new Error('当前浏览器不支持录音功能'));
            return;
        }

        // 请求麦克风权限
        rec.open(
            function () {
                console.log('麦克风权限已获取');
                resolve();
            },
            function (msg, isUserNotAllow) {
                const errorMsg = isUserNotAllow ? '用户拒绝了麦克风权限' : '无法访问麦克风: ' + msg;
                reject(new Error(errorMsg));
            }
        );
    });
}


// 开始录音
function recStart() {
    if (!rec) {
        const error = new Error('未打开录音');
        console.error(error);
        throw error;
    }
    rec.start();
    console.log('已开始录音');

}
// 结束录音
function recStop() {
    if (!rec) {
        console.error('未打开录音');
        return;
    }
    rec.stop(
        (blob, duration) => {
            //blob就是我们要的录音文件对象,可以上传,或者本地播放
            recBlob = blob;
            //简单利用URL生成本地文件地址,此地址只能本地使用,比如赋值给audio.src进行播放,赋值给a.href然后a.click()进行下载(a需提供download="xxx.mp3"属性)
            const localUrl = (window.URL || window.webkitURL).createObjectURL(blob);
            console.log('录音成功', blob, localUrl, '时长:' + duration + 'ms');
            upload(blob)
            // rec.close(); //关闭录音,释放录音资源,当然可以不释放,后面可以连续调用start
            // rec = null;
        },
        (err) => {
            console.error('结束录音出错:' + err);
            rec.close(); //关闭录音,释放录音资源,当然可以不释放,后面可以连续调用start
            rec = null;
        },
    );
}


// 上传录音
async function upload(blob) {
    if (!blob) {
        throw new Error('无效的录音文件');
    }

    try {
        const formData = new FormData();
        formData.append('vfile', blob, 'recording.wav');
        const voiceUrl = "http://127.0.0.1:5005/voiceapi"
        axios.post(voiceUrl, formData, {
            headers: { 'Content-Type': 'multipart/form-data' },
        }).then(res => {
            console.log('上传成功!');
            console.log(res.data);
            ChatResult = res.data
        })
    } catch (error) {
        console.error('上传失败:', error);
        throw error;
    }
}
五、语音合成Chat模型回答内容
在调用完服务端api请求得到大模型回答后,会先将文本内容显示到客户端,与此同时回答内容会发送到flask后端调用语音合成大模型,生成语音文件,代码如下:
const uploadtexttotts = (text) => {

    console.log(text);
    axios.get("https://api/tts", {
        params: {  // 正确传递GET参数
            text: text
        },
        headers: {  // 可选:添加请求头
            'Content-Type': 'application/json'
        }
    }).then(res => {
        console.log('响应数据:', res.data);
        let filename = res.data
        let filename_get = filename.split('/')
        voiceUrl.value = "https://api/"+filename_get[filename_get.length-1]
        shouldAutoPlay.value = true;

            // 销毁并重新创建组件
        showAudio.value = false;
        nextTick();
        showAudio.value = true;
    }).catch(error => {
        console.error('请求失败:', error);
    });

}
然后获取到语音文件地址会被绑定到标签上,实现自动播放, <AudioPlayer>也是semi-ui-vue中一个组件
    <div v-if="showAudio" class="voice_box">
    <AudioPlayer
      :audioUrl="voiceUrl"
      :autoPlay="true"
      theme="light"
      @ended="shouldAutoPlay = false"
    />
        </div>
六、TTS服务、STT服务相关博客参考
springboot:
https://gitee.com/ldlnii/aichatspringboot.gitvue:
https://gitee.com/ldlnii/aichatvueproject.git
火山引擎开发者社区是火山引擎打造的AI技术生态平台,聚焦Agent与大模型开发,提供豆包系列模型(图像/视频/视觉)、智能分析与会话工具,并配套评测集、动手实验室及行业案例库。社区通过技术沙龙、挑战赛等活动促进开发者成长,新用户可领50万Tokens权益,助力构建智能应用。
更多推荐
 37
37 0
0- 0


 已为社区贡献4条内容

所有评论(0)