Qwen2-VL-Instruct安装及测试记录
或者,右键点击下载按钮,复制下载链接,之后在服务器上使用wget命令下载。取消“Driver”选项,因为已经安装过显卡驱动了, 这里不需要安装,然后选择“Install”。执行安装脚本后,一直按回车,直到出现输入yes or no的选项,输入yes。对应显卡,依次选择筛选条件,版本选择为12.4,设置好条件后,点击“查找”,依次点击选项卡,设置筛选条件,选择所需版本后,页面下方会生成安装命令。保存
1 相关软件地址
- Qwen2-VL-7B-Instruct 模型:https://modelscope.cn/models/Qwen/Qwen2-VL-7B-Instruct
2 硬件环境
● 16vCPU(虚拟中央处理单元)
● 60G内存
● 80G硬盘
● 24G显存A10
3 软件环境
ubuntu v24
4 安装软件要求
MiniConda3
nvdia A10显卡驱动:12.4.0
cuda:12.4.0
cudnn 9.6.0
5 软件安装过程
5.1 查看/修改安装源
# 查看当前软件源
cat /etc/apt/sources.list

# 如果没有阿里云的镜像源,添加上。
# 阿里云的软件源是:
deb https://mirrors.aliyun.com/ubuntu/ noble main restricted universe multiverse
deb-src https://mirrors.aliyun.com/ubuntu/ noble main restricted universe multiverse

deb https://mirrors.aliyun.com/ubuntu/ noble-security main restricted universe multiverse
deb-src https://mirrors.aliyun.com/ubuntu/ noble-security main restricted universe multiverse

deb https://mirrors.aliyun.com/ubuntu/ noble-updates main restricted universe multiverse
deb-src https://mirrors.aliyun.com/ubuntu/ noble-updates main restricted universe multiverse

# deb https://mirrors.aliyun.com/ubuntu/ noble-proposed main restricted universe multiverse
# deb-src https://mirrors.aliyun.com/ubuntu/ noble-proposed main restricted universe multiverse

deb https://mirrors.aliyun.com/ubuntu/ noble-backports main restricted universe multiverse
deb-src https://mirrors.aliyun.com/ubuntu/ noble-backports main restricted universe multiverse
5.2 安装miniconda3(Python虚拟环境)
使用MiniConda3安装并管理Python,便于版本依赖环境隔离。
- 下载安装脚本
wget https://repo.anaconda.com/miniconda/Miniconda3-latest-Linux-x86_64.sh
- 执行安装脚本
chmod +x Miniconda3-latest-Linux-x86_64.sh
bash Miniconda3-latest-Linux-x86_64.sh
安装截图:

执行安装脚本后,一直按回车,直到出现输入yes or no的选项,输入yes
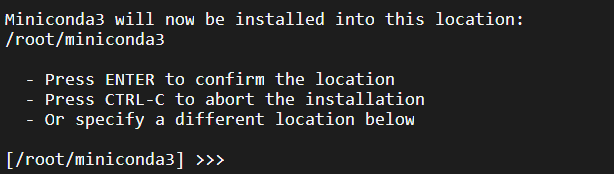
是否更改默认路径,如果需要更改则输入新的安装路径后回车。

是否要在安装过程中执行初始化,默认是no,这里输入yes。
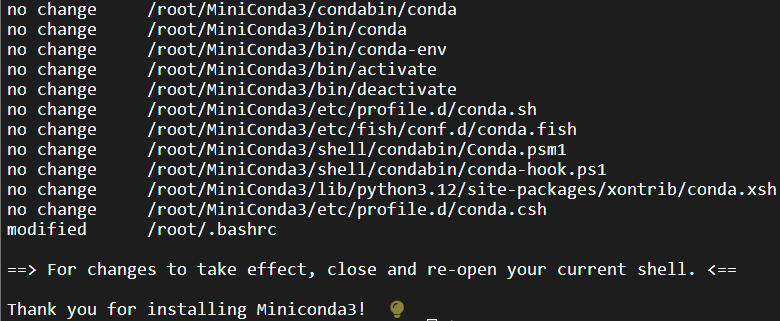
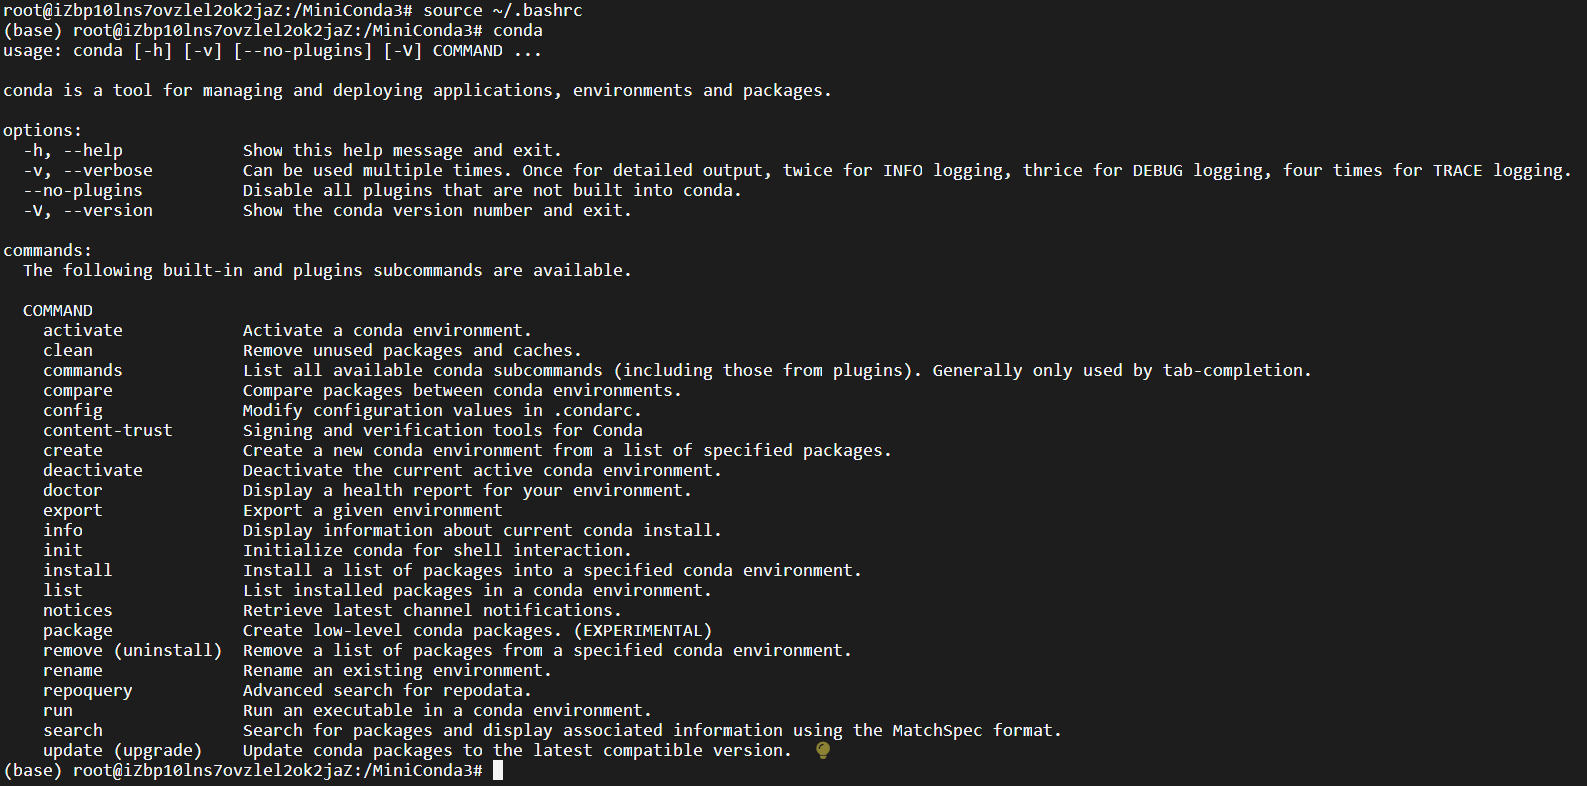
安装成功后输入source ~/.bashrc更新环境变量;
输入conda验证是否安装成功。
5.3 安装显卡驱动
- 官网下载驱动
https://www.nvidia.cn/drivers/lookup/
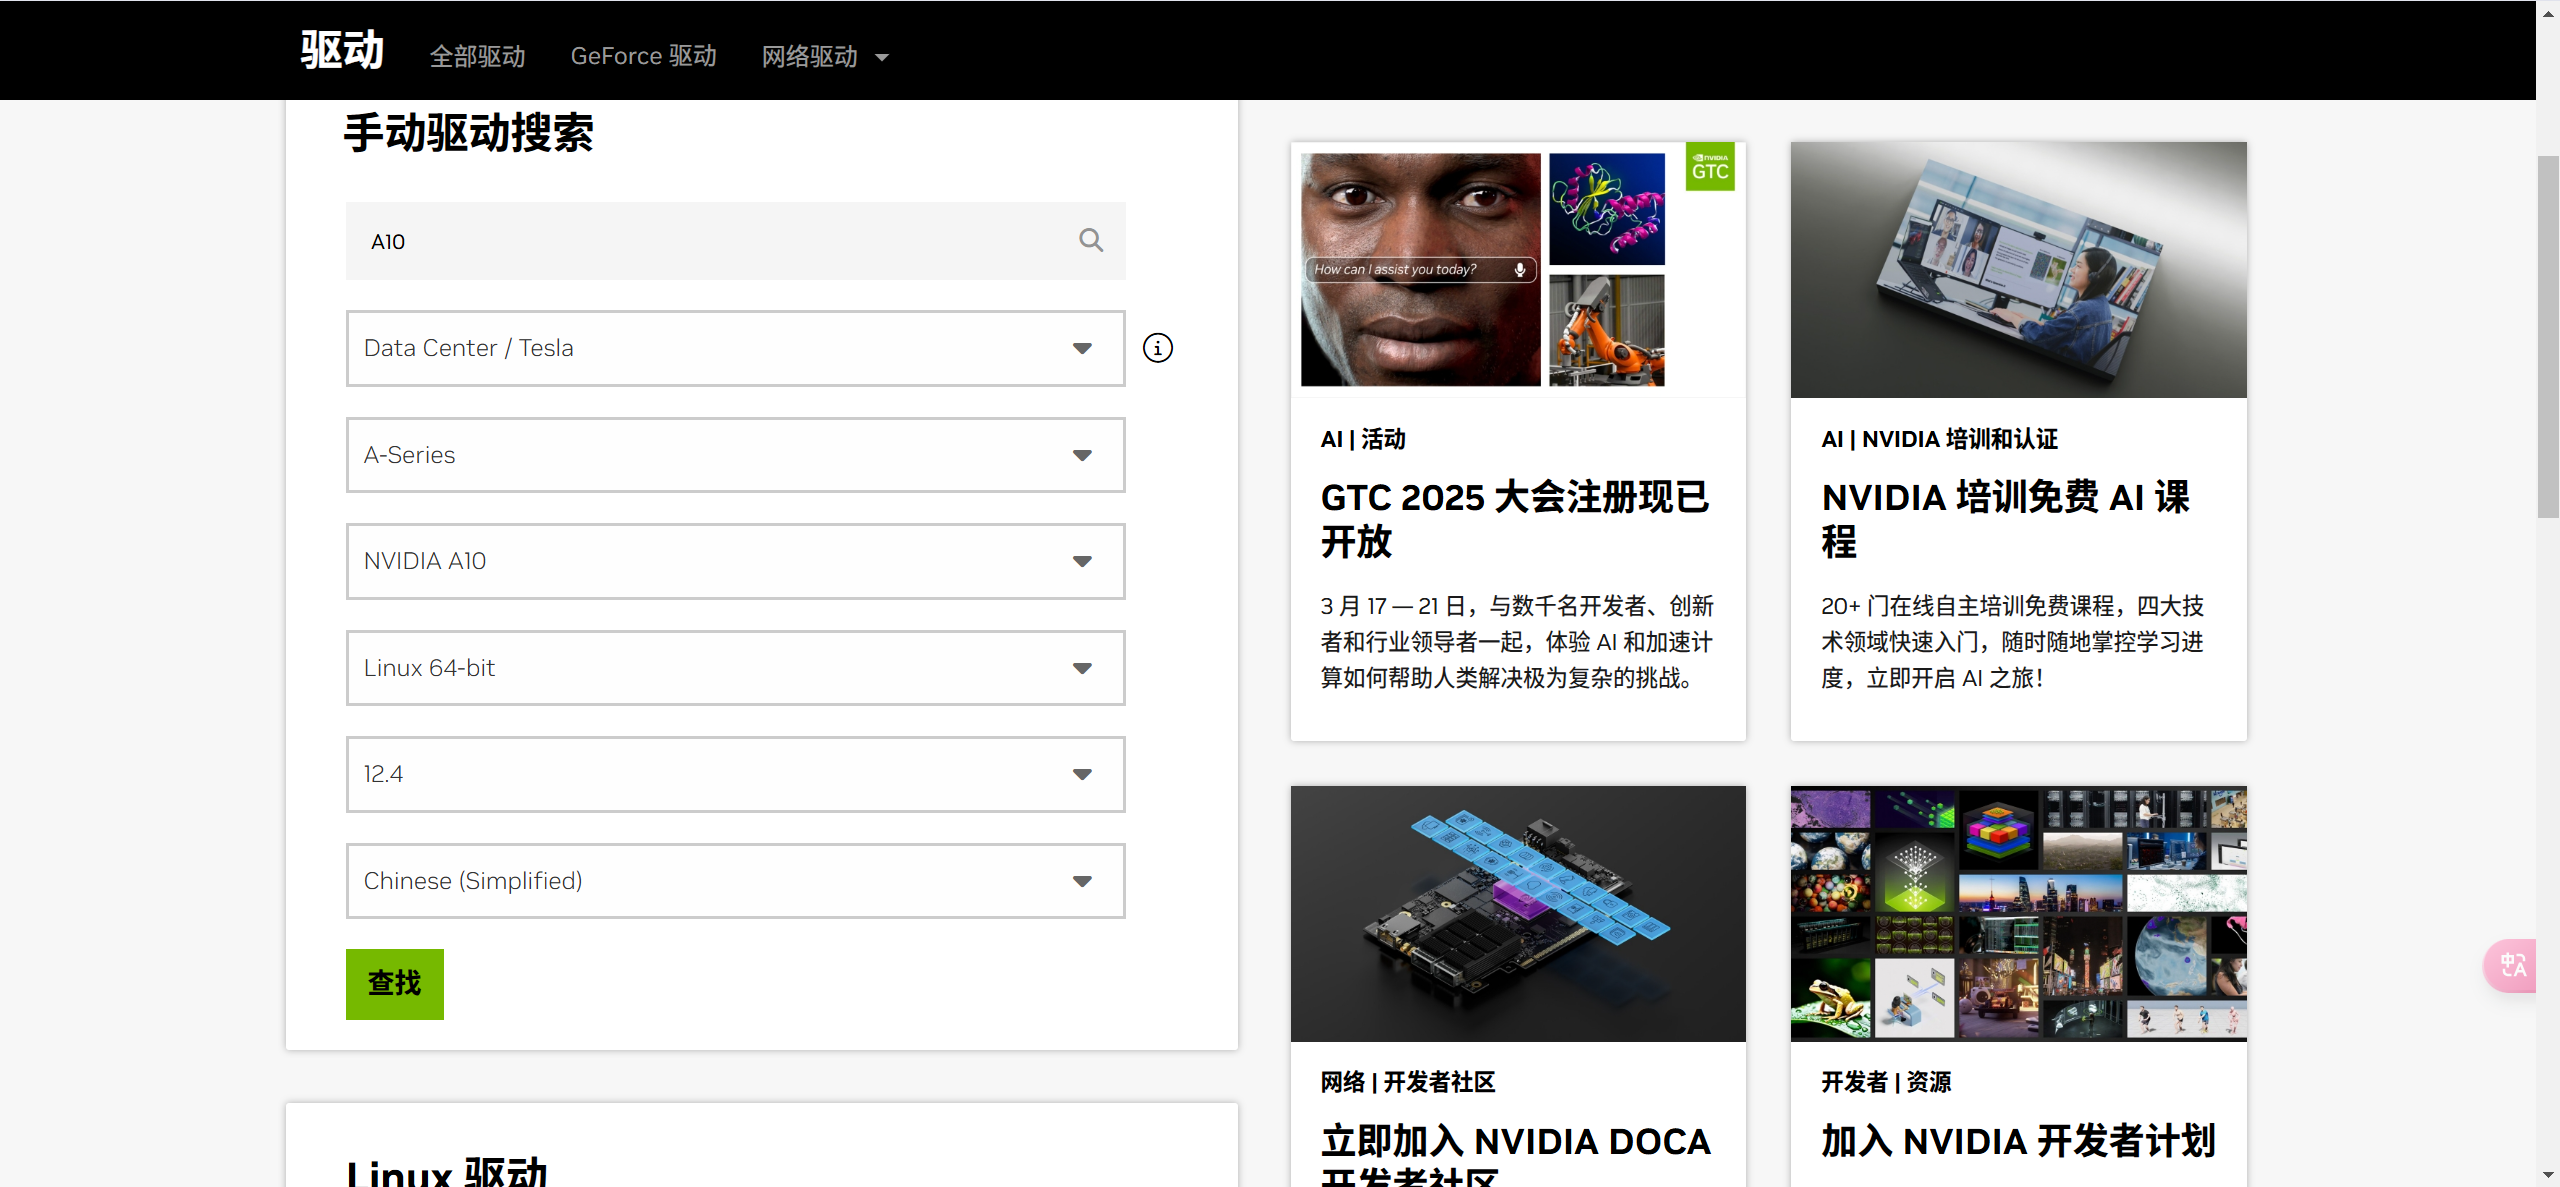
对应显卡,依次选择筛选条件,版本选择为12.4,设置好条件后,点击“查找”,
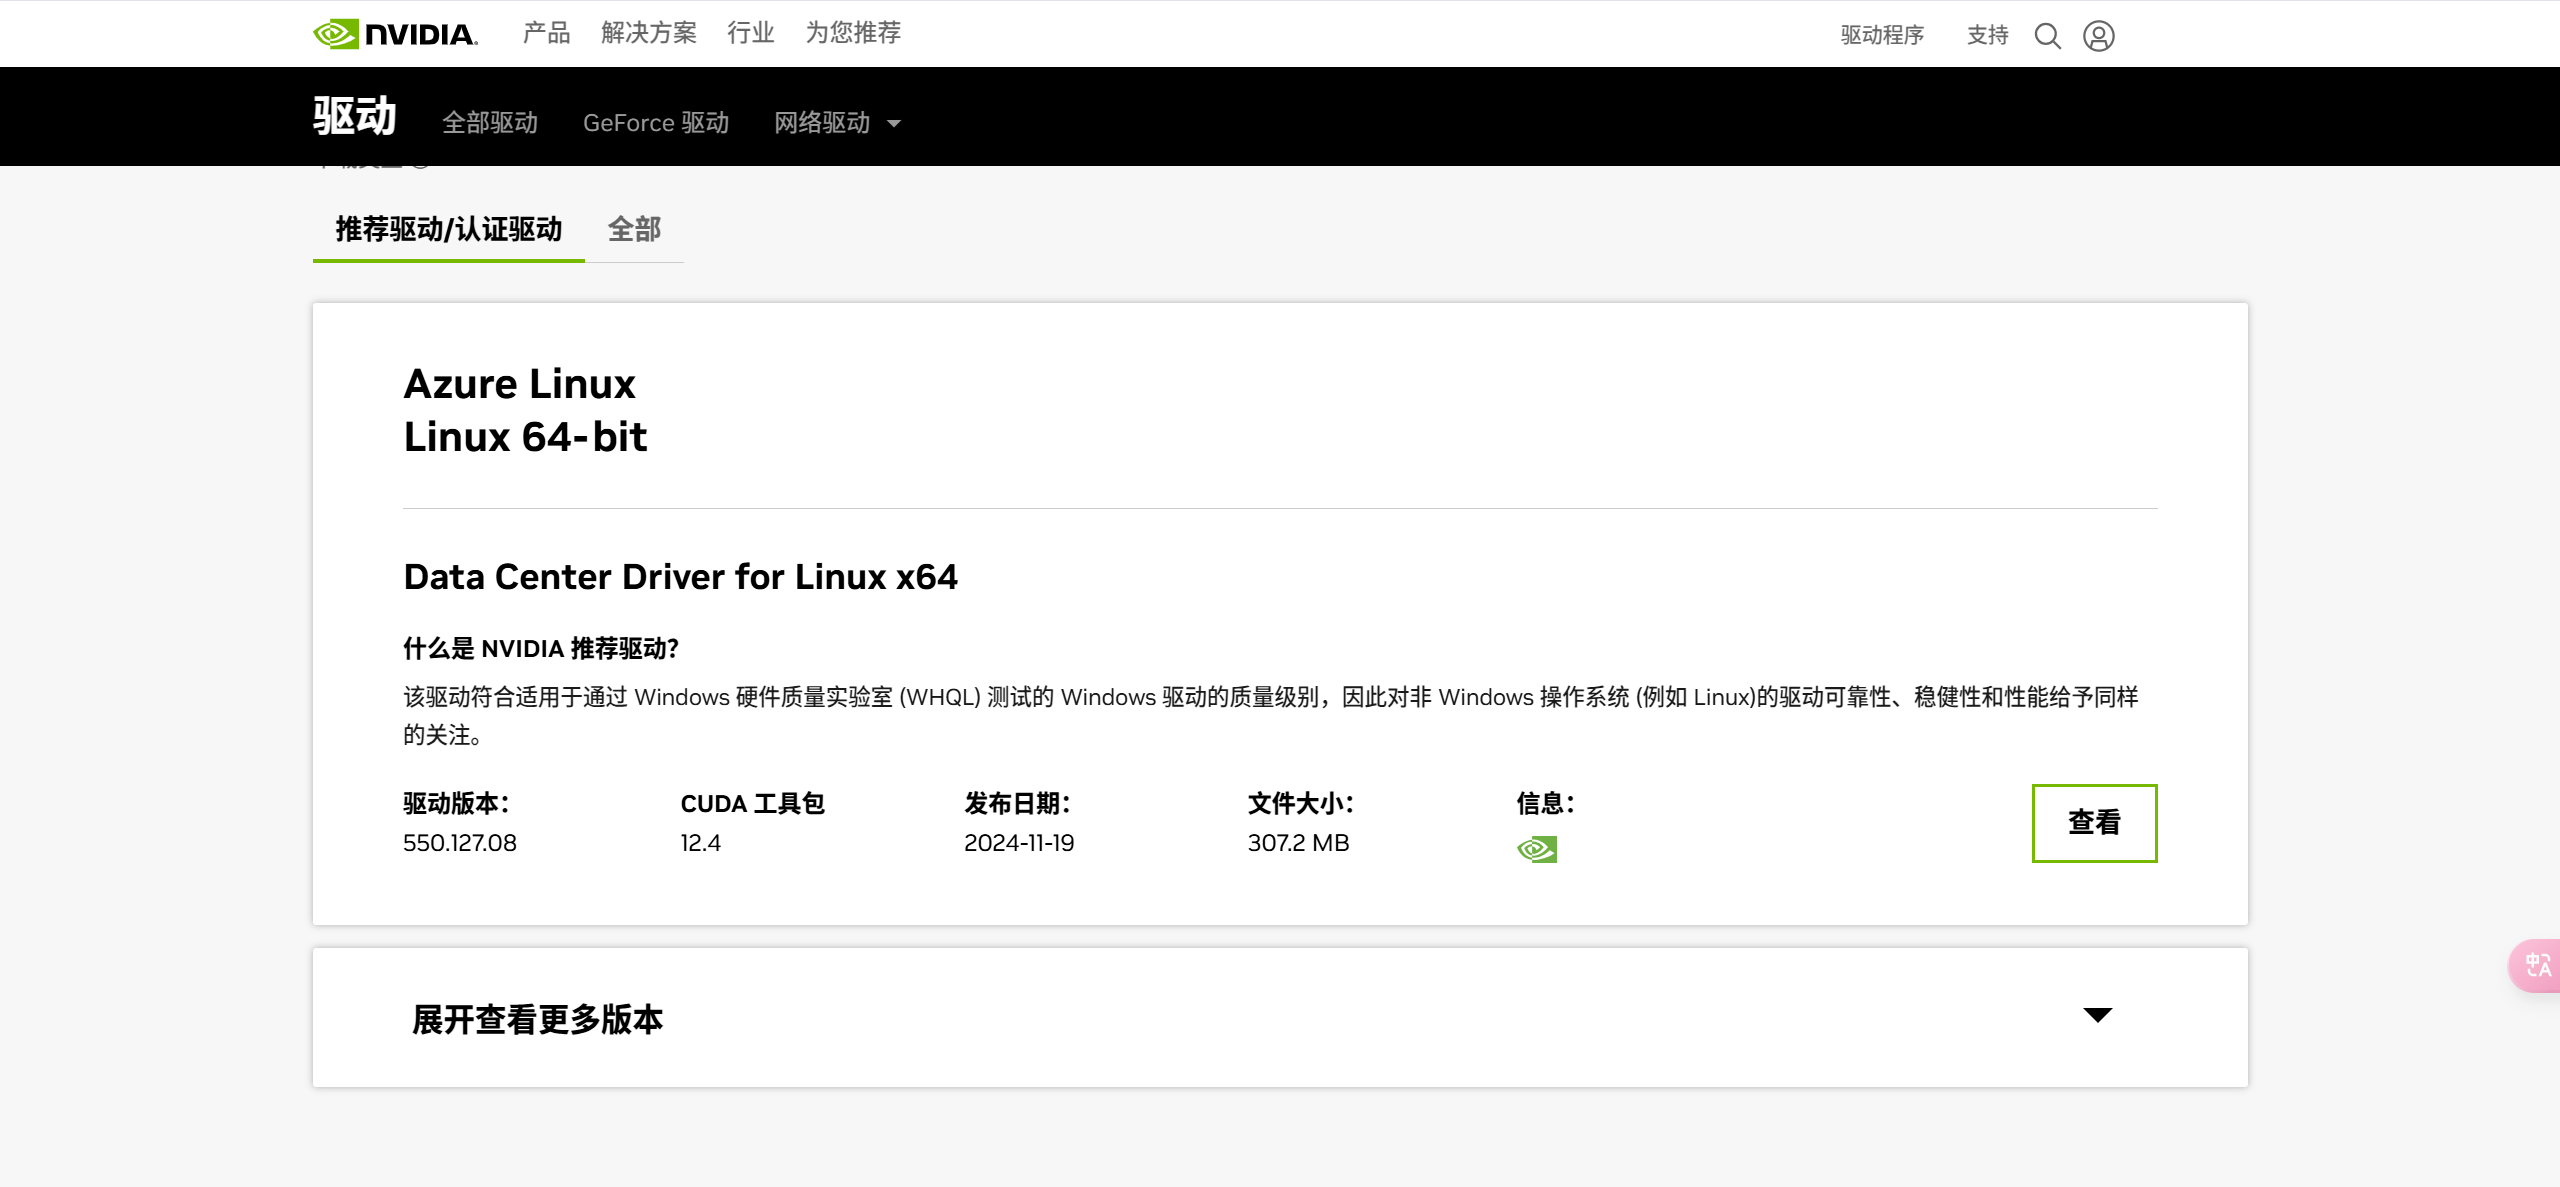
点击“查看”
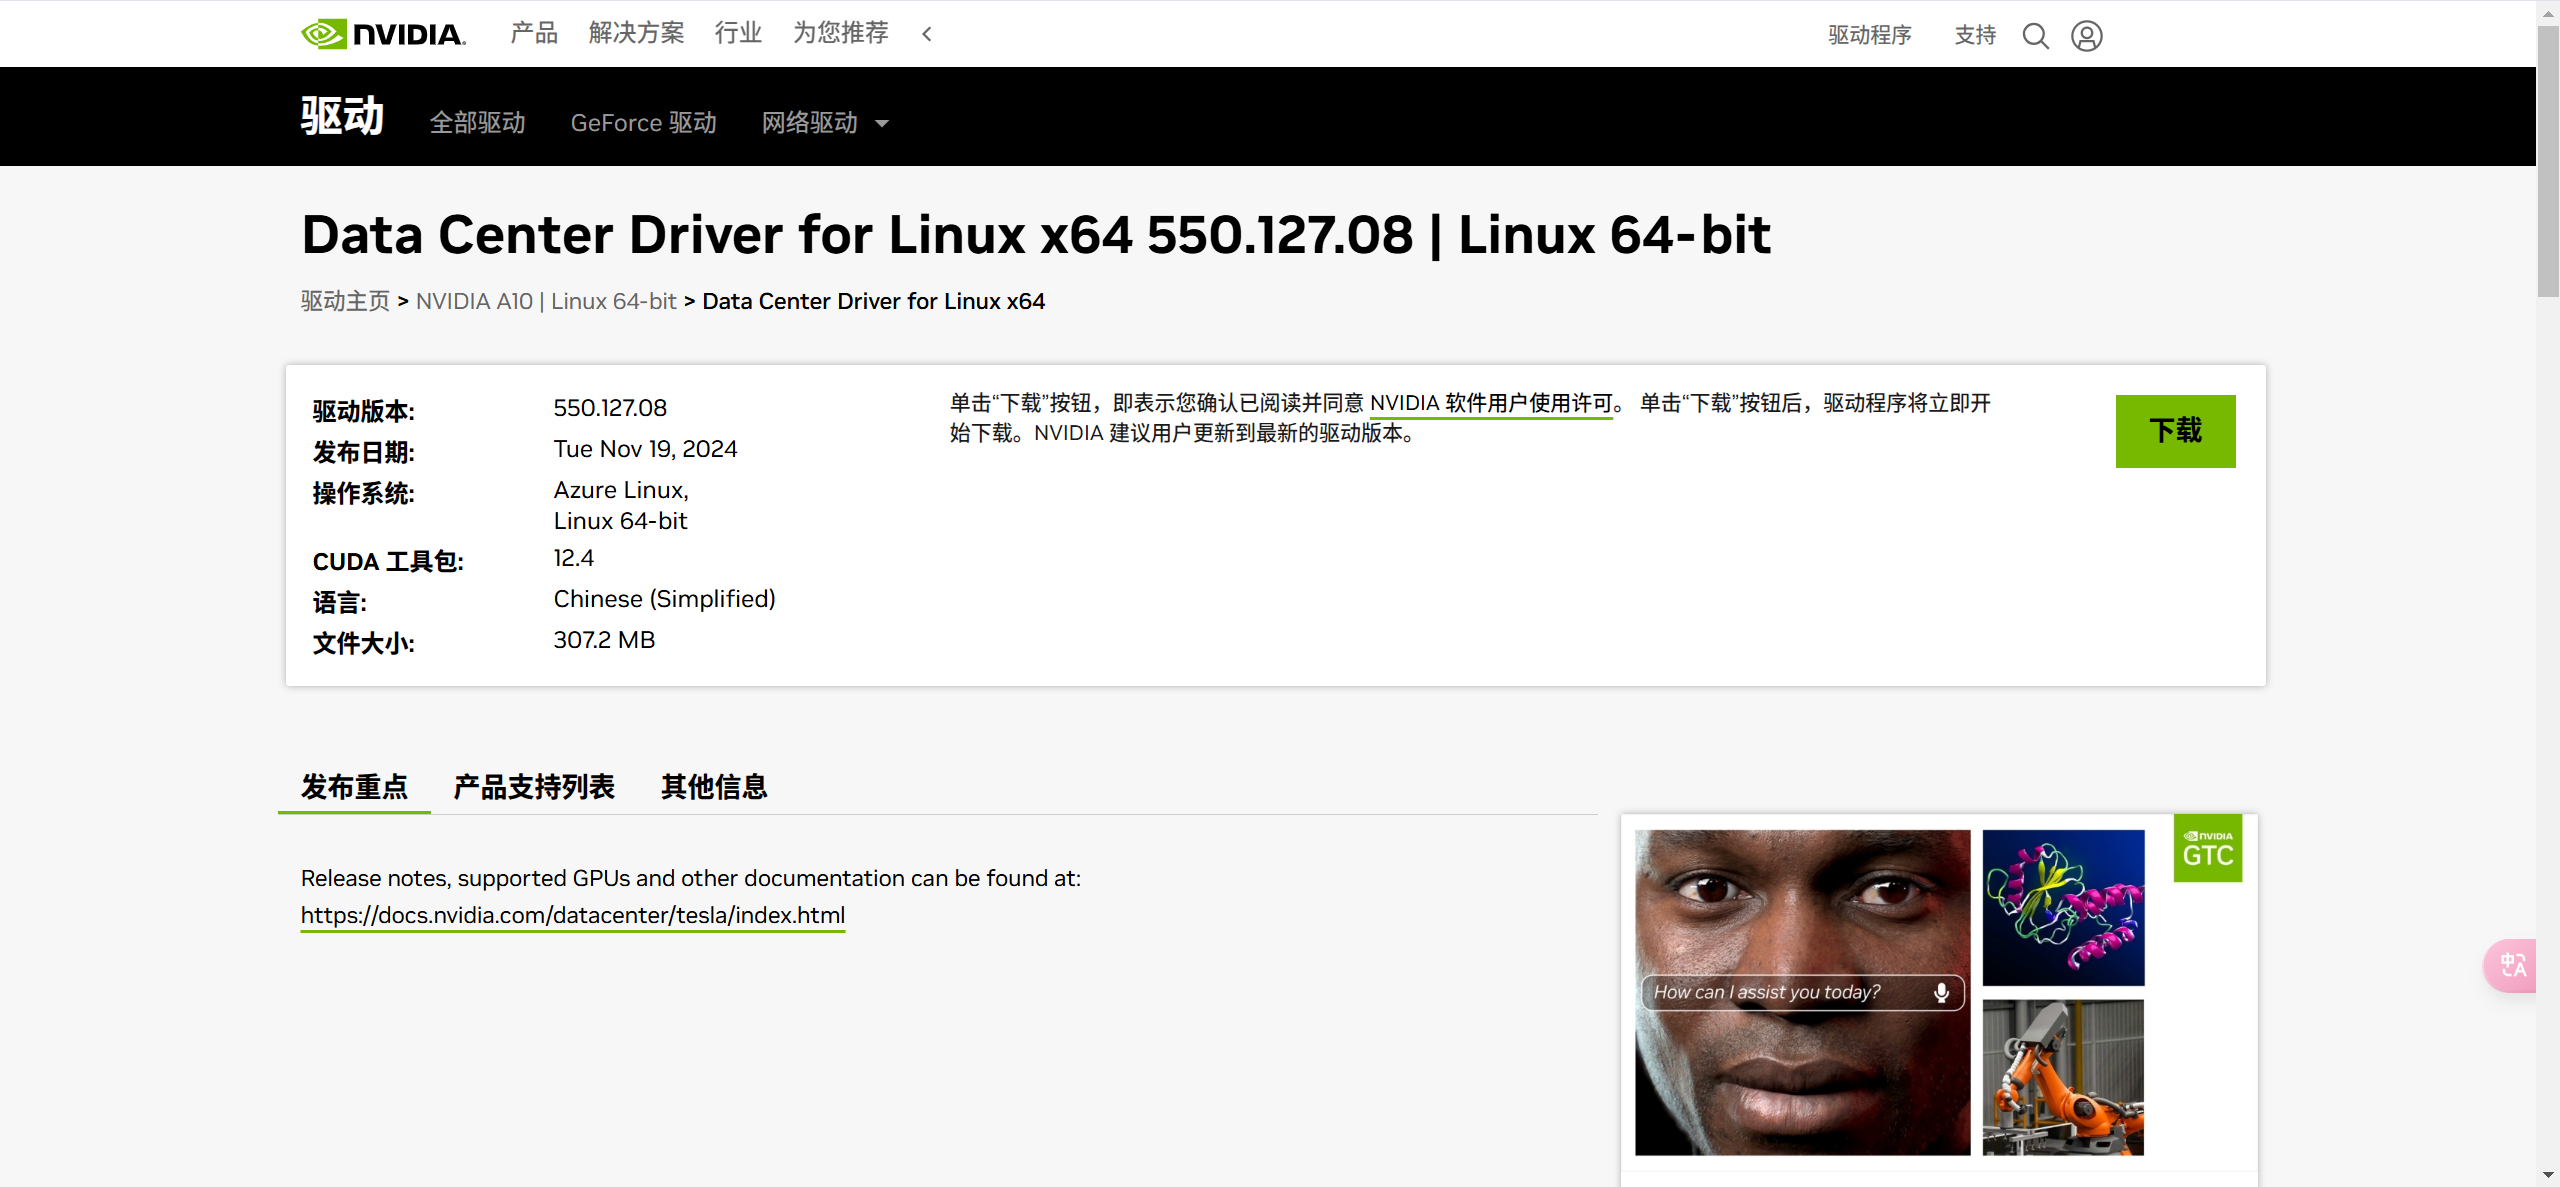
点击“下载”按钮,下载显卡驱动;或者,右键点击下载按钮,复制下载链接,之后在服务器上使用wget命令下载。例如:
wget https://cn.download.nvidia.com/tesla/550.127.08/NVIDIA-Linux-x86_64-550.127.08.run
- 确保系统中已安装gcc-12和make环境
sudo apt update
sudo apt install gcc-12 make
- 安装显卡驱动
chmod +x NVIDIA-Linux-x86_64-550.127.08.run
sudo ./NVIDIA-Linux-x86_64-550.127.08.run
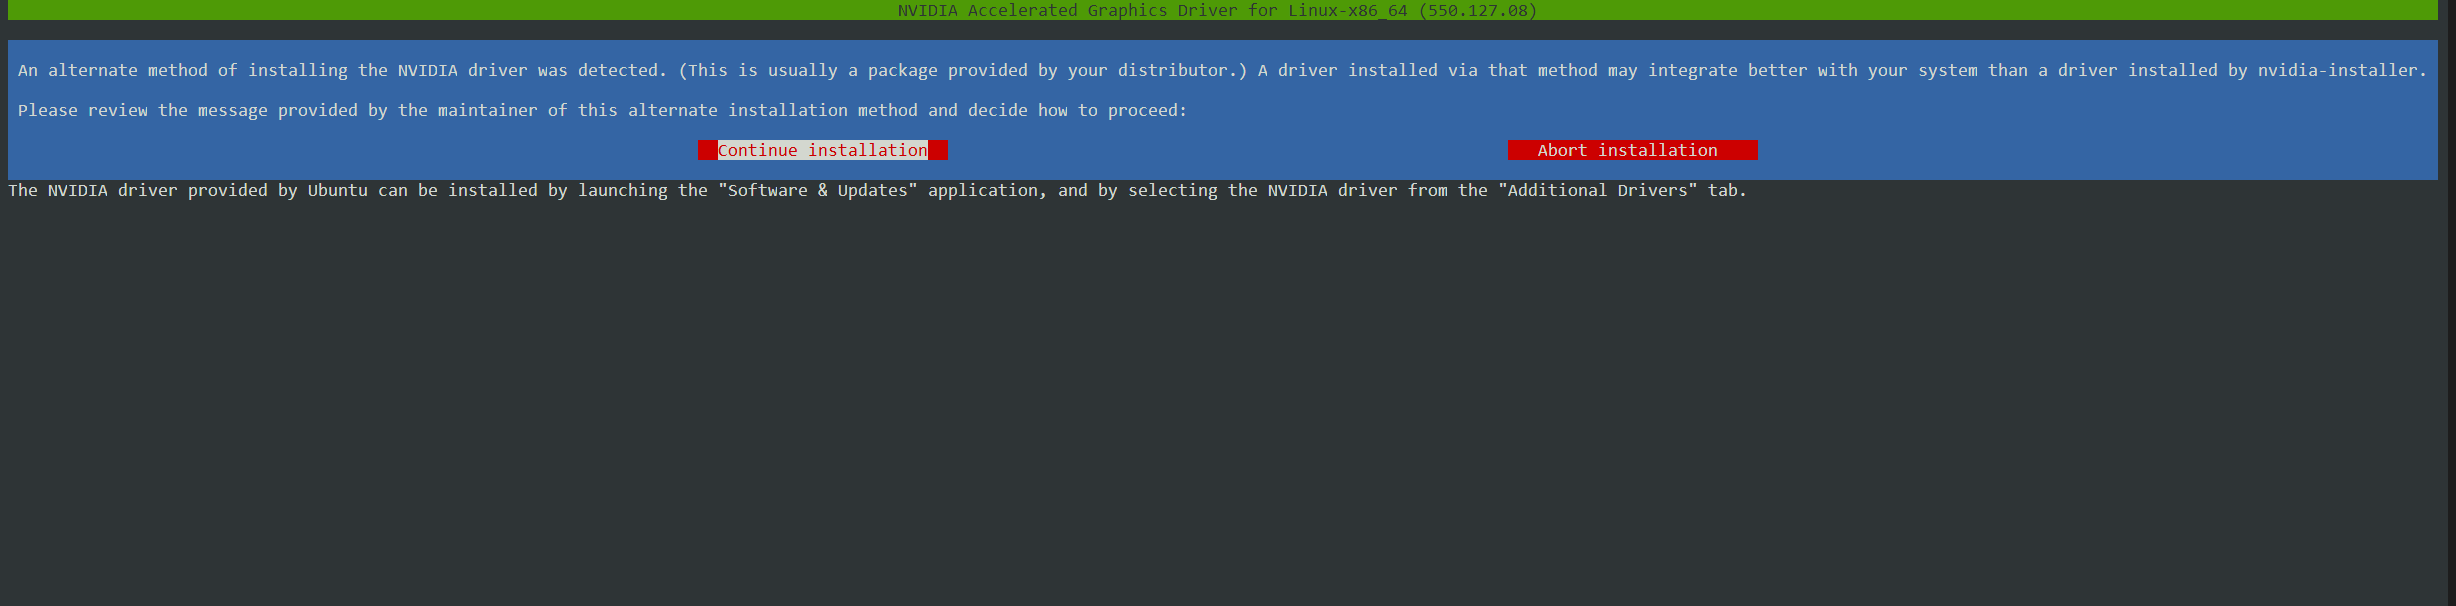
选择“Continue installation”,回车;之后的交互,全部选“ok”。
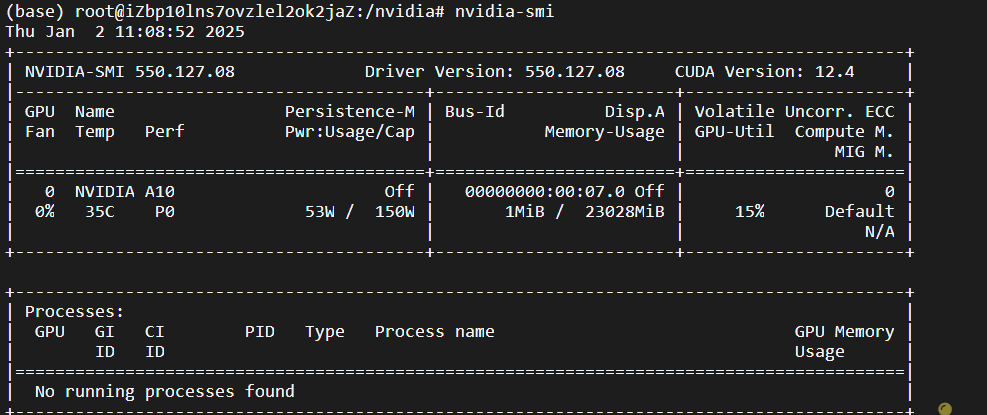
- 验证
输入“nvidia-smi”查看输出
5.4 安装CUDA
- 下载
https://developer.nvidia.com/cuda-toolkit-archive
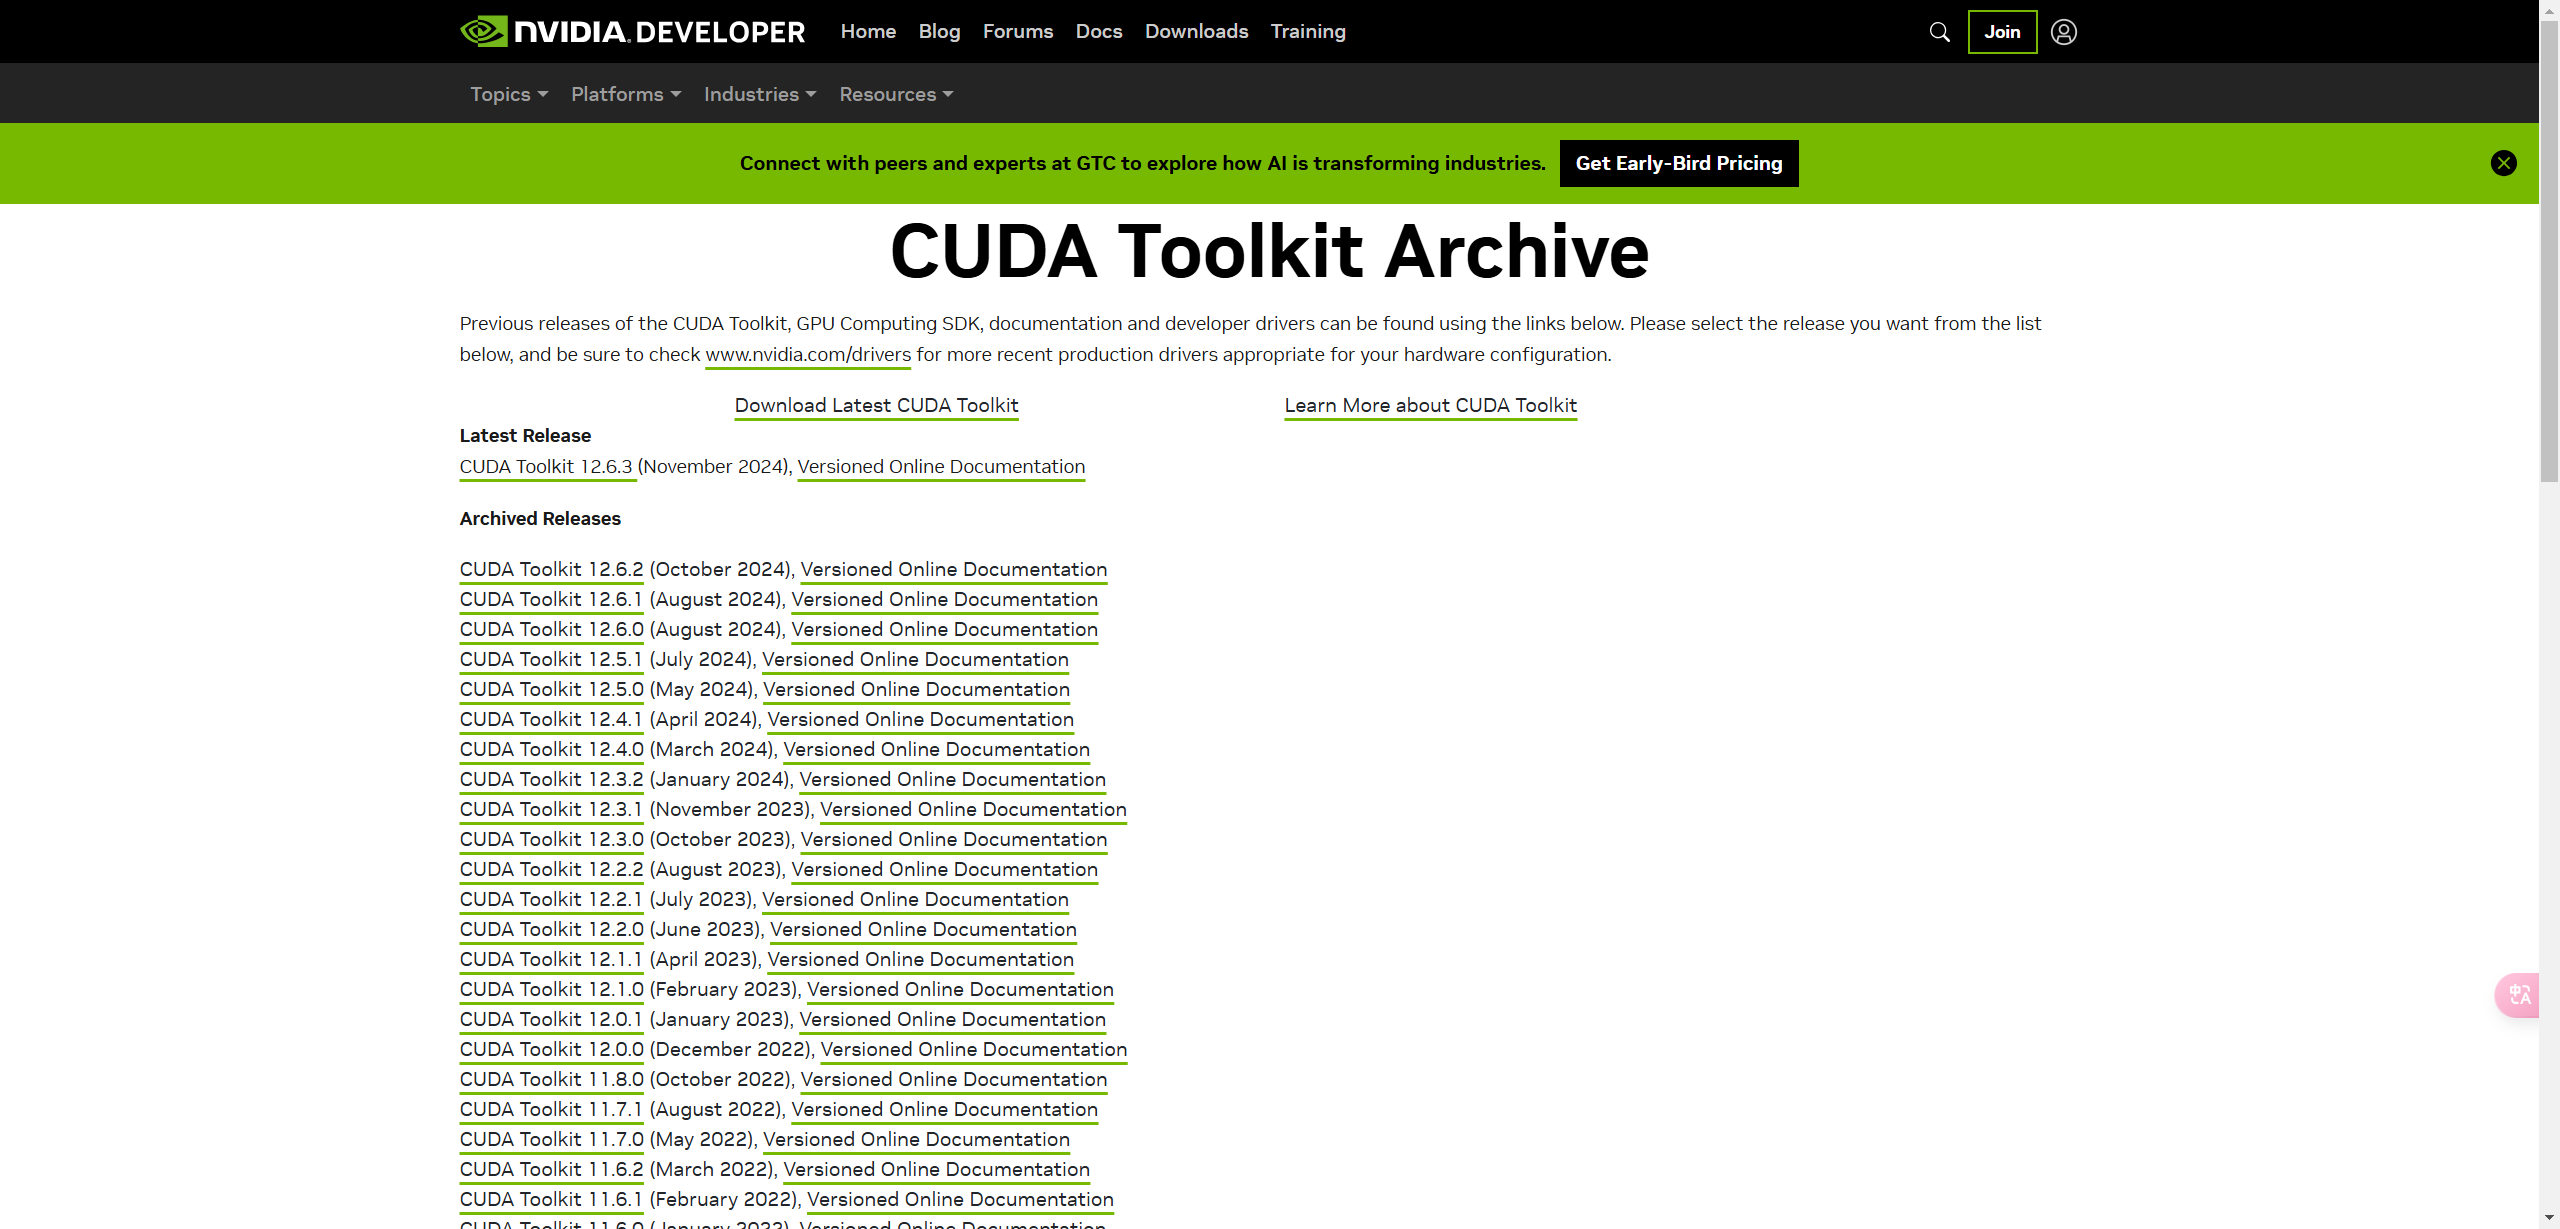
选择12.4.0版本下载
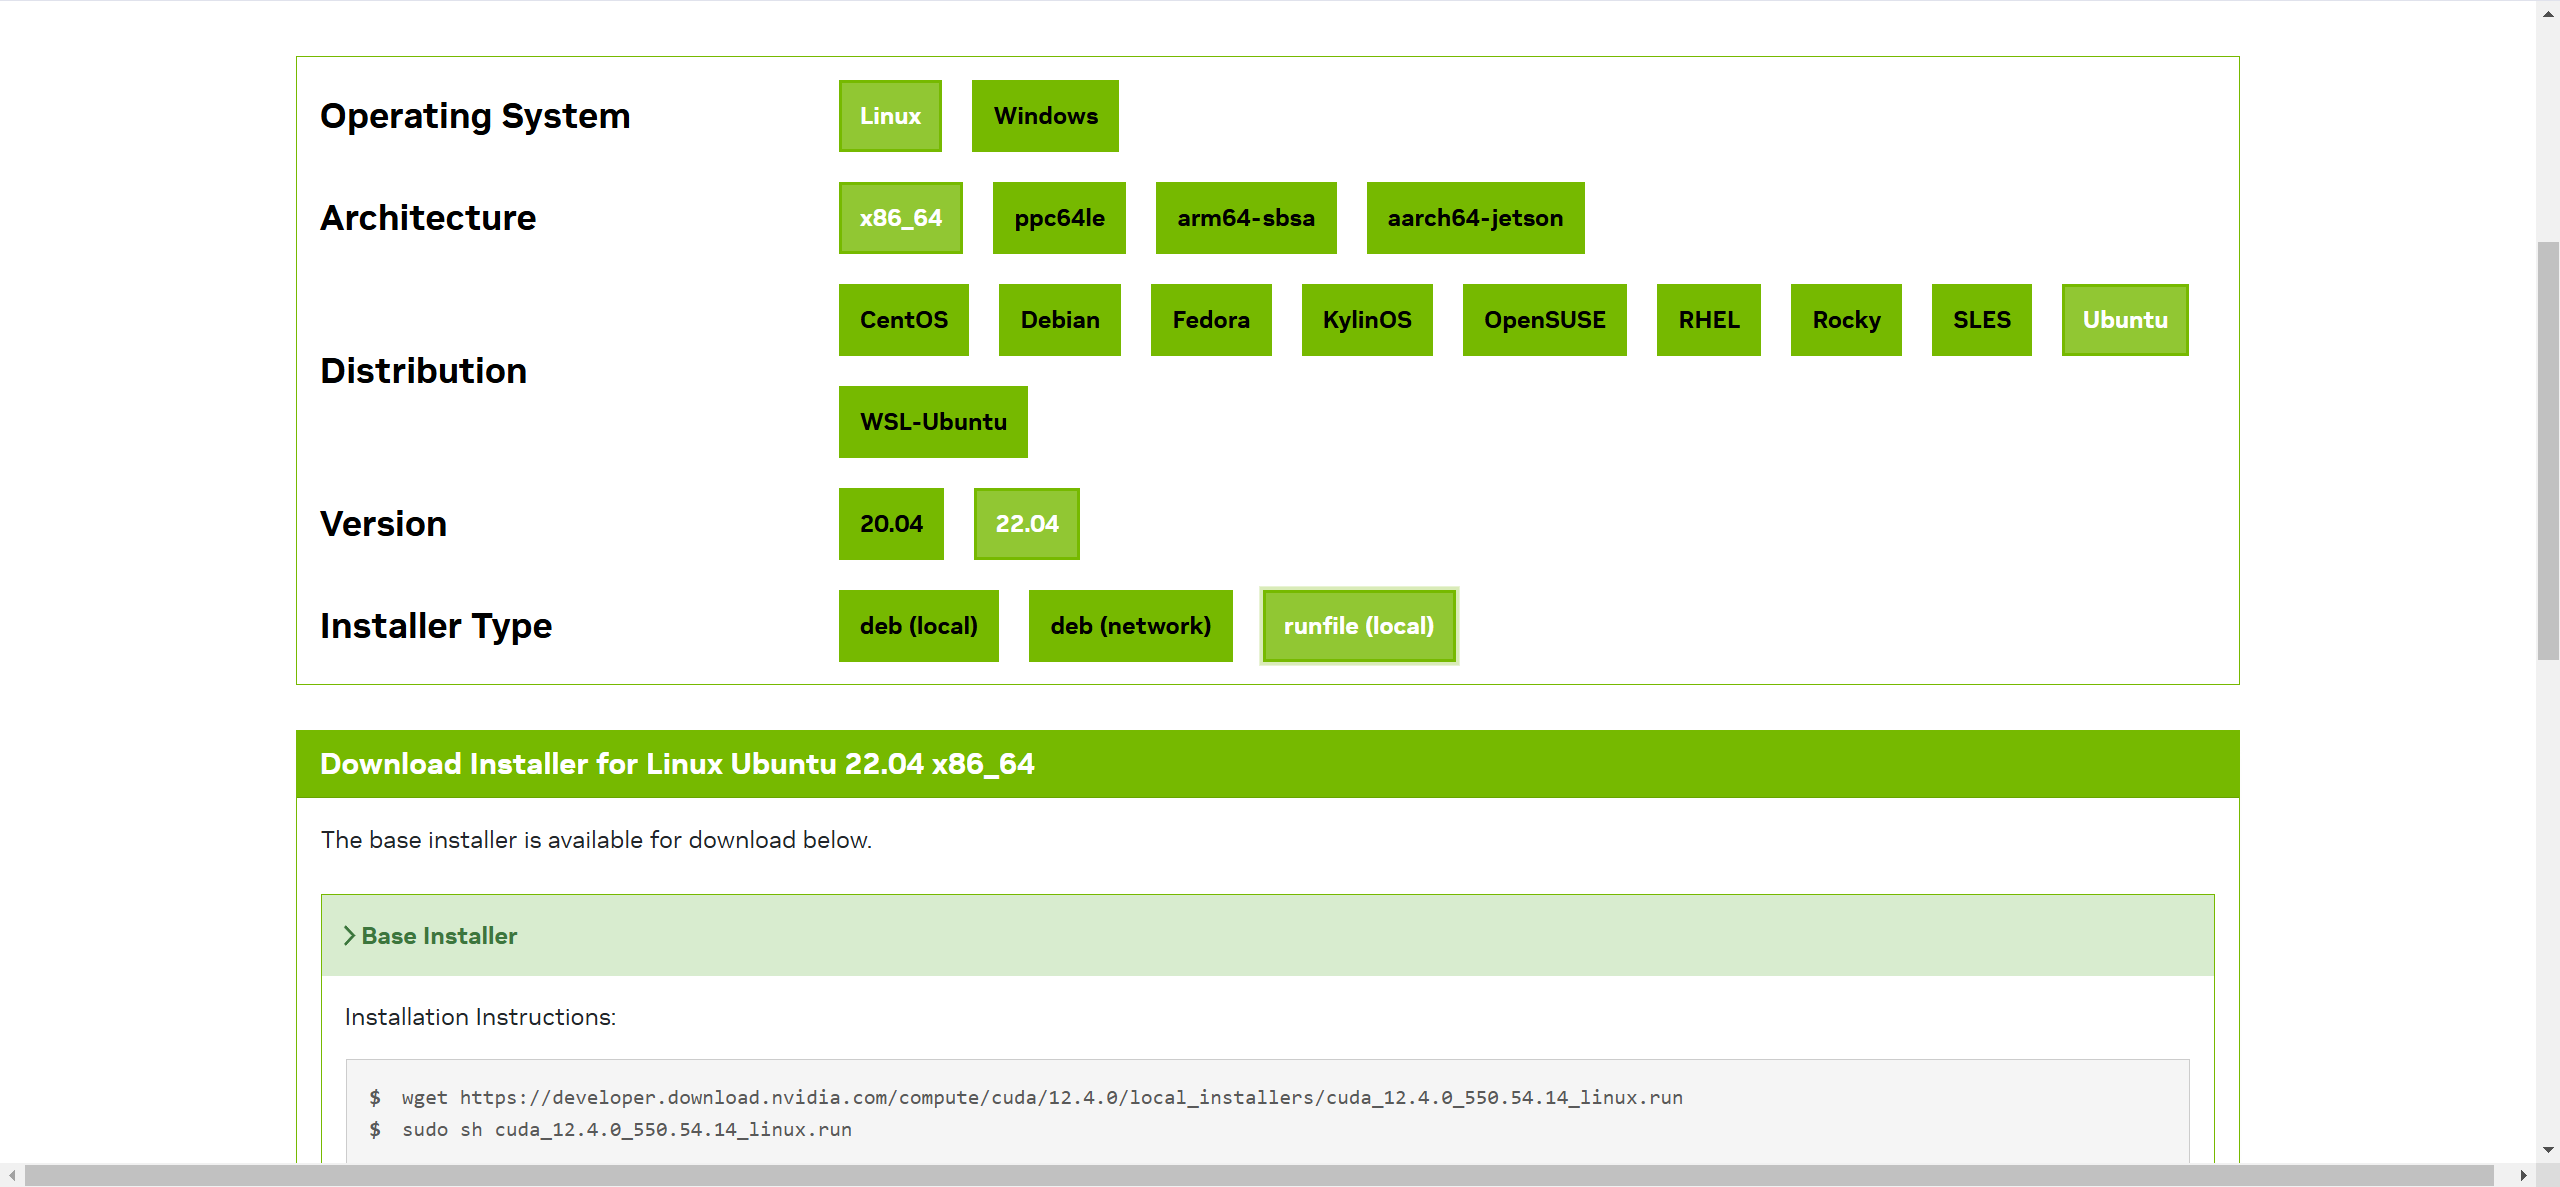
依次点击选项卡,设置筛选条件,筛选出所需安装包之后,页面下方即可显示CUDA的下载、安装命令,如:
wget https://developer.download.nvidia.com/compute/cuda/12.4.0/local_installers/cuda_12.4.0_550.54.14_linux.run
sudo sh cuda_12.4.0_550.54.14_linux.run
- 安装
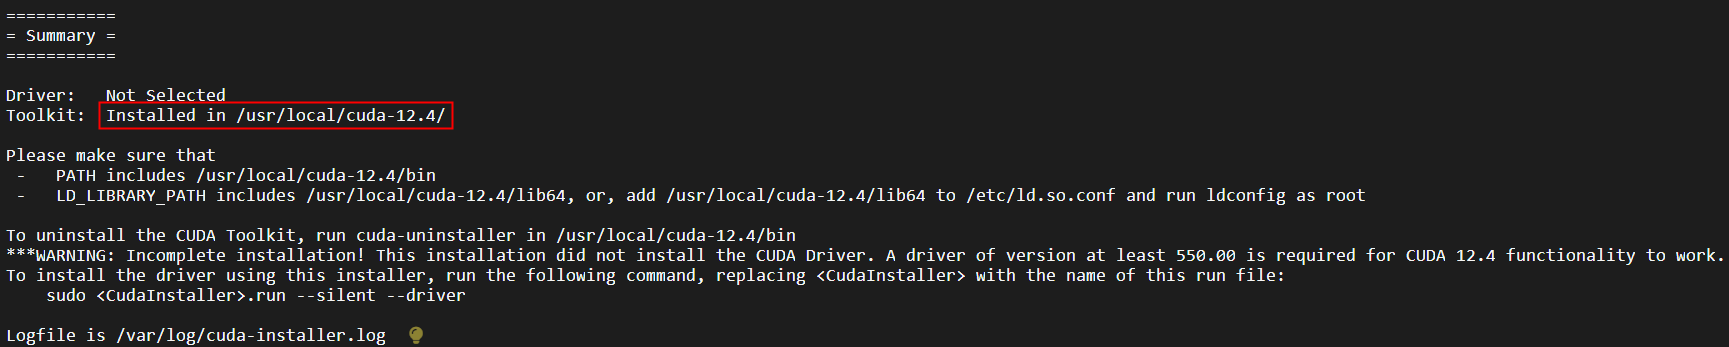
执行上述命令,安装CUDA,安装截图如下:

输入accept,回车
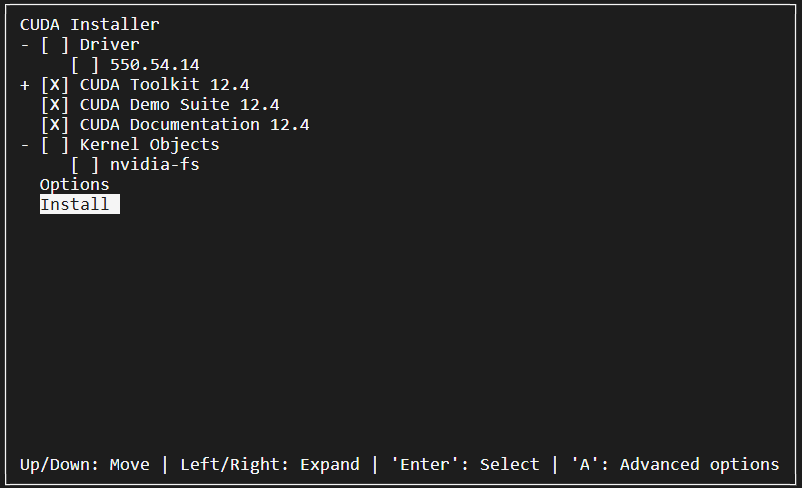
取消“Driver”选项,因为已经安装过显卡驱动了, 这里不需要安装,然后选择“Install”。
- 配置环境变量
执行“vim ~/.bashrc”命令,添加如下环境变量:
export CUDA_HOME=/usr/local/cuda-12.4
export PATH=$PATH:$CUDA_HOME/bin
export LD_LIBRARY_PATH=$LD_LIBRARY_PATH:$CUDA_HOME/lib64
保存后,执行“source ~/.bashrc”命令,更新环境变量。
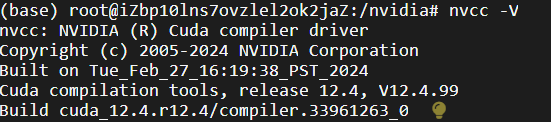
- 验证
nvcc -V
输出:
5.5 安装CUDNN
https://developer.nvidia.com/rdp/cudnn-download
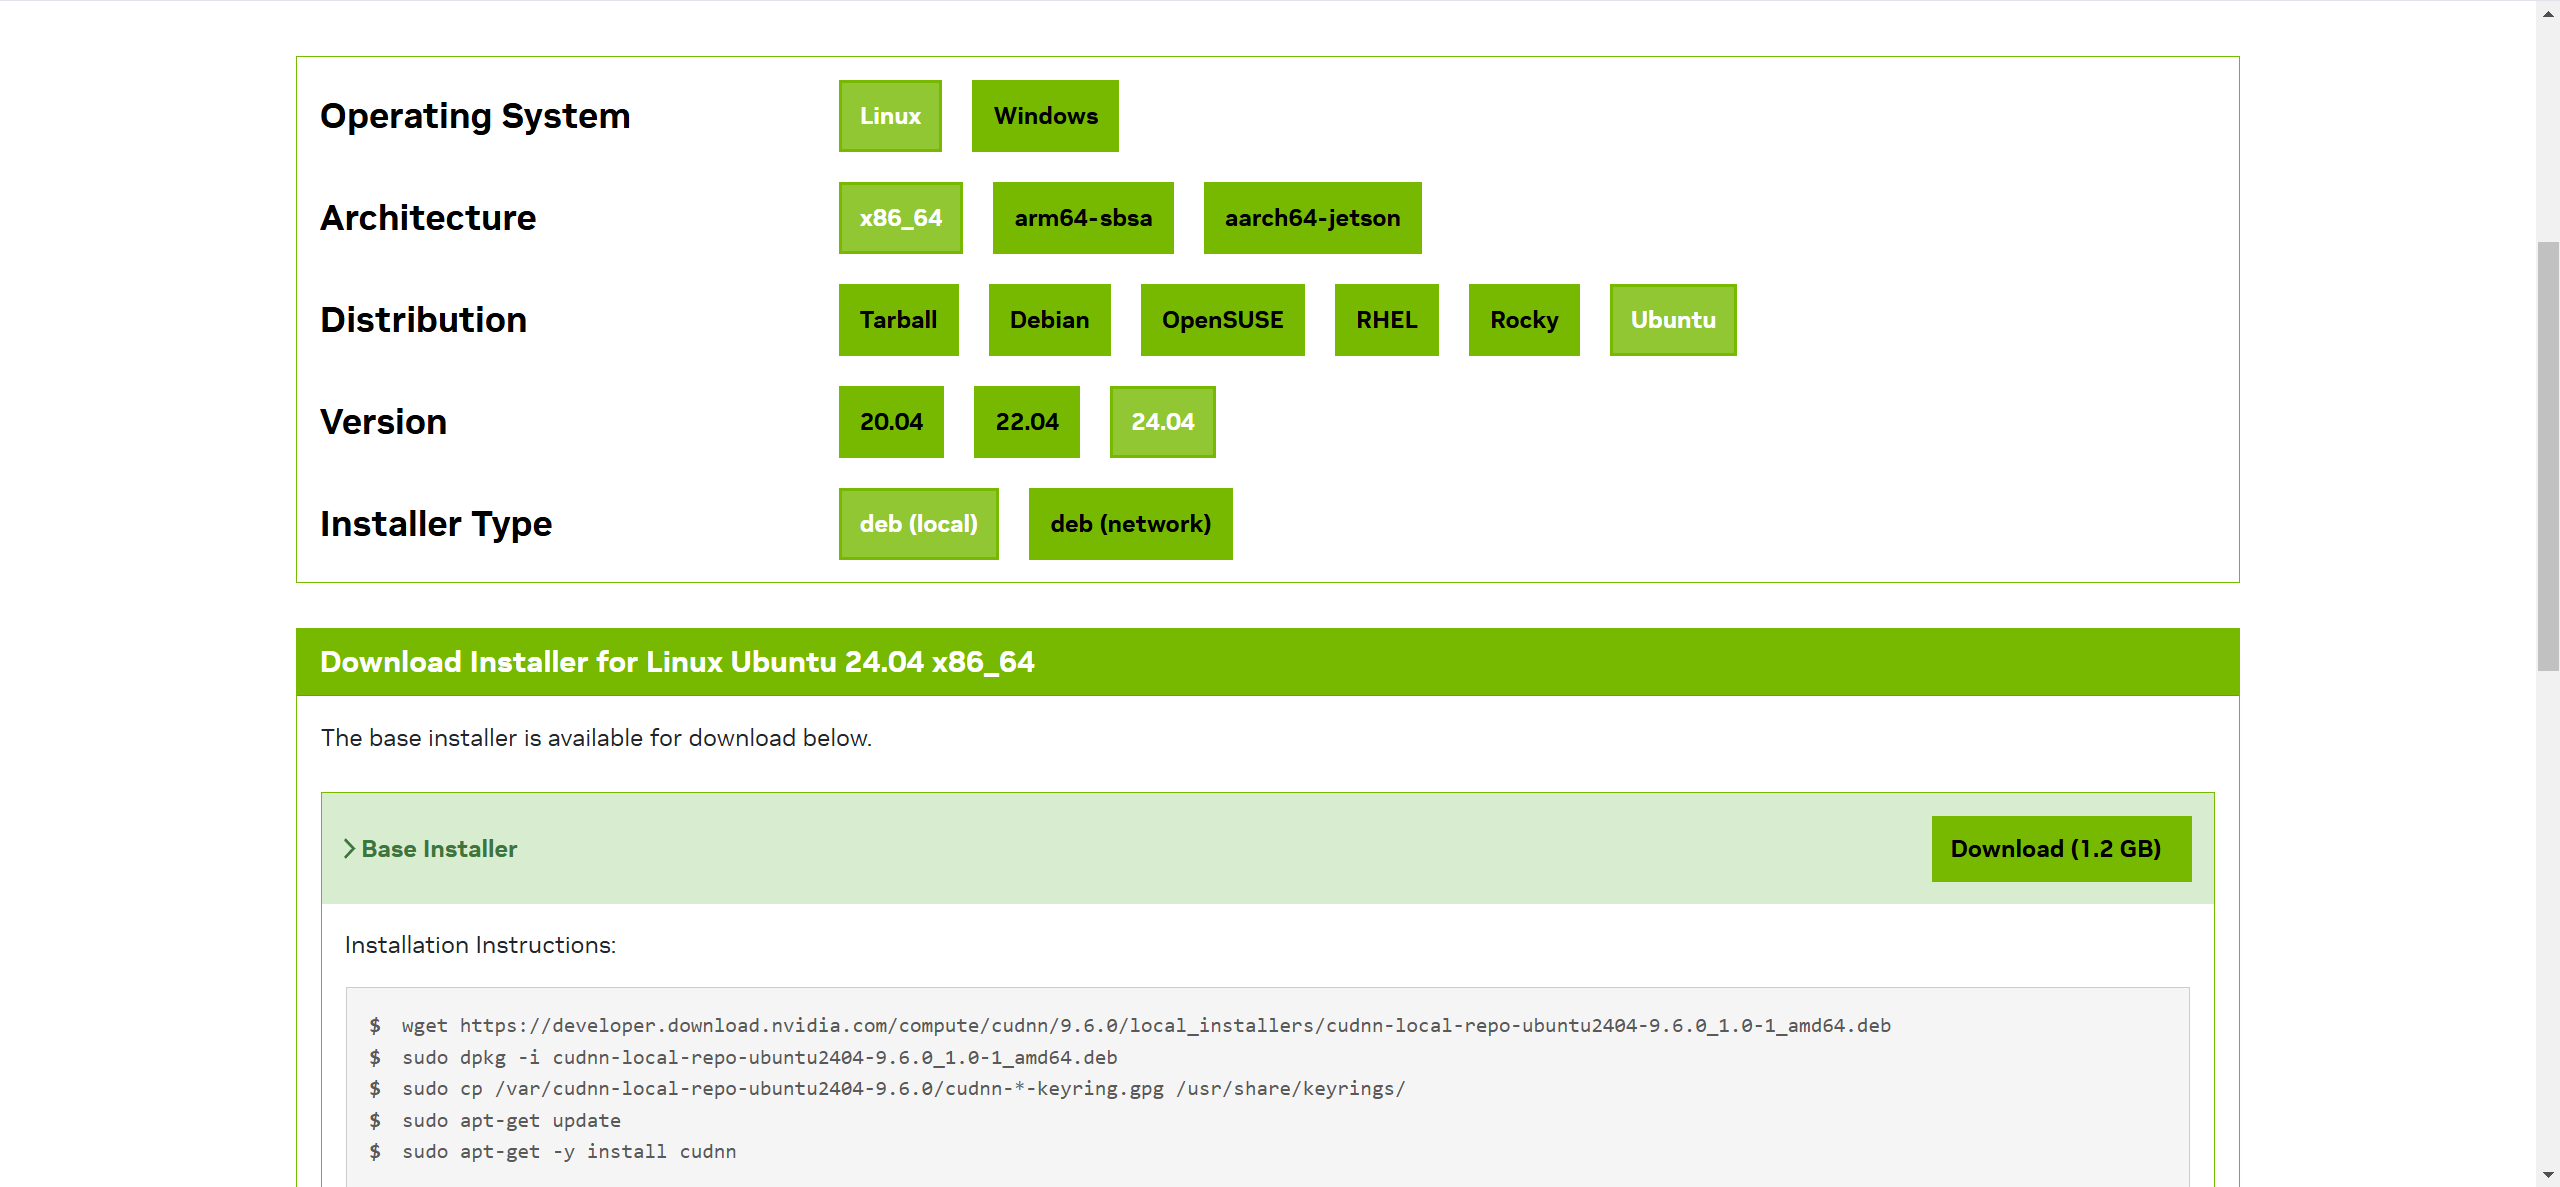
依次点击选项卡,设置筛选条件,选择所需版本后,页面下方会生成安装命令。如:
wget https://developer.download.nvidia.com/compute/cudnn/9.6.0/local_installers/cudnn-local-repo-ubuntu2404-9.6.0_1.0-1_amd64.deb
sudo dpkg -i cudnn-local-repo-ubuntu2404-9.6.0_1.0-1_amd64.deb
sudo cp /var/cudnn-local-repo-ubuntu2404-9.6.0/cudnn-*-keyring.gpg /usr/share/keyrings/
sudo apt-get update
sudo apt-get -y install cudnn
按上述命令,安装即可。
**注意:**需要安装对应CUDA版本的CUDNN。下面链接可查看。
https://docs.nvidia.com/deeplearning/cudnn/latest/reference/support-matrix.html#support-matrix
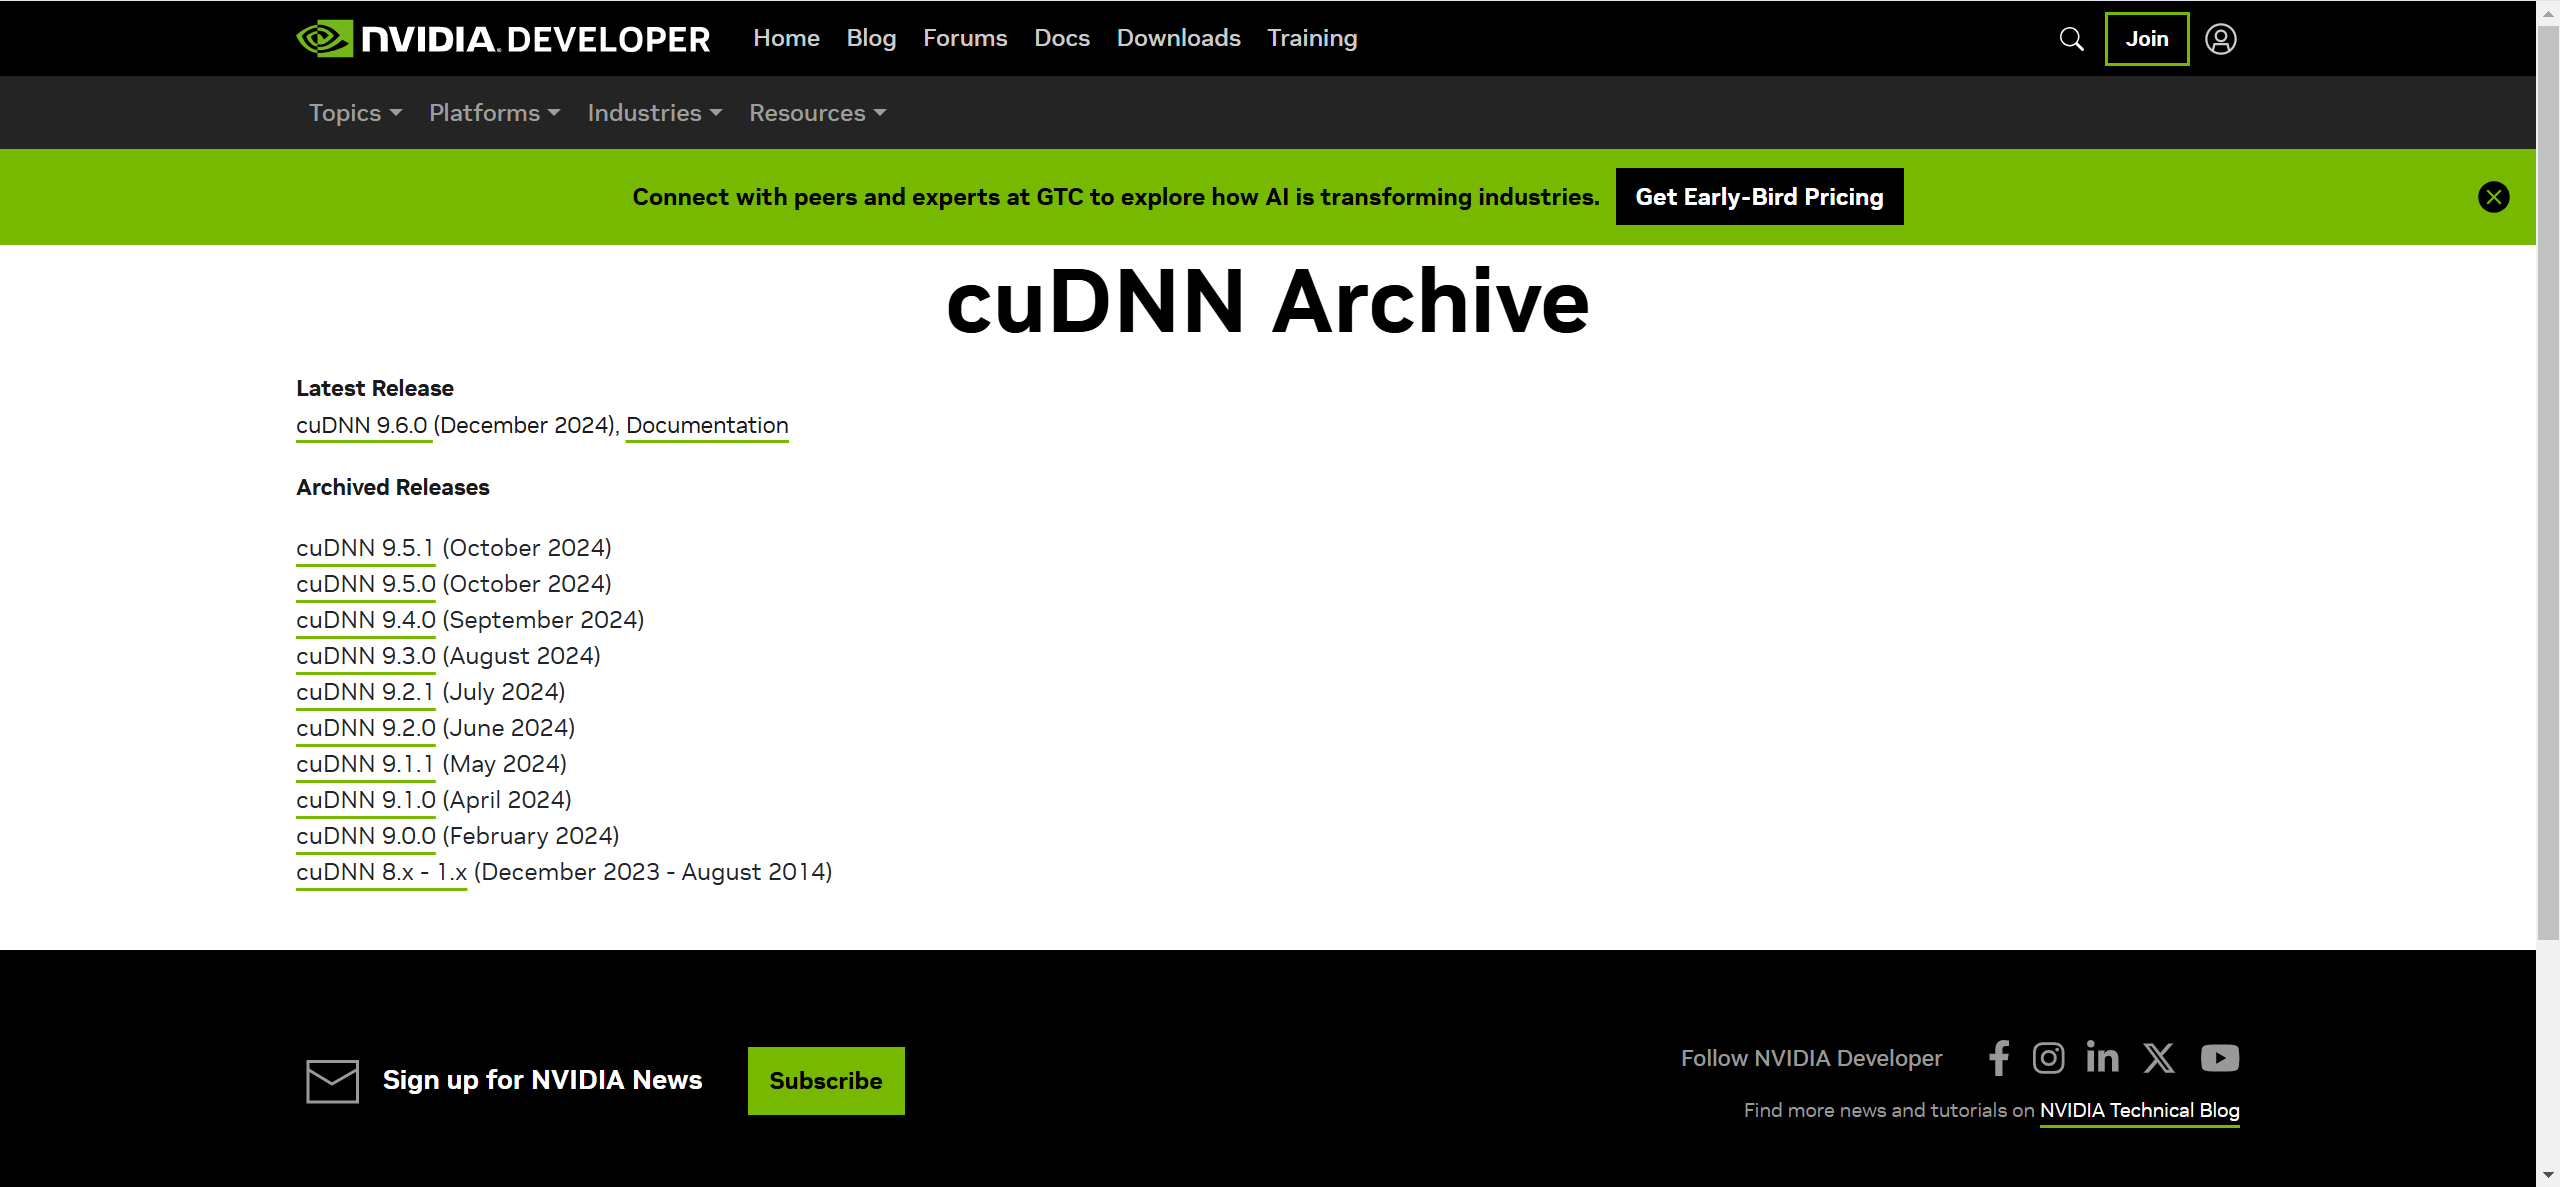
CUDNN历史版本下载
https://developer.nvidia.com/cudnn-archive
5.6 模型安装
在服务器上,创建模型安装目录,并下载模型文件,命令如下:
mkdir -p /xcloud/qwen2-vl-7b/model

cd /xcloud/qwen2-vl-7b/model

wget https://modelscope.cn/models/Qwen/Qwen2-VL-7B-Instruct/resolve/master/model-00001-of-00005.safetensors

wget https://modelscope.cn/models/Qwen/Qwen2-VL-7B-Instruct/resolve/master/model-00002-of-00005.safetensors

wget https://modelscope.cn/models/Qwen/Qwen2-VL-7B-Instruct/resolve/master/model-00003-of-00005.safetensors

wget https://modelscope.cn/models/Qwen/Qwen2-VL-7B-Instruct/resolve/master/model-00004-of-00005.safetensors

wget https://modelscope.cn/models/Qwen/Qwen2-VL-7B-Instruct/resolve/master/model-00005-of-00005.safetensors

wget https://modelscope.cn/models/Qwen/Qwen2-VL-7B-Instruct/resolve/master/chat_template.json

wget https://modelscope.cn/models/Qwen/Qwen2-VL-7B-Instruct/resolve/master/config.json

wget https://modelscope.cn/models/Qwen/Qwen2-VL-7B-Instruct/resolve/master/configuration.json

wget https://modelscope.cn/models/Qwen/Qwen2-VL-7B-Instruct/resolve/master/generation_config.json

wget https://modelscope.cn/models/Qwen/Qwen2-VL-7B-Instruct/resolve/master/LICENSE

wget https://modelscope.cn/models/Qwen/Qwen2-VL-7B-Instruct/resolve/master/merges.txt

wget https://modelscope.cn/models/Qwen/Qwen2-VL-7B-Instruct/resolve/master/model.safetensors.index.json

wget https://modelscope.cn/models/Qwen/Qwen2-VL-7B-Instruct/resolve/master/preprocessor_config.json

wget https://modelscope.cn/models/Qwen/Qwen2-VL-7B-Instruct/resolve/master/README.md

wget https://modelscope.cn/models/Qwen/Qwen2-VL-7B-Instruct/resolve/master/tokenizer.json

wget https://modelscope.cn/models/Qwen/Qwen2-VL-7B-Instruct/resolve/master/tokenizer_config.json

wget https://modelscope.cn/models/Qwen/Qwen2-VL-7B-Instruct/resolve/master/vocab.json
安装编译软件所需的工具和CMake构建系统,命令如下:
apt-get install build-essential cmake
创建并激活虚拟环境,命令如下:
# 创建名为 qwen2-vl-7b 的虚拟环境,并指定python版本
conda create -n qwen2-vl-7b python=3.11
# 查看所有的虚拟环境
conda env list
# 激活虚拟环境 qwen2-vl-7b
conda activate qwen2-vl-7b
下载依赖,命令如下:
pip install transformers
pip install modelscope
pip install qwen-vl-utils
pip install torch torchvision torchaudio --extra-index-url https://download.pytorch.org/whl/cu124
pip install accelerate==0.26.0
pip install ninja
pip install flash-attn -i https://mirrors.aliyun.com/pypi/simple
创建模型启动脚本
在/xcloud/qwen2-vl-7b目录中创建qwen2-vl-7b.py文件,写入以下代码:
import time

from modelscope import Qwen2VLForConditionalGeneration, AutoTokenizer, AutoProcessor
from qwen_vl_utils import process_vision_info
from modelscope import snapshot_download
import torch
model_dir = "/xcloud/qwen2-vl-7b/model"

# default: Load the model on the available device(s)
# model = Qwen2VLForConditionalGeneration.from_pretrained(
#     model_dir, torch_dtype="auto", device_map="auto"
# )

# We recommend enabling flash_attention_2 for better acceleration and memory saving, especially in multi-image and video scenarios.
model = Qwen2VLForConditionalGeneration.from_pretrained(
    model_dir,
    torch_dtype=torch.bfloat16,
    attn_implementation="flash_attention_2",
    device_map="auto",
)

# default processer
# processor = AutoProcessor.from_pretrained(model_dir)

# The default range for the number of visual tokens per image in the model is 4-16384. You can set min_pixels and max_pixels according to your needs, such as a token count range of 256-1280, to balance speed and memory usage.
min_pixels = 256*28*28
max_pixels = 1280*28*28
processor = AutoProcessor.from_pretrained(model_dir, min_pixels=min_pixels, max_pixels=max_pixels)

while True:
    path = input("输入图片路径:\n")
    start = time.time()

    messages = [
        {
            "role": "user",
            "content": [
                {
                    "type": "image",
                    "image": path,
                },
                {"type": "text", "text": "请格式化提取这张图片的内容,直接回答,不需要多余的回答。"},
            ],
        }
    ]

    # Preparation for inference
    text = processor.apply_chat_template(
        messages, tokenize=False, add_generation_prompt=True
    )
    image_inputs, video_inputs = process_vision_info(messages)
    inputs = processor(
        text=[text],
        images=image_inputs,
        videos=video_inputs,
        padding=True,
        return_tensors="pt",
    )
    inputs = inputs.to("cuda")

    # Inference: Generation of the output
    generated_ids = model.generate(**inputs, max_new_tokens=8192)
    generated_ids_trimmed = [
        out_ids[len(in_ids) :] for in_ids, out_ids in zip(inputs.input_ids, generated_ids)
    ]
    output_text = processor.batch_decode(
        generated_ids_trimmed, skip_special_tokens=True, clean_up_tokenization_spaces=False
    )
    end = time.time()
    print(f"共耗时 {end - start}s")
    print("识别结果:")
    print(output_text)
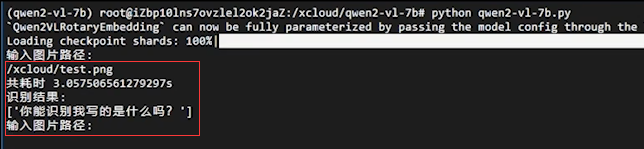
启动模型服务
cd /xcloud/qwen2-vl-7b
python qwen2_vl-7b.py

验证:准备一张写有文字的图片,将其上传到/xcloud目录下,然后在模型服务的命令中,输入图片路径,对图片进行识别,操作截图如下:

火山引擎开发者社区是火山引擎打造的AI技术生态平台,聚焦Agent与大模型开发,提供豆包系列模型(图像/视频/视觉)、智能分析与会话工具,并配套评测集、动手实验室及行业案例库。社区通过技术沙龙、挑战赛等活动促进开发者成长,新用户可领50万Tokens权益,助力构建智能应用。
更多推荐
 17
17 0
0- 0


 已为社区贡献1条内容

所有评论(0)