【Tauri2】029——Sidecar和shell插件 (一)
这篇就来简单看看Sidecar和shell插件sidecar,英文意思是(摩托车的)跨斗,边车SIDECAR中文(简体)翻译:剑桥词典SIDECAR翻译:(摩托车的)跨斗,边车。了解更多。从英文翻译中并不能得到什么有用的信息sidecar——tauri官网从官网中可以得到, sidecar其实代指二进制文件的意思。说白了。在Windows操作系统,就是指exe文件的意思。当然,简单使用一下。
目录
前言
这篇就来简单看看Sidecar和shell插件
sidecar,英文意思是 (摩托车的)跨斗,边车
SIDECAR中文(简体)翻译:剑桥词典SIDECAR翻译:(摩托车的)跨斗,边车。了解更多。![]() https://dictionary.cambridge.org/zhs/%E8%AF%8D%E5%85%B8/%E8%8B%B1%E8%AF%AD-%E6%B1%89%E8%AF%AD-%E7%AE%80%E4%BD%93/sidecar从英文翻译中并不能得到什么有用的信息
https://dictionary.cambridge.org/zhs/%E8%AF%8D%E5%85%B8/%E8%8B%B1%E8%AF%AD-%E6%B1%89%E8%AF%AD-%E7%AE%80%E4%BD%93/sidecar从英文翻译中并不能得到什么有用的信息
Embedding External Binaries | Tauri![]() https://v2.tauri.app/develop/sidecar/
https://v2.tauri.app/develop/sidecar/
You may need to embed external binaries to add additional functionality to your application or prevent users from installing additional dependencies (e.g., Node.js or Python). We call this binary a
sidecar.——tauri官网
从官网中可以得到, sidecar其实代指二进制文件的意思。说白了。
在Windows操作系统,就是指exe文件的意思。
当然,简单使用一下
正文
准备二进制文件
要使用二进制文件,笔者搜了搜,首先看到了这个视频
安装 | Bun 文档 - Bun 中文![]() https://bun.net.cn/docs/installation但感觉并不是很好用,就是一个执行JS和TS的二进制文件,没有其他功能。
https://bun.net.cn/docs/installation但感觉并不是很好用,就是一个执行JS和TS的二进制文件,没有其他功能。
笔者选择了其他二进制文件——FFmpeg
Download FFmpeg![]() https://ffmpeg.org/download.html安装完成之后,笔者是默认路径
https://ffmpeg.org/download.html安装完成之后,笔者是默认路径
在C:\Program Files\ffmpeg\bin路径下,可以看到如下二进制文件
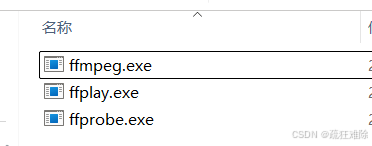
简单说说三个exe的功能
ffmpeg
主要用于音视频转码、处理、流媒体传输。
1、格式转换:将音视频文件从一种格式转码为另一种格式(如 MP4 转 AVI)。
2、编码/解码:支持几乎所有主流编解码器(如 H.264、AAC、VP9 等)。
3、编辑操作:剪切、合并视频或音频。调整分辨率等
4、提取/合成:从视频中提取音频(-vn 参数)。
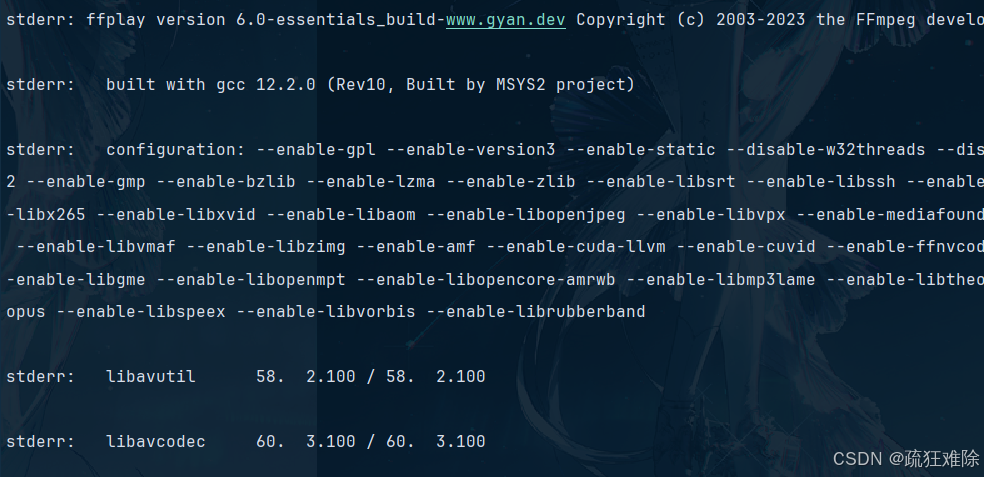
ffplay
主要用于播放音视频文件
ffprobe
主要用于分析和显示音视频文件的详细信息
怎么使用
1、直接把ffmpeg的bin目录复制到src-tauri目录下
2、在配置文件中进行说明,bundle->externalBin,即
"bundle": {
"externalBin": [
"bin/ffmpeg",
"bin/ffplay",
"bin/ffprobe"
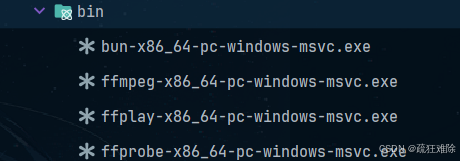
],3、按照操作系统修改exe文件的名字。笔者改的是ffmpeg-x86_64-pc-windows-msvc
不同操作系统,名字不一样。
从官网中,可以找到改名的脚本
Node.js 作为 Sidecar | Tauri - Tauri 框架![]() https://v2.tauri.org.cn/learn/sidecar-nodejs/如果要使用脚本改名。
https://v2.tauri.org.cn/learn/sidecar-nodejs/如果要使用脚本改名。
直接复制其中的内容并修改,笔者创建src/utils/rename.ts文件,
然后用bun运行,
import { execSync } from 'child_process';
import fs from 'fs';
const ext = process.platform === 'win32' ? '.exe' : '';
const rustInfo = execSync('rustc -vV');
const targetTriple = /host: (\S+)/g.exec(rustInfo)[1];
if (!targetTriple) {
console.error('Failed to determine platform target triple');
}
let oldExe=["ffmpeg","ffplay", "ffprobe"];
for (let old of oldExe) {
fs.renameSync(
`../../src-tauri/bin/${old}${ext}`,
`../../src-tauri/bin/${old}-${targetTriple}${ext}`
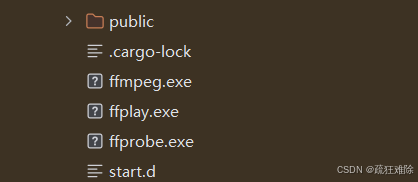
);
}运行后,在dubug目录下,出现了这三个exe文件。
笔者想尝试传对象,没成功。
笔者也尝试过添加其他目录,比如bin/tool/ffmpeg,最后结果还是一样的
使用绝对路径,需要改名,没必要。
因此,直接复制到src-tauri目录下
实际上,也可以使用resources
比如
 "resources": {
      "bin/ffmpeg-x86_64-pc-windows-msvc.exe": "tool/ffmpeg.exe",
      "bin/ffplay-x86_64-pc-windows-msvc.exe": "tool/ffplay.exe",
      "bin/ffprobe-x86_64-pc-windows-msvc.exe": "tool/ffprobe.exe",
    }
编译后,可以在debug目录下发现如下内容

应该可以运行。
可以发现无论是resources还是externalBin都是在复制文件或文件夹
shell插件的简单使用
安装及注册
官网介绍如下
Shell | Tauri![]() https://v2.tauri.app/zh-cn/plugin/shell/Cargo.toml文件中进行安装。
https://v2.tauri.app/zh-cn/plugin/shell/Cargo.toml文件中进行安装。
tauri-plugin-shell = "2"main函数中注册
.plugin(tauri_plugin_shell::init())默认权限
"shell:default",其中的方法
在Shell插件中有下面几个关键的方法
impl<R: Runtime> Shell<R> {
    pub fn command(&self, program: impl AsRef<OsStr>) -> Command

    pub fn sidecar(&self, program: impl AsRef<Path>) -> Result<Command>

    #[cfg(desktop)]
    #[deprecated(since = "2.1.0", note = "Use tauri-plugin-opener instead.")]
    pub fn open(&self, path: impl Into<String>, with: Option<open::Program>) -> Result<()>

    #[cfg(mobile)]
    #[deprecated(since = "2.1.0", note = "Use tauri-plugin-opener instead.")]
pub fn open(&self, path: impl Into<String>, _with: Option<open::Program>) -> Result<()>如果使用open方法,推荐使用opener插件替代
因此,可以认为,有两个关键的方法
command和sidecar
1、一个传递参数的类似是AsRef<OsStr>,表示 操作系统原生字符串,比如ls,mkdir等的
另一个是AsRef<Path>,表示 文件系统路径。比如 C:a/xxxx/xxxx/xx/
2、一个是系统路径中的任意可执行文件,比如说git、cargo、python
另一个是使用打包的二进制文件,需要路径,比如说,xxxx.exe。
先使用sidecar方法
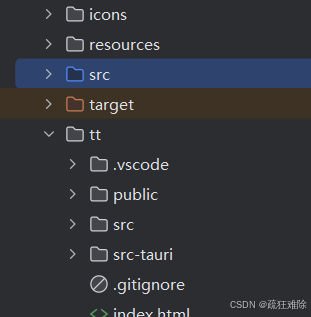
项目结构如下
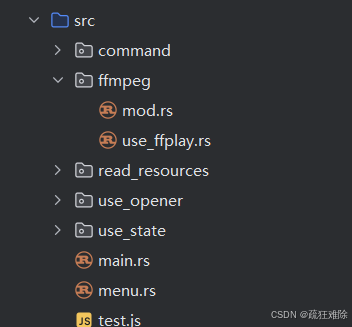
在use_ffplay.rs中,代码如下
use tauri::{AppHandle, command, Manager};
use tauri::path::BaseDirectory;
use tauri_plugin_shell::ShellExt;
#[command]
pub async  fn open_mp4(app:AppHandle){
    let shell=app.shell();
    shell.sidecar("ffplay")
        .unwrap()
        .arg("-i")
        .arg("C:/Users/26644/Videos/p/2024-01-21 16-35-04.mp4")
        .spawn()
        .expect("failed to execute process");
}
看看sidecar函数的签名
pub fn sidecar(&self, program: impl AsRef<Path>) -> Result<Command> 传一个实现了trait AsRef<Path>的类型,比如说&str,String
说白了,传一个二进制文件的路径
返回 Result<Command>
使用中和opener、fs插件没什么区别,需要导入这个trait ShellExt 。然后使用其中的方法
结果成功,
也可以写绝对路径
shell.sidecar("C:/Program Files/ffmpeg/bin/ffplay.exe")也没有问题
感觉用起来和opener没多大区别,当然,可以传递参数,更高级点
也可以使用resource的资源
shell.sidecar("tool/ffplay.exe")上面三个路径,笔者尝试,都没有问题。
Command结构体
#[derive(Debug)]
pub struct Command {
    cmd: StdCommand,
    raw_out: bool,
}
这是一个结构体,实现了Debug,还可以打印。
下面是实现的方法
pub(crate) fn new<S: AsRef<OsStr>>(program: S) -> Self
pub(crate) fn new_sidecar<S: AsRef<Path>>(program: S) -> crate::Result<Self>
pub fn arg<S: AsRef<OsStr>>(mut self, arg: S) -> Self
pub fn args<I, S>(mut self, args: I) -> Self where I: IntoIterator<Item = S>, S: AsRef<OsStr>
pub fn env_clear(mut self) -> Self
pub fn env<K, V>(mut self, key: K, value: V) -> Self where K: AsRef<OsStr>, V: AsRef<OsStr>
pub fn envs<I, K, V>(mut self, envs: I) -> Self where I: IntoIterator<Item = (K, V)>, K: AsRef<OsStr>, V: AsRef<OsStr>
pub fn current_dir<P: AsRef<Path>>(mut self, current_dir: P) -> Self
pub fn set_raw_out(mut self, raw_out: bool) -> Self
pub fn spawn(self) -> crate::Result<(Receiver<CommandEvent>, CommandChild)>
pub async fn status(self) -> crate::Result<ExitStatus>
pub async fn output(self) -> crate::Result<Output>
1、new方法:显而易见是初始化,
2、arg和args:是用来传递参数的,args是一个可迭代的参数列表,其中每个参数可以是&str,获取&String等的
3、env和envs:是用用来设置环境变量的
4、current_dir:设置命令的工作目录。
5、set_raw_out:配置命令的输出是否为原始字节,用于控制输出
6、spawn:启动命令并返回一个通道用于接收事件,返回值
Receiver<CommandEvent>:接收子进程事件(Stdout/Stderr/Terminated/Error)。
CommandChild:用于向子进程写入数据(通过 stdin_writer)。
7、output:运行命令并等待其完成,返回命令的输出和退出状态
spawn方法
spawn 方法比较重要的,是用于启动子进程的方法。它会异步运行命令,并返回一个通道接收器(Receiver<CommandEvent>)和一个子进程句柄CommandChild
pub fn spawn(self) -> crate::Result<(Receiver<CommandEvent>, CommandChild)>其中CommandEvent如下
#[derive(Debug, Clone)]
#[non_exhaustive]
pub enum CommandEvent {

    Stderr(Vec<u8>),


    Stdout(Vec<u8>),

    Error(String),

    Terminated(TerminatedPayload),
}
是个enum,使用如下
use tauri_plugin_shell::process::CommandEvent;
while let Some(event) = rx.recv().await {
        match event {
            CommandEvent::Stdout(line) => {
                println!("stdout: {}", String::from_utf8(line).unwrap());
            }
            CommandEvent::Stderr(line) => {
                println!("stderr: {}", String::from_utf8(line).unwrap());
            }
            CommandEvent::Terminated(payload) => {
                println!("Process terminated with code: {:?}", payload.code);
            }
            CommandEvent::Error(err) => {
                eprintln!("Error: {}", err);
            }
            _ => {}
        }
    }
打印了许多东西
为什么打印的stderr,笔者也不能确定,可能是没有配置权限。
总之,运行了
获取视频文件的信息——ffprobe
[总结]FFMPEG命令行工具之ffprobe详解-CSDN博客![]() https://blog.csdn.net/ice_ly000/article/details/87870446直接给出代码
https://blog.csdn.net/ice_ly000/article/details/87870446直接给出代码
#[command]
pub async fn get_mp4_info(state: State<'_, Shell<Wry>>) -> Result<String, String> {
    let shell = state.inner();
    let (mut rx, mut child) = shell.sidecar("tool/ffprobe.exe")
        .map_err(|e| e.to_string())?
        .args(["-v", "quiet", "-print_format", "json", "-show_format", "-show_streams"])
        .arg("C:/Users/26644/Videos/p/2024-01-21 16-35-04.mp4")
        .spawn()
        .map_err(|e| e.to_string())?;
    let mut stdout = Vec::new();
    while let Some(event) = rx.recv().await {
        if let CommandEvent::Stdout(line) = event {
            println!("stdout: {}", String::from_utf8(line.clone()).unwrap());
            stdout.extend(line);
        }
    }
    let output = String::from_utf8(stdout).map_err(|e| e.to_string())?;
    Ok(output)
}
笔者使用了State,直接使用
前端打印的结果如下
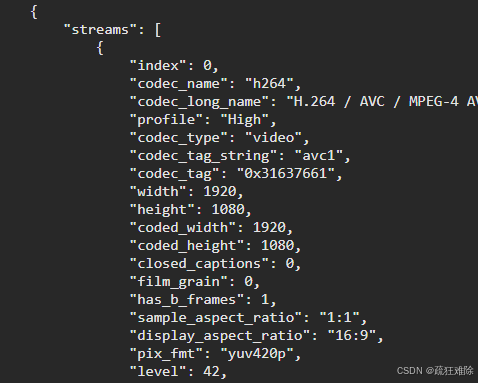
当然输出了很多。
具体含义可参考有关ffmpeg的教程
使用command方法
#[command]
pub async fn use_command_method(app_handle: AppHandle){
    let shell = app_handle.shell();
    let out=shell.command("ffmpeg")
        .arg("--version")
        .output().await;
    match out {
        Ok(output) => {
            println!("stdout: {}", String::from_utf8_lossy(&output.stdout));
            println!("stderr: {}", String::from_utf8_lossy(&output.stderr));
        }
        Err(e) => {
            eprintln!("Error: {}", e);
        }
    }
}
笔者配置了ffmpeg的系统环境,可以获取其信息
结果如下
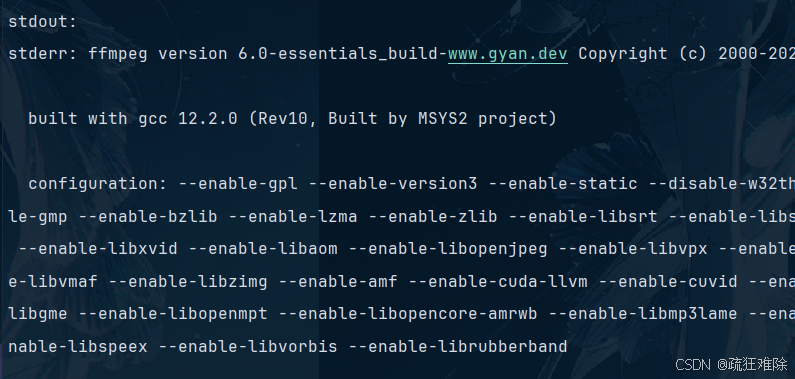
实际上这ffmpeg是调用的本机的。
比如说,笔者电脑配置了GDAL(开源的地理库)的环境
    let out=shell.command("gdalinfo")
        .arg("--version")
        .output().await;
结果如下
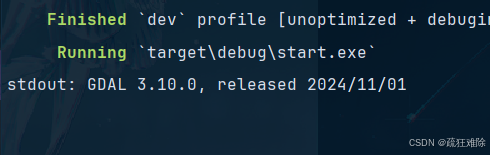
可以看出这个command方法,实际上就是命令行cmd,但是这个是模拟的命令行
通过cargo创建tauri项目
笔者想使用pnpm,但是报错了,笔者没解决,因此使用cargo
代码如下
#[command]
pub async fn use_command_method(app_handle: AppHandle){
    let shell = app_handle.shell();
    shell.command("cargo")
        .arg("create-tauri-app")
        .arg("tt")
        .args(["-m", "pnpm"])
        .args(["-t", "react-ts"])
        .arg("-y")
        .spawn()
        .expect("创建失败");
}
运行后,在src-tauri目录下出现了tt目录。创建成功。
使用CommandChild
实现的方法如下
impl CommandChild {

    pub fn write(&mut self, buf: &[u8]) -> crate::Result<()> {

    }
    pub fn kill(self) -> crate::Result<()> {

    }

    pub fn pid(&self) -> u32 {

    }
}
因此,代码如下
#[command]
pub async fn use_command_method(app_handle: AppHandle) {
    let shell = app_handle.shell();

    let (mut rx, mut child) = shell.command("python")
        .arg("-i")
        .spawn()
        .expect("创建失败");
    child.write(b"def main():return 'hello world' \n");
    child.write(b"\n");
    child.write(b"main()\n");

    while let Some(event) = rx.recv().await {
       ....
    }
}
使用python 的交互模式
定义了一个main函数,返回字符串hello world
结果如下
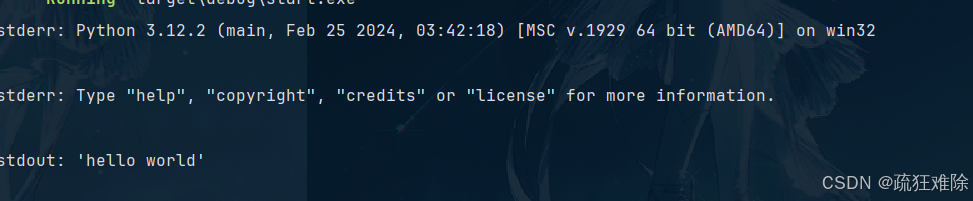
运行成功
但是笔者想这样操作
    let (mut rx, mut child) = shell.command("cargo")
        .arg("create-tauri-app")
        .spawn()
        .expect("创建失败");
    child.write(b"tts\n");
    child.write(b"\n");
想前面一样创建cargo项目,发现不行,报错了
stderr: error: IO error: not a terminal: not a terminal

Process terminated with code: Some(1)
必须是个终端,比如Python和node就可以
比如Java的终端jshell
    let (mut rx, mut child) = shell.command("jshell")
        .spawn()
        .expect("创建失败");
    child.write(b"System.out.println("hello world")\n");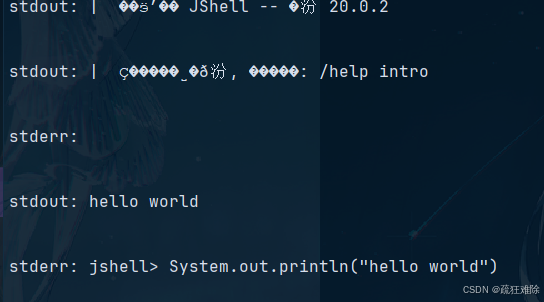

火山引擎开发者社区是火山引擎打造的AI技术生态平台,聚焦Agent与大模型开发,提供豆包系列模型(图像/视频/视觉)、智能分析与会话工具,并配套评测集、动手实验室及行业案例库。社区通过技术沙龙、挑战赛等活动促进开发者成长,新用户可领50万Tokens权益,助力构建智能应用。
更多推荐
 36
36 0
0- 0


 已为社区贡献2条内容

所有评论(0)