Klipper安装Moonraker-timelaspe,并且启用延时摄影功能
Moonraker-Timelapse 是一个用于3D打印延时摄影的项目,通过截取摄像头照片并生成延时视频。项目安装需要先安装 ffmpeg 库,然后通过命令行克隆项目并执行安装命令。配置部分涉及在 moonraker.cfg 和 moonraker.conf 中添加相关参数,如输出路径、摄像头地址等。项目提供了多个宏命令,如 TIMELAPSE_TAKE_FRAME 用于截取照片,TIMELAP
项目介绍
以下是大体的项目介绍
链接:Moonraker-Timelapse 项目介绍
安装和配置链接如下,这里的教程十分详尽:
链接:Moonraker-timelapse
相关配置教学视频如下,这个视频最主要的作用是有效展现了成功开启延时摄影功能时,配置文件长什么样,有助于后来者的把握安装情况。
链接:klipper 摄像头与延时摄影 配置
预备库
需要安装ffmpeg库
sudo apt update
sudo apt install ffmpeg
安装
教程中的安装过程包括两个部分:安装和更新
安装,在命令行中执行以下命令:
cd ~/
git clone https://github.com/mainsail-crew/moonraker-timelapse.git
cd ~/moonraker-timelapse
make install
更新的配置,则是在moonraker.cfg里添加:
[update_manager timelapse]
	type: git_repo
	primary_branch: main
	path: ~/moonraker-timelapse
	origin: https://github.com/mainsail-crew/moonraker-timelapse.git
	managed_services: klipper moonraker
参数配置
在moonraker.conf添加以下内容,
根据需要启用对应的参数,参数介绍可以参考github项目里的configuration.md
# moonraker.conf

[timelapse]
  #   Following basic configuration is default to most images and don't need
  #   to be changed in most scenarios. Only uncomment and change it if your
  #   Image differ from standart installations. In most common scenarios
  #   a User only need [timelapse] in their configuration.
  output_path: ~/timelapse/
  #   Directory where the generated video will be saved
  frame_path: /tmp/timelapse/
  #   Directory where the temporary frames are saved
  ffmpeg_binary_path: /usr/bin/ffmpeg
  #   Directory where ffmpeg is installed

  # 开启功能
  enabled: true
  # 每层拍照模式
  mode: layermacro
  # 摄像头地址
  snapshoturl:http://localhost:8080/?action=snapshot
  # 启用layermacro宏
  gcode_verbose:True

  # parkhead: False
  # parkpos: back_left
  # park_custom_pos_x: 0.0
  # park_custom_pos_y: 0.0
  # park_custom_pos_dz: 0.0
  # park_travel_speed: 100
  # park_retract_speed: 15
  # park_extrude_speed: 15
  # park_retract_distance: 1.0
  # park_extrude_distance: 1.0
  # hyperlapse_cycle: 30
  # autorender: True
  # constant_rate_factor: 23
  # output_framerate: 30
  # pixelformat: yuv420p
  # time_format_code: %Y%m%d_%H%M
  # extraoutputparams:
  # variable_fps: False
  # targetlength: 10
  # variable_fps_min: 5
  # variable_fps_max: 60
  # flip_x: False
  # flip_y: False
  # duplicatelastframe: 0
  # previewimage: True
  # saveframes: False
  #wget_skip_cert_check: False
同时需要在printer.cfg里添加[include timelapse.cfg]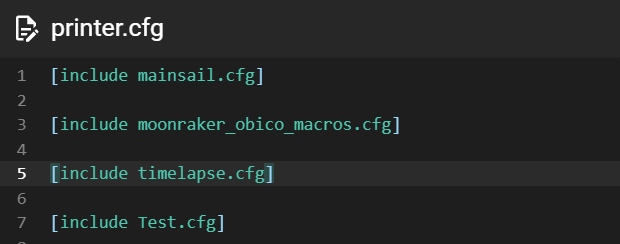
timelapse.cfg里主要的宏命令的作用介绍
这些指令可以直接在console里执行
①TIMELAPSE_TAKE_FRAME
最重要的宏命令,需要将其穿插在gcode里。
功能:截取摄像头照片并且保存在本地
是组成延时摄影功能的重要支柱功能。
②TIMELAPSE_RENDER
功能:在打印结束时渲染时间间隔摄影视频。
实现方式:调用远程方法timelapse_render来启动渲染过程,然后暂停打印机,通过延迟宏_WAIT_TIMELAPSE_RENDER等待渲染完成。
③GET_TIMELAPSE_SETUP
输出timelapse在moonraker.cfg里的配置,我这里只配置了这些参数,输入如下: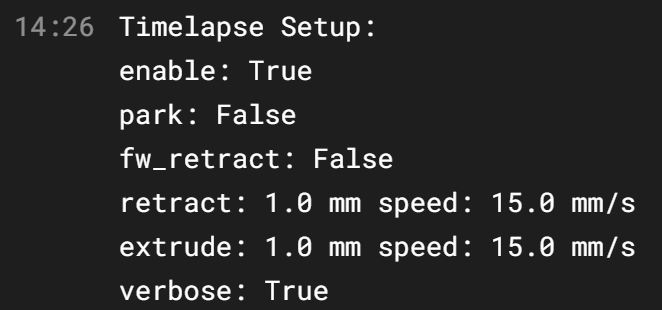
④_SET_TIMELAPSE_SETUP
在console里手动设置相关参数,不过最好还是去moonraker.cfg里设置这些参数。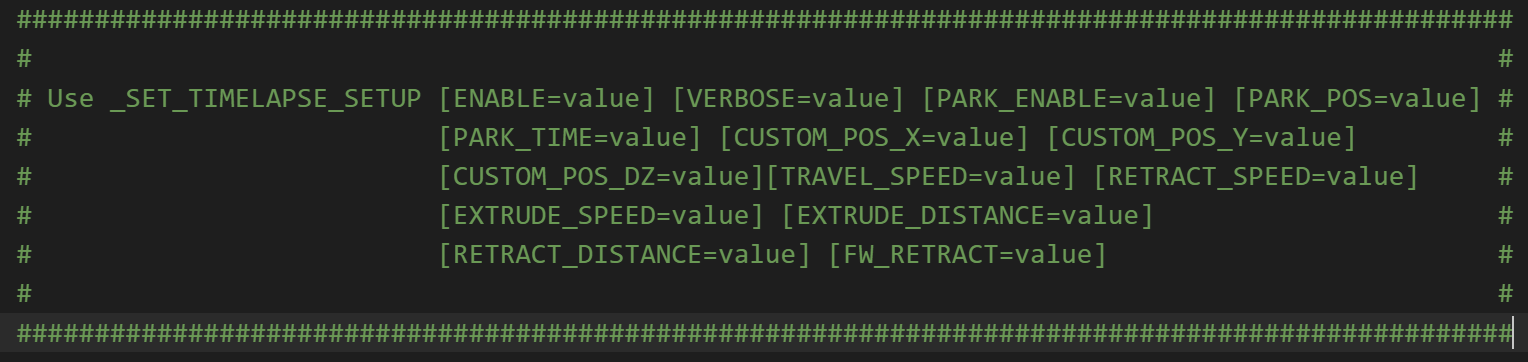
⑤_TIMELAPSE_NEW_FRAME
功能:作为时间间隔摄影拍摄的动作调用宏,用于触发实际的拍摄操作。
实现方式:通过action_call_remote_method调用远程方法timelapse_newframe,并传递相关参数。
⑥HYPERLAPSE
功能:启动或停止超 lapse 视频录制。
实现方式:根据传入的ACTION参数,设置相关变量并启动或停止延迟宏_HYPERLAPSE_LOOP,以实现按指定周期拍摄照片。
⑦TEST_STREAM_DELAY
功能:辅助宏,用于查找流和停车延迟。
实现方式:将打印头移动到特定位置,等待一段时间,然后拍摄照片,以测试流和停车延迟。
使用方法
在github的configuration.md中有很详细的介绍,我这里提供大致的说法。
①在gcode文件中,每一层打印结束时,添加
TIMELAPSE_TAKE_FRAME
②在gcode文件中,整体打印结束后,添加
TIMELAPSE_RENDER
出现的问题
问题①:Mainsail没能正确识别timelapse并且在导航栏显示
解决方案:moonraker.cfg里的[timelapse]的"enabled=true“改成false重启,然后再改成true.

中国智能体开发者社区,聚焦智能体与大模型开发,提供前沿资讯、实用工具链、开源项目及行业案例。通过技术沙龙、开发者大赛等活动,促进经验交流与协作,助力开发者快速构建创新智能应用。
更多推荐
 8
8 0
0- 0


 已为社区贡献2条内容

所有评论(0)