基于ComfyUI-Video-Matting实现视频人像抠图
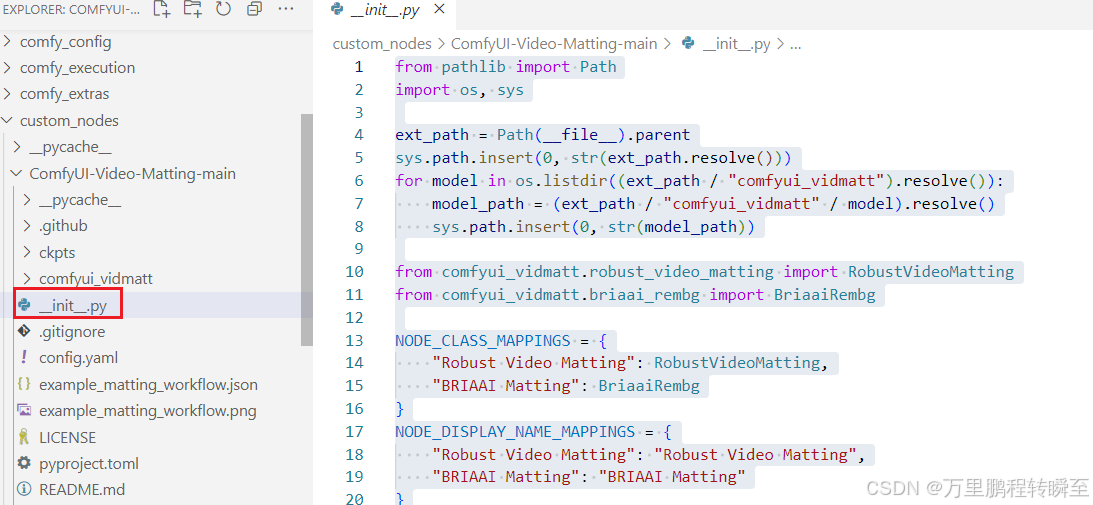
下载插件源码,解压到custom_nodes 目录下同样,下载VideoHelperSuite插件,解压到custom_nodes 目录下然后,基于以下命令启动comfyui并在浏览器打开这里主要是定义NODE_CLASS_MAPPINGS、NODE_DISPLAY_NAME_MAPPINGS 两个变量,将自定义的RobustVideoMatting、BriaaiRembg节点注册到comfyui
comfyui环境搭建:https://hpg123.blog.csdn.net/article/details/150443190 这里需要注意,comfyui的项目代码不要放在包含中文的路径下。
1、插件简介
插件地址:https://github.com/Fannovel16/ComfyUI-Video-Matting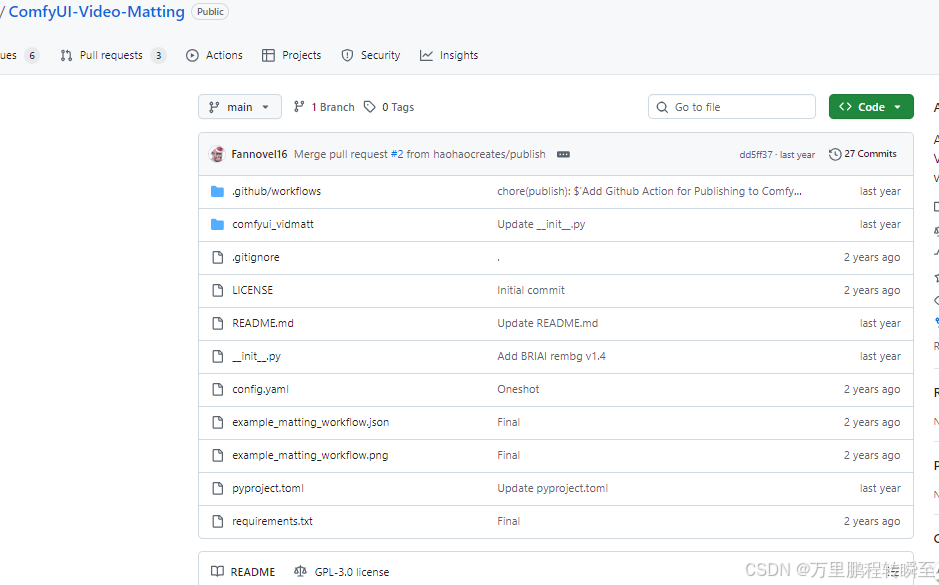
下载插件源码,解压到 custom_nodes 目录下
同样,下载VideoHelperSuite插件,解压到 custom_nodes 目录下
https://github.com/Kosinkadink/ComfyUI-VideoHelperSuite
然后,基于以下命令启动comfyui
python main.py --force-fp16
并在浏览器打开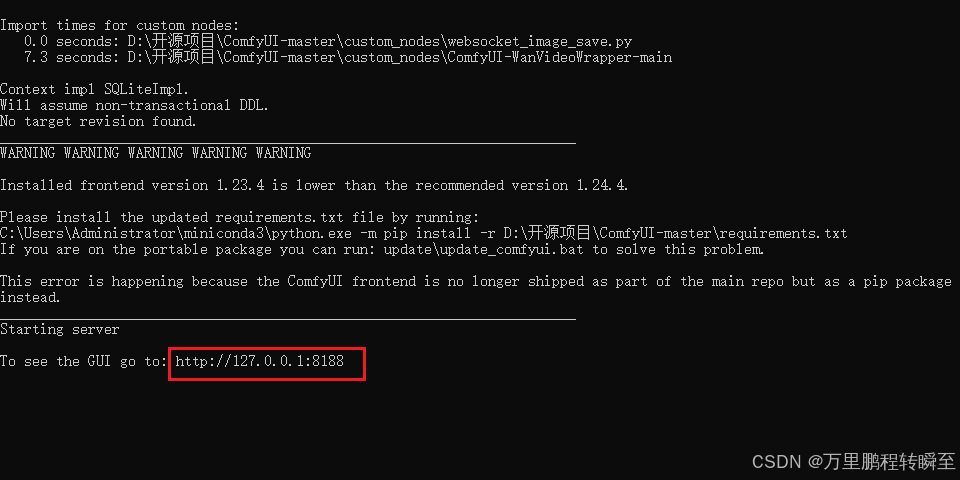
2、视频人像抠图
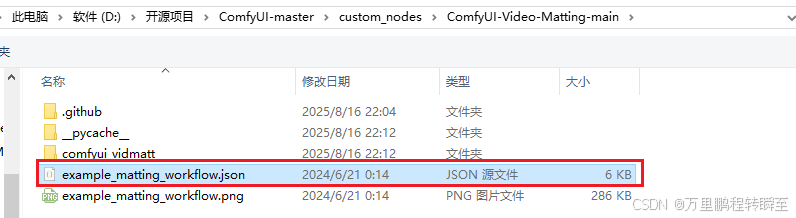
在浏览器页面点打开,选择 对应的工作流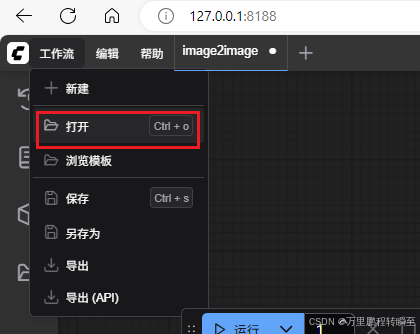
选择工作流后,选择视频,点击运行后,可能出现一下报错。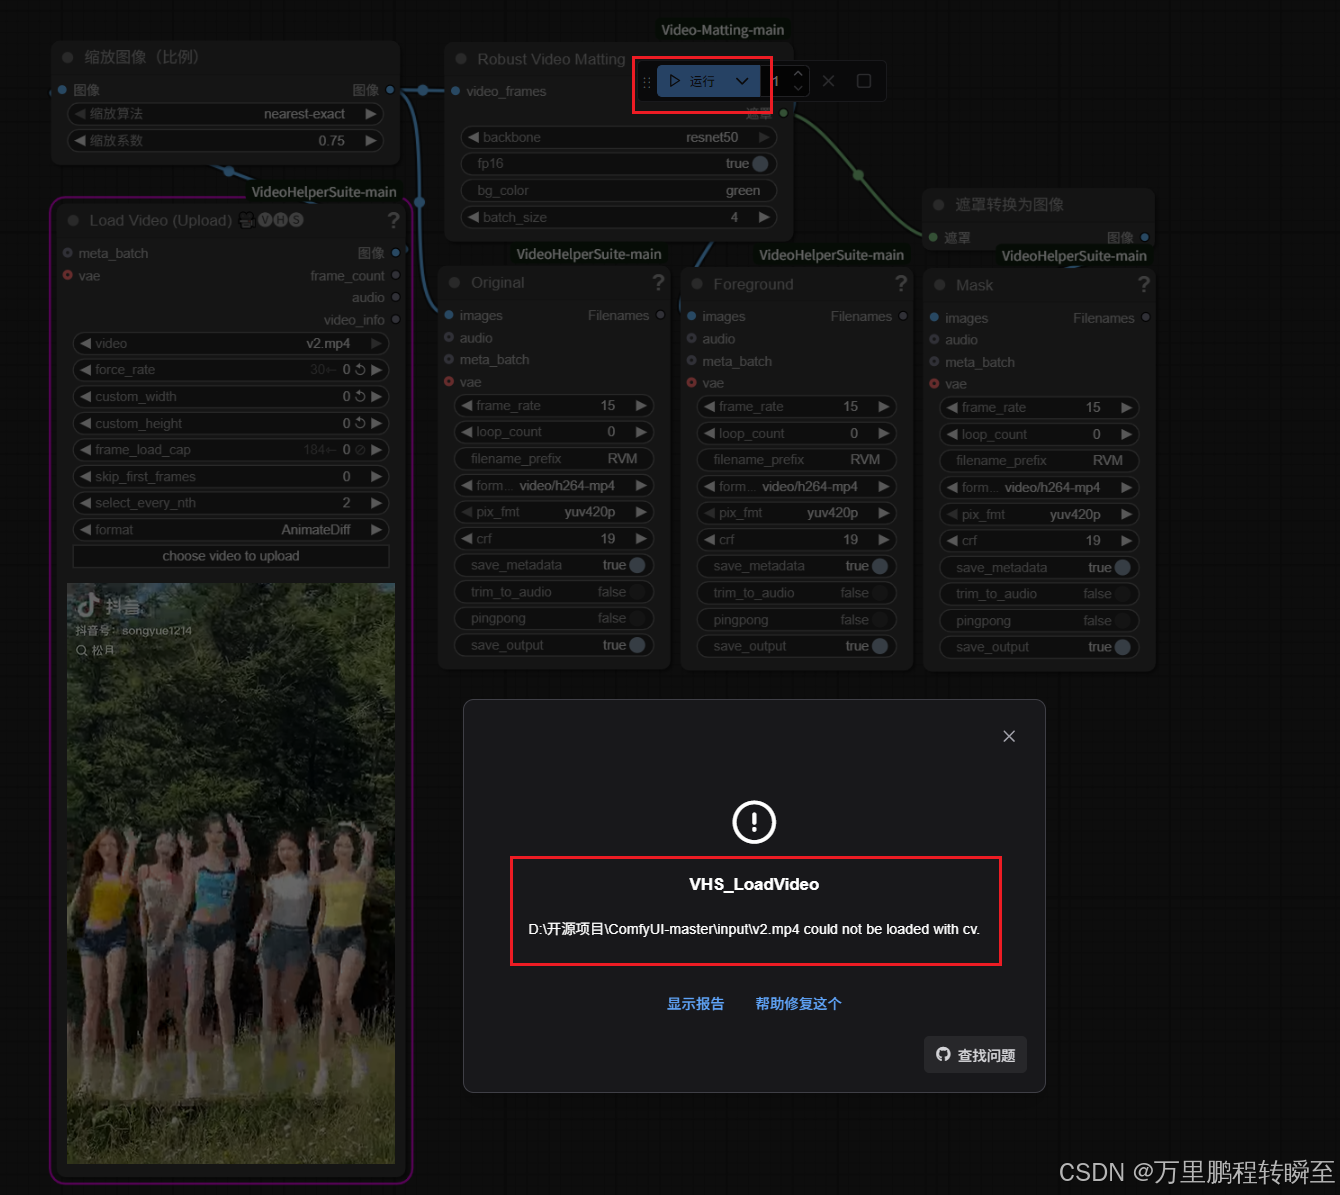
此时可以鼠标右键双击空白处,输入load video, 选择ffmpeg解码的节点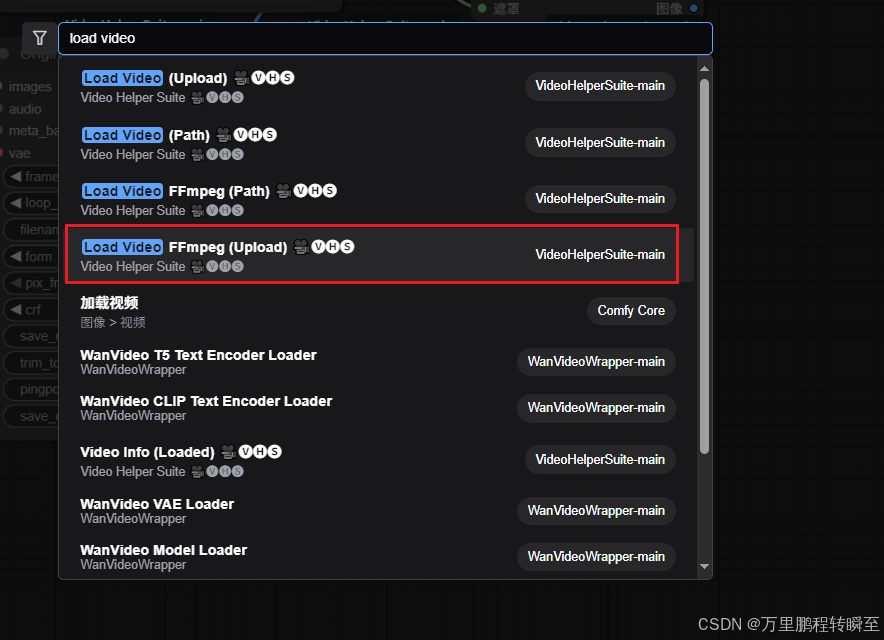
将原先节点删除,然后用新的节点替换,重新建立连接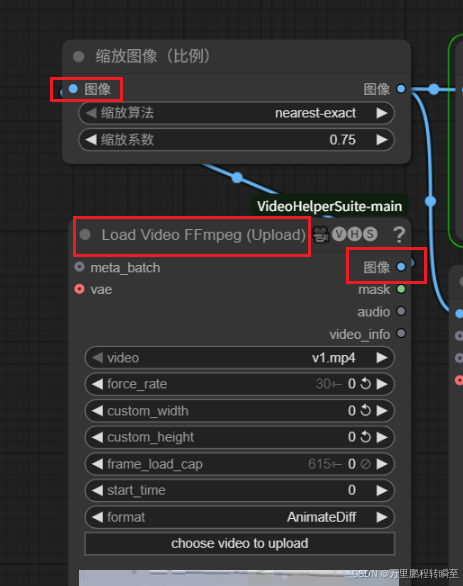
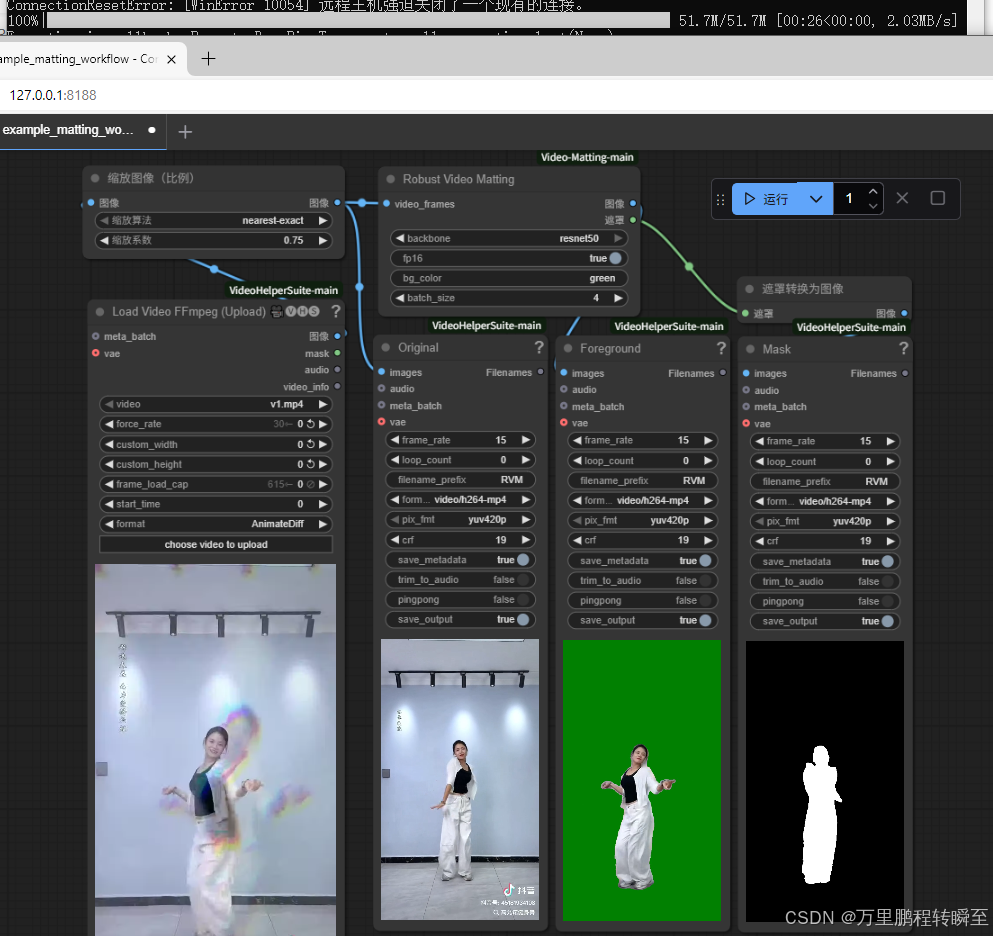
执行效果如下所示,这里是使用resnet50的backbone。节点会自动下载 rvm_resnet50_fp16.torchscript模型
3、节点定义代码说明
3.1 __init__.py
这里主要是定义NODE_CLASS_MAPPINGS、NODE_DISPLAY_NAME_MAPPINGS 两个变量,将自定义的RobustVideoMatting、BriaaiRembg节点注册到comfyui中
from pathlib import Path
import os, sys

ext_path = Path(__file__).parent
sys.path.insert(0, str(ext_path.resolve()))
for model in os.listdir((ext_path / "comfyui_vidmatt").resolve()):
    model_path = (ext_path / "comfyui_vidmatt" / model).resolve()
    sys.path.insert(0, str(model_path))

from comfyui_vidmatt.robust_video_matting import RobustVideoMatting
from comfyui_vidmatt.briaai_rembg import BriaaiRembg

NODE_CLASS_MAPPINGS = {
    "Robust Video Matting": RobustVideoMatting,
    "BRIAAI Matting": BriaaiRembg
}
NODE_DISPLAY_NAME_MAPPINGS = {
    "Robust Video Matting": "Robust Video Matting",
    "BRIAAI Matting": "BRIAAI Matting"
}

__all__ = ["NODE_CLASS_MAPPINGS", "NODE_DISPLAY_NAME_MAPPINGS"]
3.2 节点定义代码
RobustVideoMatting 节点定义代码如下
import torch
from einops import rearrange, repeat
from comfy.model_management import soft_empty_cache, get_torch_device
from PIL import ImageColor

from comfyui_vidmatt.utils import CKPTS_PATH, load_file_from_url, prepare_frames_color

def auto_downsample_ratio(h, w):
    """
    Automatically find a downsample ratio so that the largest side of the resolution be 512px.
    """
    return min(512 / max(h, w), 1)

download_url_template = "https://github.com/PeterL1n/RobustVideoMatting/releases/download/v1.0.0/rvm_{backbone}_{dtype}.torchscript"
device = get_torch_device()
class RobustVideoMatting:
    @classmethod
    def INPUT_TYPES(s):
        return {
            "required": {
                "video_frames": ("IMAGE",),
                "backbone": (["mobilenetv3", "resnet50"], {"default": "resnet50"}),
                "fp16": ("BOOLEAN", {"default": True}),
                "bg_color": ("STRING", {"default": "green"}),
                "batch_size": ("INT", {"min": 1, "max": 64, "default": 4})
            }
        }

    RETURN_TYPES = ("IMAGE", "MASK")
    FUNCTION = "matting"
    CATEGORY = "Video Matting"

    def matting(self, video_frames, backbone, fp16, bg_color, batch_size):
        model_path = load_file_from_url(download_url_template.format(backbone=backbone, dtype="fp16" if fp16 else "fp32"), model_dir=CKPTS_PATH)
        model = torch.jit.load(model_path, map_location=device)
        video_frames, orig_num_frames, bg_color = prepare_frames_color(video_frames, bg_color, batch_size)
        bg_color = bg_color.to(device)
        if fp16:
            model.half()
            bg_color.half()
        model = torch.jit.freeze(model)
        rec, fgrs, masks = [None] * 4, [], []
        for i in range(video_frames.shape[0] // batch_size):
            input = video_frames[i*batch_size:(i+1)*batch_size].to(device)
            if fp16:
                input = input.half()
            fgr, pha, *rec = model(input, *rec, auto_downsample_ratio(*video_frames.shape[2:]))
            mask = pha.gt(0) #Remove blur
            fgr = fgr * mask + bg_color * ~mask
            fgrs.append(fgr.cpu())
            masks.append(mask.cpu().to(fgr.dtype))
            soft_empty_cache()
        fgrs = rearrange(torch.cat(fgrs, dim=0), "n c h w -> n h w c")[:orig_num_frames].detach().float()
        masks = torch.cat(masks, dim=0).squeeze(1)[:orig_num_frames].detach().float()
        soft_empty_cache()
        return (fgrs, masks)
,可以发现以下代码才是关键,定义了节点的输入、输出数据类型。同时FUNCTION指定了该节点对应的处理函数。我们可以基于该规则自定义节点。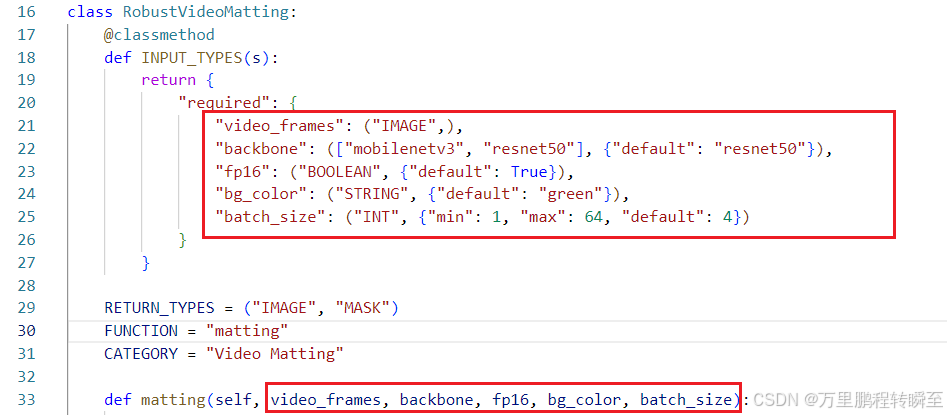


火山引擎开发者社区是火山引擎打造的AI技术生态平台,聚焦Agent与大模型开发,提供豆包系列模型(图像/视频/视觉)、智能分析与会话工具,并配套评测集、动手实验室及行业案例库。社区通过技术沙龙、挑战赛等活动促进开发者成长,新用户可领50万Tokens权益,助力构建智能应用。
更多推荐
 6
6 0
0- 0


 已为社区贡献23条内容

所有评论(0)