学生-教师课堂识别之教师巡视轨迹识别-YOLOv7与Qwen2.5-VL-7B-Instruct实现
本文提出了一种基于多模态模型的教师巡视轨迹识别方法。首先通过视频抽帧处理获取课堂视频帧序列,然后利用Qwen2.5-VL-7B-Instruct模型识别包含教师巡视行为的视频帧,最后使用YOLOv7检测教师位置坐标,从而构建完整的巡视轨迹。该方法整合了视觉理解和目标检测技术,实现了对教师课堂巡视行为的自动识别与轨迹提取。相关代码和模型已开源,包括视频抽帧脚本和基于Qwen2.5-VL的多模态处理流
视觉大模型汇总 LVM:https://blog.csdn.net/WhiffeYF/article/details/153721733
本文在过去的学生-教师课堂识别上进行教师巡视轨迹的识别。
思路如下:
首先对视频进行抽帧,然后使用Qwen2.5-VL-7B-Instruct识别视频帧中教师的“巡视“的行为,再将巡视行为的对应的视频帧送入到YOLOv7中进行检测,检测出教师的坐标,这样结合,就可以得到教师”巡视“的轨迹。
相关模型都在:https://github.com/Whiffe/SCB-dataset
b站:学生-教师课堂识别之教师巡视轨迹识别-YOLOv7与Qwen2.5-VL-7B-Instruct实现
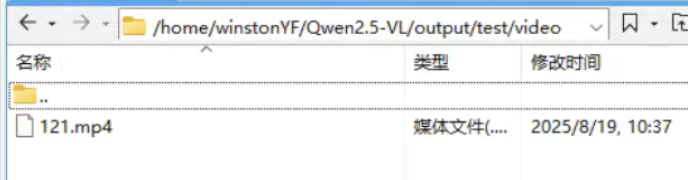
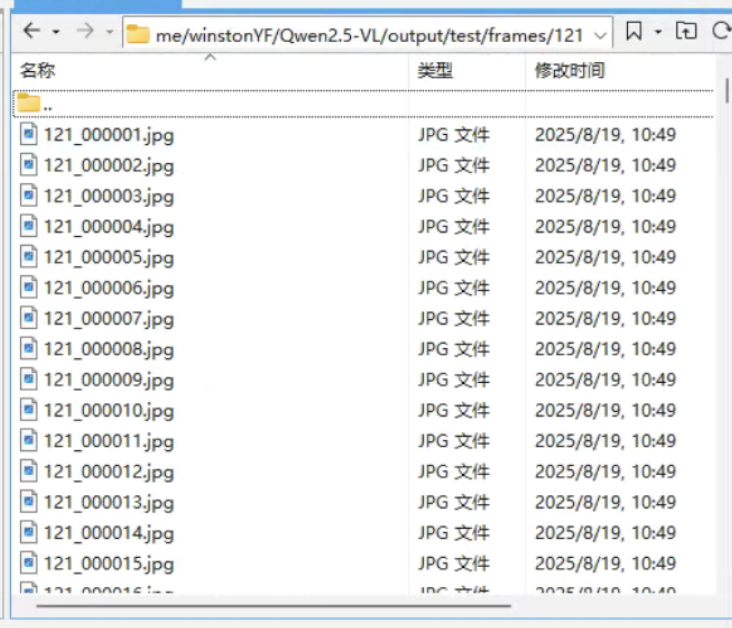
1 视频抽帧
cut_videos.py
'''
conda install x264 ffmpeg -c conda-forge -y

conda install -c https://mirrors.tuna.tsinghua.edu.cn/anaconda/cloud/conda-forge/ x264 ffmpeg -y
'''
# python cut_videos.py --IN_DATA_DIR videos_flotage_06 --OUT_DATA_DIR frames_flotage_06 --FRAME_RATE 1
# python cut_videos.py --IN_DATA_DIR videos --OUT_DATA_DIR frames --FRAME_RATE 1
# 将一个视频文件夹的视频抽帧
import os
import shutil
import subprocess
import argparse

parser = argparse.ArgumentParser()
parser.add_argument('--IN_DATA_DIR', type=str)
parser.add_argument('--OUT_DATA_DIR', type=str)
parser.add_argument('--FRAME_RATE', type=int, default=1)

arg = parser.parse_args()
IN_DATA_DIR = arg.IN_DATA_DIR
OUT_DATA_DIR = arg.OUT_DATA_DIR
FRAME_RATE = arg.FRAME_RATE # 这里假定帧率为1,您可以根据需要修改

def convert_videos_to_frames(in_data_dir, out_data_dir, frame_rate):
    # 检查输出目录是否存在,如果不存在则创建
    if not os.path.exists(out_data_dir):
        os.makedirs(out_data_dir)

    # 遍历输入目录中的所有文件
    for video_path in os.listdir(in_data_dir):
        video_path = os.path.join(in_data_dir, video_path)

        # 获取视频文件名(不含路径)
        video_name = os.path.basename(video_path)

        # 根据视频文件扩展名去除后缀
        if video_name.endswith('.webm'):
            video_name = video_name[:-5]
        else:
            video_name = video_name[:-4]

        # 构建输出目录路径
        out_video_dir = os.path.join(out_data_dir, video_name)

        # 创建输出目录
        if not os.path.exists(out_video_dir):
            os.makedirs(out_video_dir)

        # 构建输出文件名模板
        out_name = os.path.join(out_video_dir, f"{video_name}_%06d.jpg")

        # 使用ffmpeg命令将视频转换为帧
        command = [
            'ffmpeg',
            '-i', video_path,
            '-r', str(frame_rate),
            '-q:v', '1',
            out_name
        ]
        subprocess.run(command, check=True)

convert_videos_to_frames(IN_DATA_DIR, OUT_DATA_DIR, FRAME_RATE)
2 Qwen2.5-VL-7B-Instruct 识别 巡视
采用Qwen2.5-VL-7B-Instruct 识别出 巡视
qwen_vl_batch_processor.py
这里有4个路径需要填写:
读取提示词文本的路径
instruction_file = “/home/winstonYF/Qwen2.5-VL/output/test/prompt_teacher.txt”
视频帧的路径
image_folder = “/home/winstonYF/Qwen2.5-VL/output/test/frames/121”
输出的json路径
output_json = “/home/winstonYF/Qwen2.5-VL/output/test/results.json”
Qwen2.5-VL-7B-Instruct 模型的路径
model = Qwen2_5_VLForConditionalGeneration.from_pretrained(
“/home/winstonYF/Qwen2.5-VL/output/Qwen2.5-VL-7B-Instruct-F2”,
import os
import json
import torch
from transformers import Qwen2_5_VLForConditionalGeneration, AutoProcessor
from qwen_vl_utils import process_vision_info

def save_results(results, output_json):
    """单独的结果保存函数,用于每次更新后保存"""
    try:
        with open(output_json, 'w', encoding='utf-8') as f:
            json.dump(results, f, ensure_ascii=False, indent=2)
        print(f"结果已更新并保存到 {output_json}")
    except Exception as e:
        print(f"保存结果文件失败: {e}")

def main():
    # 配置参数
    instruction_file = "/home/winstonYF/Qwen2.5-VL/output/test/prompt_teacher.txt"  # 指令文件路径
    image_folder = "/home/winstonYF/Qwen2.5-VL/output/test/frames/121"  # 图片文件夹路径
    output_json = "/home/winstonYF/Qwen2.5-VL/output/test/results.json"  # 输出结果文件路径

    # 加载模型和处理器
    print("正在加载模型和处理器...")
    model = Qwen2_5_VLForConditionalGeneration.from_pretrained(
        "/home/winstonYF/Qwen2.5-VL/output/Qwen2.5-VL-7B-Instruct-F2",
        torch_dtype=torch.bfloat16,
        device_map="auto"
    )

    # 配置图片处理参数,平衡性能和成本
    min_pixels = 256 * 28 * 28
    max_pixels = 1280 * 28 * 28
    processor = AutoProcessor.from_pretrained(
        "/home/winstonYF/Qwen2.5-VL/output/Qwen2.5-VL-7B-Instruct-F2",
        min_pixels=min_pixels,
        max_pixels=max_pixels
    )

    # 读取指令文件
    print("正在读取指令文件...")
    try:
        with open(instruction_file, 'r', encoding='utf-8') as f:
            prompt = f.read().strip()
        if not prompt:
            raise ValueError("指令文件内容为空")
    except Exception as e:
        print(f"读取指令文件失败: {e}")
        return

    # 获取图片文件夹中的所有JPG文件
    print("正在收集图片文件...")
    try:
        image_files = [
            f for f in os.listdir(image_folder)
            if f.lower().endswith('.jpg') and os.path.isfile(os.path.join(image_folder, f))
        ]
        if not image_files:
            print("图片文件夹中没有找到JPG文件")
            return
        print(f"找到 {len(image_files)} 个JPG文件")
    except Exception as e:
        print(f"读取图片文件夹失败: {e}")
        return

    # 初始化结果字典,如果已有结果文件则加载
    results = {}
    if os.path.exists(output_json):
        try:
            with open(output_json, 'r', encoding='utf-8') as f:
                results = json.load(f)
            print(f"已加载现有结果,共 {len(results)} 条记录")
        except Exception as e:
            print(f"加载现有结果失败,将重新创建: {e}")
            results = {}

    total = len(image_files)

    for i, filename in enumerate(image_files, 1):
        # 跳过已处理的图片
        image_path = os.path.abspath(os.path.join(image_folder, filename))
        if image_path in results:
            print(f"图片 {i}/{total}: {filename} 已处理,跳过")
            continue

        try:
            print(f"处理图片 {i}/{total}: {filename}")

            # 构建消息
            messages = [
                {
                    "role": "user",
                    "content": [
                        {"type": "image", "image": image_path},
                        {"type": "text", "text": prompt}
                    ]
                }
            ]

            # 准备推理输入
            text = processor.apply_chat_template(
                messages, tokenize=False, add_generation_prompt=True
            )
            image_inputs, video_inputs = process_vision_info(messages)
            inputs = processor(
                text=[text],
                images=image_inputs,
                videos=video_inputs,
                padding=True,
                return_tensors="pt",
            )
            inputs = inputs.to(model.device)

            # 模型推理
            generated_ids = model.generate(** inputs, max_new_tokens=128)
            generated_ids_trimmed = [
                out_ids[len(in_ids) :] for in_ids, out_ids in zip(inputs.input_ids, generated_ids)
            ]
            output_text = processor.batch_decode(
                generated_ids_trimmed,
                skip_special_tokens=True,
                clean_up_tokenization_spaces=False
            )[0].strip()

            print(f"模型回答: {output_text}")

            # 判断结果并记录
            results[image_path] = "1" if output_text == "巡视" else "0"

            # 每次处理完一张图片后立即保存结果
            save_results(results, output_json)

        except Exception as e:
            print(f"处理图片 {filename} 时出错: {e}")
            results[image_path] = "error"
            # 出错时也保存结果,记录错误状态
            save_results(results, output_json)

    print(f"所有图片处理完成,最终结果已保存到 {output_json}")

if __name__ == "__main__":
    main()
prompt_teacher.txt如下:
你是一位专业的课堂行为分类专家,擅长从图片中精准识别并分类学生与教师在课堂中的特定行为。请根据下方的行为定义和识别规则,对图片中的主导行为进行唯一分类。

行为分类分两大类:学生行为、教师行为
学生行为包括:读写、台上展示、学生板书、回答问题、朗读、讨论、听讲、学生举手、其它。
教师行为包括:讲授、指导、应答、台上互动、教师板书、巡视、其它。

以下是每一类行为的定义:
学生行为类别定义:
读写:学生在读书或者写字。
台上展示:学生在台上展示,和教师行为中的台上互动的区别在于,台上互动有教师参与,但是台上展示是没有教师,只有学生在台上。
学生板书:学生在黑板上板书,注意区分学生板书与教师板书。
回答问题:学生站立起来,回答问题,注意和教师行为中的应答区别,回答问题是画面中只有学生,没有教师,而应答是画面中既有学生也有教师。
朗读:学生齐声朗读,注意区分与读写的区别,学生朗读时在读写的基础上有张开嘴或张开的趋势。
讨论:学生在课堂中进行讨论,可以是同桌之间的讨论,也可以是前后两排之间的学生讨论。
听讲:学生抬头听教师讲课。
学生举手:学生举手,一般举手的学生超过3个才算举手。
其它:不属于上述任何一种行为。

教师行为类别定义:
讲授:教师通常站在讲台上,讲解课堂上的知识点,注意区分师生互动与教师讲授,教师讲授就只有教师一人站立。
指导:教师走下讲台,针对某位学生进行个别指导,通常伴随弯腰、驻足等动作(仅站在学生旁边观看不算指导)。
应答:学生回答教师的问题,通常教师与学生都站立,教师提问,学生回答。通常教师与学生都站立,教师提问,学生回答,注意区分教师讲授与师生互动,教师讲授没有学生站立回答问题。
台上互动:教师邀请学生上台进行活动,包括做游戏、完成任务或学生上台板书。注意区分学生行为中的台上展示与教师行为中的台上互动,台上展示讲台上只有学生,台上互动是老师和学生都有。
教师板书:教师在黑板上进行书写。注意,板书指的是教师在黑板上的书写行为,学生上台书写不算作教师的行为。
巡视:教师不在讲台上,而是在教室内走动,观察学生或巡视教室。
其它:不属于上述任何一种行为。

识别规则:

1. 单一行为优先:每张图片只识别一个主导行为,如果存在复合动作,按主导行为进行分类。
2. 唯一输出:每次识别只输出一种行为类别。

现在需要你识别图片中教师的行为,输出格式:
请严格按照以下格式输出行为类别:
讲授/指导/应答/台上互动/教师板书/巡视/其它
输出的results.json如下,其中0代表非巡视,1代表巡视:
{
  "/home/winstonYF/Qwen2.5-VL/output/test/frames/121/121_000833.jpg": "0",
  "/home/winstonYF/Qwen2.5-VL/output/test/frames/121/121_000861.jpg": "0",
  "/home/winstonYF/Qwen2.5-VL/output/test/frames/121/121_001548.jpg": "0",
  "/home/winstonYF/Qwen2.5-VL/output/test/frames/121/121_000119.jpg": "0",
  "/home/winstonYF/Qwen2.5-VL/output/test/frames/121/121_001313.jpg": "1",
  "/home/winstonYF/Qwen2.5-VL/output/test/frames/121/121_001523.jpg": "1",
  "/home/winstonYF/Qwen2.5-VL/output/test/frames/121/121_001782.jpg": "0",
  "/home/winstonYF/Qwen2.5-VL/output/test/frames/121/121_000399.jpg": "1",
  "/home/winstonYF/Qwen2.5-VL/output/test/frames/121/121_002476.jpg": "1",
  "/home/winstonYF/Qwen2.5-VL/output/test/frames/121/121_001531.jpg": "1",
  "/home/winstonYF/Qwen2.5-VL/output/test/frames/121/121_001825.jpg": "0",
  "/home/winstonYF/Qwen2.5-VL/output/test/frames/121/121_002180.jpg": "1",
3 YOLOv7 检测教师坐标
接下来采用YOLOv7模型输出教师的坐标,
detect_json.py,注意,这个脚本是放在YOLOv7的目录下,下面脚本需要写入两个路径:
输入的json路径(其中包括需要识别的图片路径)/home/winstonYF/Qwen2.5-VL/output/test/results.json
模型路径 best.pt
另外,输出的json与输入json路径相同。
# python detect_json.py --json /home/winstonYF/Qwen2.5-VL/output/test/results.json --weights best.pt --device 0

import argparse
import json
import time
from pathlib import Path

import cv2
import torch
import torch.backends.cudnn as cudnn
from numpy import random

from models.experimental import attempt_load
from utils.datasets import LoadImages
from utils.general import check_img_size, non_max_suppression, scale_coords, xyxy2xywh, set_logging
from utils.torch_utils import select_device, time_synchronized
from utils.plots import plot_one_box


def detect_from_json(json_path, weights='yolov7.pt', img_size=640, device=''):
    # 读取json
    with open(json_path, 'r') as f:
        data = json.load(f)

    set_logging()
    device = select_device(device)
    half = device.type != 'cpu'

    # 加载模型
    model = attempt_load(weights, map_location=device)
    stride = int(model.stride.max())
    img_size = check_img_size(img_size, s=stride)
    if half:
        model.half()

    names = model.module.names if hasattr(model, 'module') else model.names

    # 遍历 json,筛选出 label=1 的图片
    new_data = {}
    for path, label in data.items():
        if label == "1":
            dataset = LoadImages(path, img_size=img_size, stride=stride)

            for img_path, img, im0s, vid_cap in dataset:
                img = torch.from_numpy(img).to(device)
                img = img.half() if half else img.float()
                img /= 255.0
                if img.ndimension() == 3:
                    img = img.unsqueeze(0)

                # 推理
                with torch.no_grad():
                    pred = model(img)[0]

                # NMS,只保留class=5
                pred = non_max_suppression(pred, conf_thres=0.25, iou_thres=0.45,
                                           classes=[5], agnostic=False)

                det = pred[0]
                if len(det):
                    det[:, :4] = scale_coords(img.shape[2:], det[:, :4], im0s.shape).round()

                    # 只保存第一个检测框(如果有多个可自行修改)
                    x1, y1, x2, y2, conf, cls = det[0].tolist()
                    new_data[path] = {
                        "label": "1",
                        "x": int(x1),
                        "y": int(y1),
                        "w": int(x2 - x1),
                        "h": int(y2 - y1)
                    }
                else:
                    # 没检测到目标,保持 label=1
                    new_data[path] = "1"
        else:
            # 非巡视保持原样
            new_data[path] = label

    # 保存新json
    save_path = Path(json_path).with_name("detect_result.json")
    with open(save_path, 'w') as f:
        json.dump(new_data, f, indent=2, ensure_ascii=False)

    print(f"检测完成,结果保存在: {save_path}")


if __name__ == '__main__':
    parser = argparse.ArgumentParser()
    parser.add_argument('--json', type=str, required=True, help='输入json文件路径')
    parser.add_argument('--weights', type=str, default='yolov7.pt', help='模型路径')
    parser.add_argument('--img-size', type=int, default=640, help='推理尺寸')
    parser.add_argument('--device', type=str, default='', help='CUDA设备,例如 0 或 cpu')
    opt = parser.parse_args()

    detect_from_json(opt.json, weights=opt.weights, img_size=opt.img_size, device=opt.device)
输出detect_result.json样例如下:
{
  "/home/winstonYF/Qwen2.5-VL/output/test/frames/121/121_000833.jpg": "0",
  "/home/winstonYF/Qwen2.5-VL/output/test/frames/121/121_000861.jpg": "0",
  "/home/winstonYF/Qwen2.5-VL/output/test/frames/121/121_001548.jpg": "0",
  "/home/winstonYF/Qwen2.5-VL/output/test/frames/121/121_000119.jpg": "0",
  "/home/winstonYF/Qwen2.5-VL/output/test/frames/121/121_001313.jpg": "1",
  "/home/winstonYF/Qwen2.5-VL/output/test/frames/121/121_001523.jpg": {
    "label": "1",
    "x": 458,
    "y": 362,
    "w": 226,
    "h": 457
  },
  "/home/winstonYF/Qwen2.5-VL/output/test/frames/121/121_001782.jpg": "0",
  "/home/winstonYF/Qwen2.5-VL/output/test/frames/121/121_000399.jpg": {
    "label": "1",
    "x": 1439,
    "y": 301,
    "w": 243,
    "h": 367
  },
上面json记录了巡视(“label”: “1”)的教师的坐标。
4 可视化
对教师的巡视轨迹进行简单的可视化
visualize_json_labels.py 需要输入上一步骤输出的json路径:“/home/winstonYF/Qwen2.5-VL/output/test/detect_result.json”
import json
import random
import cv2
import numpy as np
import os
from matplotlib import pyplot as plt

# 设置JSON文件路径
JSON_FILE_PATH = "/home/winstonYF/Qwen2.5-VL/output/test/detect_result.json"

def load_json_data(json_path):
    """加载JSON文件数据"""
    try:
        with open(json_path, 'r') as f:
            return json.load(f)
    except FileNotFoundError:
        print(f"错误:找不到文件 {json_path}")
        return None
    except json.JSONDecodeError:
        print(f"错误:{json_path} 不是有效的JSON文件")
        return None

def get_labeled_entries(data):
    """提取所有带有label:1的条目"""
    labeled_entries = []
    for img_path, value in data.items():
        if isinstance(value, dict) and value.get('label') == '1':
            # 提取坐标信息
            coords = {
                'x': value.get('x', 0),
                'y': value.get('y', 0),
                'w': value.get('w', 0),
                'h': value.get('h', 0),
                'image_path': img_path
            }
            labeled_entries.append(coords)
    return labeled_entries

def draw_centers(image, points, point_size=2, color=(255, 0, 0)):
    """在图像上绘制中心点"""
    # 创建图像副本以避免修改原图
    image_with_points = image.copy()

    # 绘制每个中心点
    for point in points:
        x, y = int(point['center_x']), int(point['center_y'])

        # 确保坐标在图像范围内
        if 0 <= x < image.shape[1] and 0 <= y < image.shape[0]:
            # 绘制点 (使用小矩形模拟点,确保2px大小)
            cv2.rectangle(
                image_with_points,
                (x - point_size//2, y - point_size//2),
                (x + (point_size + 1)//2, y + (point_size + 1)//2),
                color,
                -1  # 填充矩形
            )

    return image_with_points

def main():
    # 加载JSON数据
    json_data = load_json_data(JSON_FILE_PATH)
    if not json_data:
        return

    # 获取所有图片路径
    all_image_paths = list(json_data.keys())

    # 随机选择一张图片
    selected_image_path = random.choice(all_image_paths)
    print(f"已选择图片: {selected_image_path}")

    # 检查图片是否存在
    if not os.path.exists(selected_image_path):
        print(f"错误:图片 {selected_image_path} 不存在")
        return

    # 加载图片
    image = cv2.imread(selected_image_path)
    if image is None:
        print(f"错误:无法加载图片 {selected_image_path}")
        return

    # 转换为RGB格式(OpenCV默认是BGR)
    image_rgb = cv2.cvtColor(image, cv2.COLOR_BGR2RGB)

    # 获取所有带有label:1的条目
    labeled_entries = get_labeled_entries(json_data)
    if not labeled_entries:
        print("没有找到带有label:1的条目")
        return

    print(f"找到 {len(labeled_entries)} 个带有label:1的目标")

    # 计算每个目标的中心点
    points = []
    for entry in labeled_entries:
        center_x = entry['x'] + entry['w'] / 2
        center_y = entry['y'] + entry['h'] / 2
        points.append({
            'center_x': center_x,
            'center_y': center_y
        })

    # 绘制中心点(大小为2px,红色)
    image_with_points = draw_centers(image_rgb, points, point_size=2, color=(255, 0, 0))

    # 显示结果
    plt.figure(figsize=(12, 8))
    plt.imshow(image_with_points)
    plt.title(f"图片: {os.path.basename(selected_image_path)}\n显示所有label=1的目标中心点 (2px)")
    plt.axis('off')
    plt.tight_layout()

    # 保存结果
    output_path = f"points_{os.path.basename(selected_image_path)}"
    cv2.imwrite(output_path, cv2.cvtColor(image_with_points, cv2.COLOR_RGB2BGR))
    print(f"带中心点的图片已保存至: {output_path}")

if __name__ == "__main__":
    main()
最后可视化的图片如下: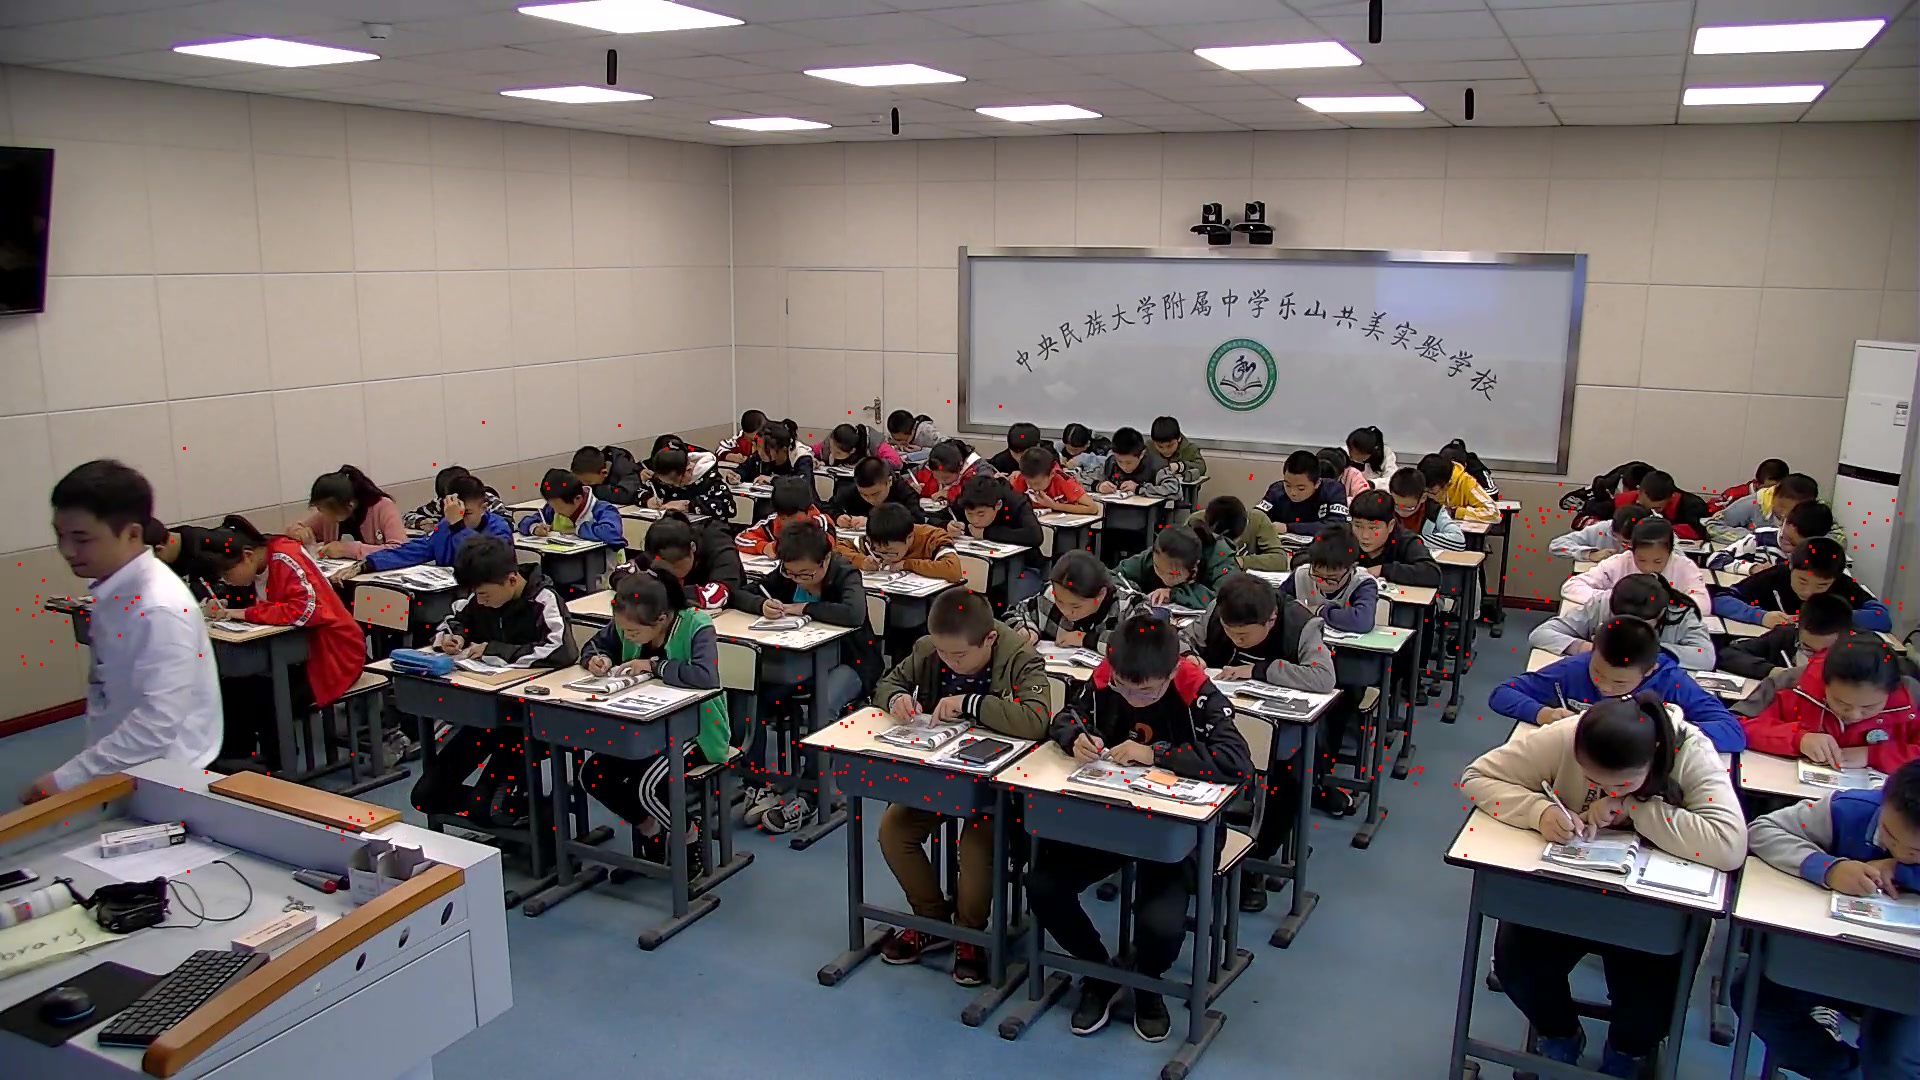
其中红色的点就是识别教师巡视过程的中心点坐标。

火山引擎开发者社区是火山引擎打造的AI技术生态平台,聚焦Agent与大模型开发,提供豆包系列模型(图像/视频/视觉)、智能分析与会话工具,并配套评测集、动手实验室及行业案例库。社区通过技术沙龙、挑战赛等活动促进开发者成长,新用户可领50万Tokens权益,助力构建智能应用。
更多推荐
 6
6 0
0- 0


 已为社区贡献34条内容

所有评论(0)