Python agent2agent-client 包:功能详解、安装配置与实战案例
1. 引言
随着 AI Agent 技术的快速发展,多智能体协作已成为构建复杂自动化系统的关键能力。agent2agent-client 是 Python 生态中一个专注于智能体间通信与协作的客户端库,它封装了智能体发现、消息传递、任务调度等核心能力,让开发者能够以标准化的方式构建多智能体系统。本文将详细介绍该包的功能特性、安装方法、核心语法与参数,并通过 8 个实际应用案例展示其用法,最后总结常见错误与使用注意事项。
2. 核心功能概述
agent2agent-client 包主要提供以下核心功能:
- 智能体注册与发现:支持智能体在中心化或去中心化注册中心中注册自身能力,并发现其他可用智能体。
- 消息路由与传递:提供基于主题、能力标签或智能体 ID 的消息路由机制,支持同步与异步消息传递。
- 任务分发与编排:支持将复杂任务拆解为子任务,并分发到不同智能体执行,支持结果聚合。
- 会话管理:维护智能体间的会话上下文,支持长对话与状态保持。
- 安全认证:内置 API 密钥、JWT 令牌等认证机制,保障通信安全。
- 协议适配:支持 HTTP、WebSocket、gRPC 等多种底层传输协议。
3. 安装与环境配置
3.1 基础安装
通过 pip 安装最新稳定版:
pip install agent2agent-client3.2 指定版本安装
pip install agent2agent-client==1.2.03.3 安装可选依赖
根据使用的传输协议安装对应扩展:
# WebSocket 支持
pip install agent2agent-client[websocket]
gRPC 支持
pip install agent2agent-client[grpc]
全部可选依赖
pip install agent2agent-client[all]
3.4 环境要求
- Python 3.8 及以上版本
- 操作系统:Linux、macOS、Windows
- 网络环境:智能体间需保持网络可达
4. 核心语法与参数详解
4.1 客户端初始化
from agent2agent import AgentClient
client = AgentClient(
agent_id="agent-001",
registry_url="http://localhost:8500",
capabilities=["text_analysis", "data_extraction"],
transport="http",
auth_token="your-auth-token"
)
参数说明:
agent_id:智能体唯一标识符,字符串类型。registry_url:注册中心地址,用于智能体注册与发现。capabilities:智能体能力标签列表,用于路由匹配。transport:传输协议,可选http、websocket、grpc。auth_token:认证令牌,用于安全通信。
4.2 发送消息
response = client.send_message(
    target_agent="agent-002",
    message={"type": "query", "content": "请分析这段文本的情感倾向"},
    timeout=30,
    sync=True
)
参数说明:
target_agent:目标智能体 ID。message:消息体,字典格式。timeout:超时时间(秒)。sync:是否同步等待响应。
4.3 发现智能体
agents = client.discover_agents(
    capability="text_analysis",
    limit=10,
    status="online"
)
参数说明:
capability:按能力标签筛选。limit:返回最大数量。status:智能体状态筛选,可选online、offline、all。
4.4 任务分发
task_id = client.dispatch_task(
    task={"name": "data_pipeline", "steps": ["extract", "transform", "load"]},
    strategy="round_robin",
    callback_url="http://callback-server/result"
)
参数说明:
task:任务定义字典。strategy:分发策略,可选round_robin、random、capability_match。callback_url:任务完成后的回调地址。
5. 8 个实际应用案例
案例 1:文本分析协作
两个智能体协作完成文本情感分析与关键词提取:
from agent2agent import AgentClient
初始化情感分析智能体
sentiment_agent = AgentClient(
agent_id="sentiment-analyzer",
registry_url="http://localhost:8500",
capabilities=["sentiment_analysis"]
)
初始化关键词提取智能体
keyword_agent = AgentClient(
agent_id="keyword-extractor",
registry_url="http://localhost:8500",
capabilities=["keyword_extraction"]
)
发送文本分析任务
text = "这款产品的用户体验非常出色,但价格略高。"
sentiment_result = sentiment_agent.send_message(
target_agent="sentiment-analyzer",
message={"text": text},
sync=True
)
keyword_result = keyword_agent.send_message(
target_agent="keyword-extractor",
message={"text": text},
sync=True
)
print(f"情感分析结果:{sentiment_result}")
print(f"关键词提取结果:{keyword_result}")
案例 2:数据采集与清洗流水线
# 采集智能体
collector = AgentClient(agent_id="collector", capabilities=["web_scraping"])
# 清洗智能体
cleaner = AgentClient(agent_id="cleaner", capabilities=["data_cleaning"])
分发采集任务
task_id = collector.dispatch_task(
task={"url": "https://example.com/data", "format": "json"},
strategy="direct",
target_agent="collector"
)
采集完成后触发清洗
raw_data = collector.get_task_result(task_id)
clean_result = cleaner.send_message(
target_agent="cleaner",
message={"data": raw_data, "rules": ["remove_nulls", "deduplicate"]},
sync=True
)
案例 3:多智能体问答系统
# 路由智能体
router = AgentClient(agent_id="router", capabilities=["query_routing"])
注册多个专业智能体
specialists = {
"tech": AgentClient(agent_id="tech-expert", capabilities=["tech_qa"]),
"finance": AgentClient(agent_id="finance-expert", capabilities=["finance_qa"]),
"medical": AgentClient(agent_id="medical-expert", capabilities=["medical_qa"])
}
根据问题类型路由
question = "Python 中如何实现异步编程?"
domain = router.send_message(
target_agent="router",
message={"question": question},
sync=True
)["domain"]
answer = specialists[domain].send_message(
target_agent=specialists[domain].agent_id,
message={"question": question},
sync=True
)
print(f"来自 {domain} 专家的回答:{answer}")
案例 4:实时监控告警系统
import asyncio
from agent2agent import AgentClient
async def monitor_system():
monitor = AgentClient(
agent_id="monitor",
transport="websocket",
capabilities=["system_monitoring"]
)
# 订阅监控数据流
async for metric in monitor.subscribe(topic="system_metrics"):
    if metric["cpu_usage"] > 90:
        alert_agent = AgentClient(agent_id="alerter")
        alert_agent.send_message(
            target_agent="alerter",
            message={"level": "critical", "metric": metric},
            sync=False
        )
asyncio.run(monitor_system())
案例 5:文档翻译工作流
# 翻译智能体
translator = AgentClient(agent_id="translator", capabilities=["translation"])
# 校对智能体
proofreader = AgentClient(agent_id="proofreader", capabilities=["proofreading"])
documents = ["Hello World", "How are you?", "Good morning"]
translated = []
for doc in documents:
# 翻译
result = translator.send_message(
target_agent="translator",
message={"text": doc, "source_lang": "en", "target_lang": "zh"},
sync=True
)
# 校对
final = proofreader.send_message(
target_agent="proofreader",
message={"text": result["translated_text"], "lang": "zh"},
sync=True
)
translated.append(final["corrected_text"])
print(translated)
案例 6:自动化测试编排
test_orchestrator = AgentClient(
    agent_id="test-orchestrator",
    capabilities=["test_orchestration"]
)
定义测试套件
test_suite = {
"name": "regression_test",
"tests": [
{"id": "TC001", "type": "unit", "module": "auth"},
{"id": "TC002", "type": "integration", "module": "payment"},
{"id": "TC003", "type": "e2e", "module": "checkout"}
]
}
分发测试任务
result = test_orchestrator.dispatch_task(
task=test_suite,
strategy="capability_match",
callback_url="http://test-reporter/results"
)
获取聚合结果
final_report = test_orchestrator.get_task_result(result["task_id"])
print(f"测试通过率:{final_report['pass_rate']}%")
案例 7:智能客服分流
class CustomerServiceSystem:
    def __init__(self):
        self.classifier = AgentClient(agent_id="intent-classifier")
        self.agents = {
            "billing": AgentClient(agent_id="billing-agent"),
            "technical": AgentClient(agent_id="tech-support"),
            "general": AgentClient(agent_id="general-qa")
        }
def handle_inquiry(self, inquiry: str):
    # 意图分类
    intent = self.classifier.send_message(
        target_agent="intent-classifier",
        message={"text": inquiry},
        sync=True
    )["intent"]
# 分流到对应智能体
agent = self.agents.get(intent, self.agents["general"])
response = agent.send_message(
    target_agent=agent.agent_id,
    message={"inquiry": inquiry},
    sync=True
)
return response
system = CustomerServiceSystem()
print(system.handle_inquiry("我的账单为什么多了 50 元?"))
案例 8:分布式爬虫协作
from agent2agent import AgentClient
import json
调度智能体
scheduler = AgentClient(agent_id="scheduler", capabilities=["task_scheduling"])
爬虫智能体集群
crawlers = [
AgentClient(agent_id=f"crawler-{i}", capabilities=["web_crawling"])
for i in range(5)
]
urls = ["https://site1.com", "https://site2.com", "https://site3.com"]
调度器分发 URL 到各爬虫
for i, url in enumerate(urls):
crawler = crawlers[i % len(crawlers)]
scheduler.dispatch_task(
task={"url": url, "depth": 2},
strategy="direct",
target_agent=crawler.agent_id
)
收集结果
all_results = []
for crawler in crawlers:
results = crawler.get_completed_tasks()
all_results.extend(results)
with open("crawled_data.json", "w") as f:
json.dump(all_results, f)
6. 常见错误与使用注意事项
6.1 常见错误
- 连接超时:智能体间网络不可达或防火墙拦截,建议检查网络连通性并适当增大
timeout参数。 - 认证失败:
auth_token过期或无效,需重新获取令牌并更新客户端配置。 - 智能体未注册:目标智能体未在注册中心注册,调用
discover_agents确认智能体状态。 - 消息格式错误:消息体不符合目标智能体的预期 schema,建议使用
validate_message方法预校验。 - 任务分发失败:所有候选智能体均不可用,建议设置备用智能体或实现重试机制。
- 版本不兼容:客户端与服务端版本不匹配,建议保持两端版本一致。
6.2 使用注意事项
- 合理设置超时:根据任务复杂度设置合理的超时时间,避免长时间阻塞。
- 实现重试机制:网络波动可能导致消息丢失,建议在业务层实现指数退避重试。
- 监控智能体状态:定期检查智能体健康状态,及时处理离线智能体。
- 消息序列化:复杂对象需先序列化为 JSON 或字节流再发送。
- 安全通信:生产环境务必启用 TLS/SSL 加密,避免敏感信息泄露。
- 日志记录:开启客户端日志以便排查问题:
import logging; logging.basicConfig(level=logging.DEBUG)。 - 资源清理:使用完毕后调用
client.close()释放连接资源。
7. 总结
agent2agent-client 为 Python 开发者提供了一套简洁而强大的多智能体通信框架。通过本文介绍的功能、安装方法、核心语法与 8 个实战案例,读者可以快速上手构建自己的多智能体协作系统。在实际使用中,注意网络配置、认证管理和错误处理等关键环节,能够有效提升系统的稳定性和可靠性。随着 AI Agent 生态的持续演进,agent2agent-client 也将不断迭代,为智能体协作提供更完善的底层支持。
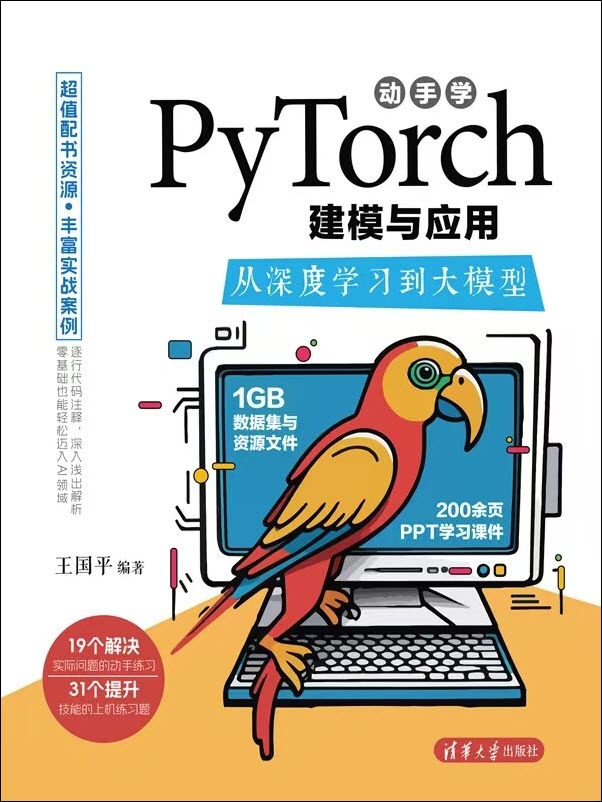
《动手学PyTorch建模与应用:从深度学习到大模型》是一本从零基础上手深度学习和大模型的PyTorch实战指南。全书共11章,前6章涵盖深度学习基础,包括张量运算、神经网络原理、数据预处理及卷积神经网络等;后5章进阶探讨图像、文本、音频建模技术,并结合Transformer架构解析大语言模型的开发实践。书中通过房价预测、图像分类等案例讲解模型构建方法,每章附有动手练习题,帮助读者巩固实战能力。内容兼顾数学原理与工程实现,适配PyTorch框架最新技术发展趋势。

中国智能体开发者社区,聚焦智能体与大模型开发,提供前沿资讯、实用工具链、开源项目及行业案例。通过技术沙龙、开发者大赛等活动,促进经验交流与协作,助力开发者快速构建创新智能应用。
更多推荐
 3
3 0
0- 0


 已为社区贡献63条内容

所有评论(0)