使用OpenAI和RestApi调用本地基于ollama部署的DeepSeek大模型API
使用OpenAI和RestApi调用本地基于ollama部署的DeepSeek大模型API详解
1.DeepSeek api能力主要包含以下几个:
1.文本生成能力:能够根据输入的提示信息,生成各种类型的文本内容,包括但不限于文章、故事、诗歌、对话等
2.知识问答能力:具备广泛而深入的知识储备,能够回答各种领域的问题。无论是科学技术、历史文化、艺术娱乐还是日常生活中的问题,它都能提供准确、详细的答案
3.语言翻译能力:支持多种语言之间的翻译。开发者可以将其用于翻译工具,跨国交流软件项目中
4.文本摘要能力:可以对长篇文本进行有效的摘要提取,帮助用户快速了解文本的核心内容
5.情感分析能力: 能够对输入的文本进行情感分析,判断文本所表达的情感倾向,如积极、消极或中性。在社交媒体监测、客户反馈分析等领域有广泛的应用
2.使用OpenAI调用本地ollama部署的DeepSeek大模型API:
#正常调用deepseek api步骤:
1.注册获取api key秘钥
2.了解api接口文档
3.构建请求
使用OpenAI之前必须先安装openai库:pip install openai
代码demo如下:
#deepseek api 调用步骤#
#1.api秘钥
dpApiKey="ollama" #随便写的,没有生成apikey
client = OpenAI(api_key=dpApiKey, base_url="http://localhost:11434/v1")
#2.调用deepseek-r1:8b模型#
response = client.chat.completions.create(
    model="deepseek-r1:8b",
    messages=[
        {"role": "system", "content": "You are a helpful assistant"},
        {"role": "user", "content": "翻译 i love dog 成中文"},
    ],
    stream=False
)

print(response.choices[0].message.content)
运行结果如下: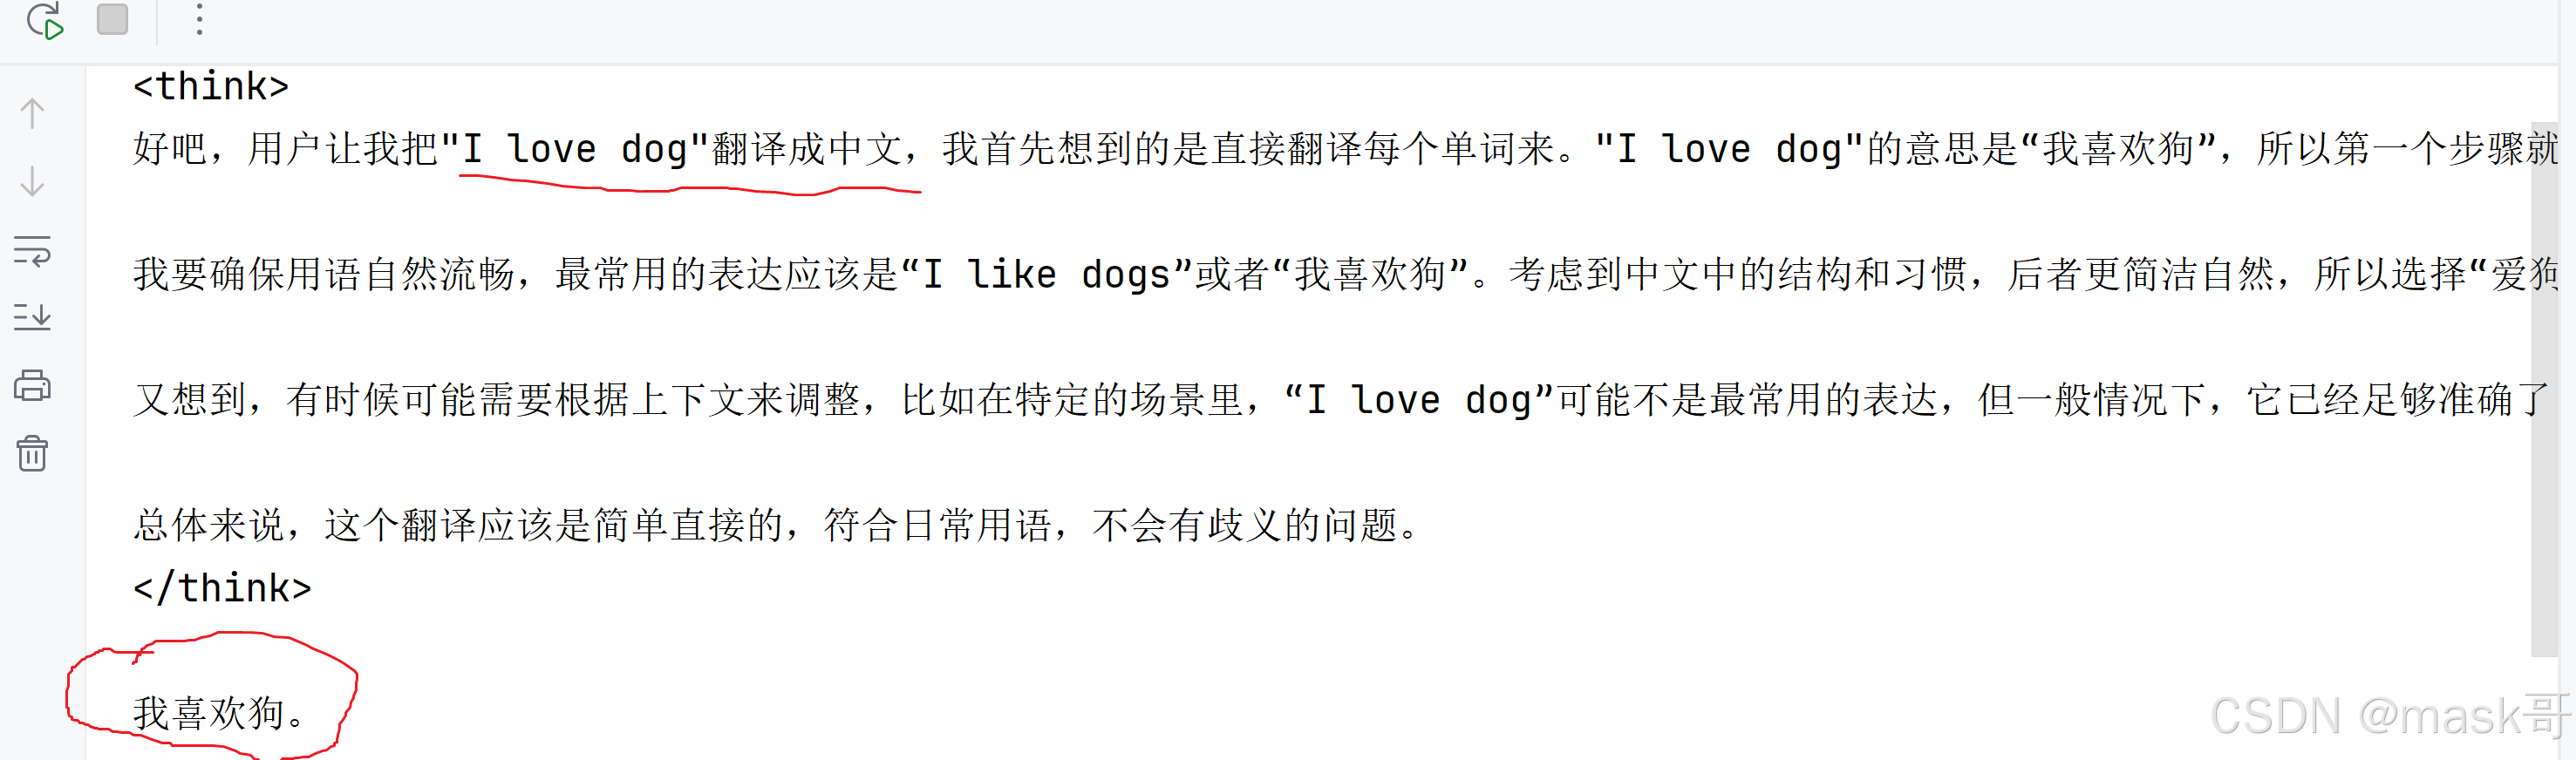
3.使用restApi调用本地基于ollama部署的deepseek大模型api:
代码如下:
import requests

# Ollama中提供的chat功能的API地址
url = 'http://127.0.0.1:11434/api/chat'
# 要发送的数据
data = {
    "model": "deepseek-r1:8b",
    "messages": [{
        "role": "user",
        "content": "1+1等于几?"}],
    "stream": False
}

# 发送POST请求
response = requests.post(url, json=data)
# 打印模型的输出文本
print(response.json()["message"]["content"])
运行效果如下:

4.基于deepseek实现windows pc微信端自动回复好友消息
#首先安装wxauto库: pip install wxauto
import time
import requests
from wxauto import WeChat

def deepSeekChat(question):
    # Ollama中提供的chat功能的API地址
    url = 'http://127.0.0.1:11434/api/chat'
    # 要发送的数据
    data = {
        "model": "deepseek-r1:8b",
        "messages": [{
            "role": "user",
            "content": question}],
        "stream": False
    }

    # 发送POST请求
    response = requests.post(url, json=data)
    # 打印模型的输出文本
    answerStr=response.json()["message"]["content"]
    print(answerStr)
    return answerStr


#获取当前微信登录的实例
wx = WeChat()

#who='小李'
#发送文本消息
# wx.SendMsg("这是我用python脚本发你的消息",who)
# print("发送出去消息了")

#发送图片消息
# img_path="D:/obama.png"
# wx.SendFiles(img_path,who)
# wx.SendMsg("这是我用python脚本发你的图片",who)
# print("发送ok")

#发送消息@XX人
#wx.SendMsg("这是我用python脚本发你的消息@",who,at=who)

#获取文字消息#
#1.获取当前聊天窗口消息
# msgs=wx.GetAllMessage(
#     # savepic   = True,   # 保存图片
#     # savefile  = True,   # 保存文件
#     # savevoice = True    # 保存语音转文字内容
# )
# #2.输出消息内容
# for msg in msgs:
#     if msg.type== 'sys':
#         print(f"【系统消息】{msg.content}")
#     if msg.type=='friend':
#         sender=msg.sender_remark  #获取备注名
#         print(f"{sender.rjust(20)}:{msg.content}")
#     elif msg.type=='self':
#         print(f"{msg.sender.ljust(20)}:{msg.content}")
#     elif msg.type=='time':
#         print(f"\n【时间消息】{msg.time}")
#     elif msg.type=='recall':
#         print(f"【撤回消息】{msg.content}")


#获取新消息#
# msgs2=wx.GetAllNewMessage()
# for msg in msgs2:
#     # if msg.type== 'sys':
#     #     print(f"【系统消息】{msg.content}")
#     if msg.type=='friend':
#         sender=msg.sender_remark  #获取备注名
#         print(f"{sender.rjust(20)}:{msg.content}")
#     elif msg.type=='self':
#         print(f"{msg.sender.ljust(20)}:{msg.content}")
#     elif msg.type=='time':
#         print(f"\n【时间消息】{msg.time}")
#     elif msg.type=='recall':
#         print(f"【撤回消息】{msg.content}")


#获取好友信息
# infos=wx.GetAllFriends('小李')
# print(infos)


#一个简单的接受消息机器人#
#1.设置监听列表
listen_list = ["小李"]
#2.添加监听对象
for i in listen_list:
    wx.AddListenChat(who=i)

wait=5  #等待5s查看一次消息
while True:
    msgs=wx.GetListenMessage()
    for chat in msgs:
        one_msgs= msgs.get(chat) #获取消息内容

        #回复收到
        for msg in one_msgs:
             print(msg.type)
             if msg.type== 'sys':
                 print(f"【系统消息】{msg.content}")
             elif msg.type=='friend':
                 sender=msg.sender_remark  #获取备注名
                 print(f"{sender.rjust(20)}:{msg.content}")

                 question=msg.content
                 #收到消息回复
                 # 增加大模型deepseek AI回复消息
                 ans=deepSeekChat(question)
                 chat.SendMsg(ans)

             elif msg.type=='self':
                  print(f"{msg.sender.ljust(20)}:{msg.content}")
             elif msg.type=='time':
                 print(f"\n【时间消息】{msg.time}")
             elif msg.type=='recall':
                 print(f"【撤回消息】{msg.content}")

    time.sleep(wait)

火山引擎开发者社区是火山引擎打造的AI技术生态平台,聚焦Agent与大模型开发,提供豆包系列模型(图像/视频/视觉)、智能分析与会话工具,并配套评测集、动手实验室及行业案例库。社区通过技术沙龙、挑战赛等活动促进开发者成长,新用户可领50万Tokens权益,助力构建智能应用。
更多推荐
 5
5 0
0- 0


 已为社区贡献3条内容

所有评论(0)