【手撕MCP代码】实现天气预报查询并根据天气心情生成朋友圈文案
·
MCP实现天气预报查询并生成朋友圈文案
一、本文目标
1. 手撕MCP服务器代码,实现根据所在城市天气生成朋友圈文案
2. 最后使用Cherry Studio测试。
二、什么是MCP?
Model Context Protocol (MCP), 一个开源的模型上下文协议。用于将AI应用程序连接到外部系统。就像AI应用程序的USB接口。
MCP架构
- MCP主机:发起请求的AI应用程序。
- MCP服务端:像MCP 客户端提供上下文、工具和提示信息。
- MCP客户端:由MCP主机创建的与MCP服务器1:1的连接。
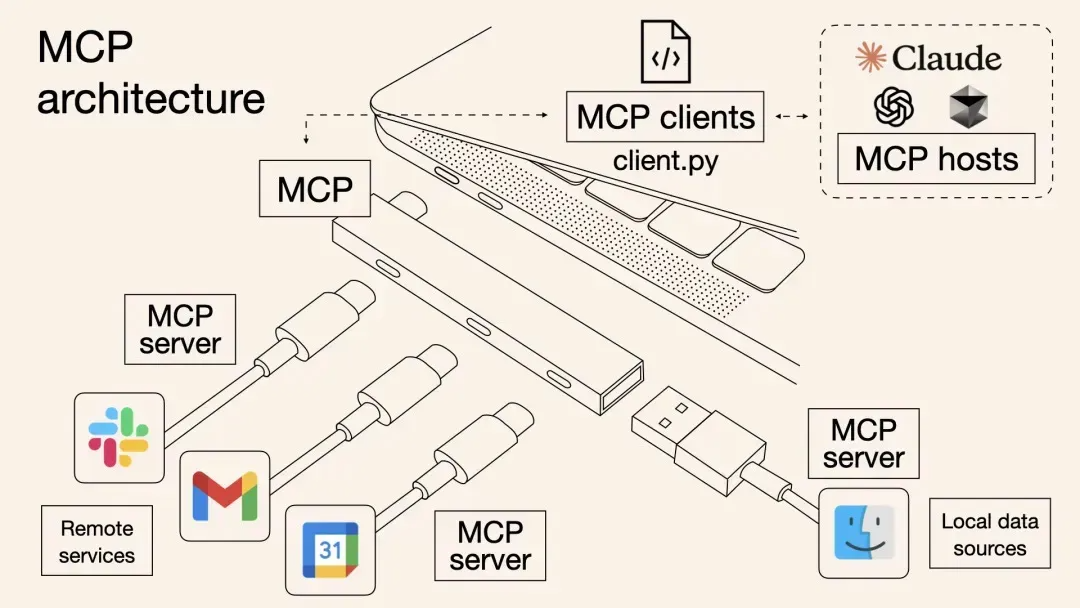
MCP server 是 MCP 架构中的关键组件,包含3个主要类型的功能:
- 资源(Resources): 类似文件的数据,可以被客户端读取,如 本地文件、数据库。
- 工具(Tools): 可以被 LLM 调用的函数,执行工具调用,如搜索引擎、天气查询、车票查询。
- 提示(Prompts): 预先编写的prompt模板,专业的提示词,帮助用户完成特定任务。
三、前置配置
3.1 环境配置
python 3.11+
3.2 所需依赖
mcp==1.23.1
litellm==1.79.0
requests==2.32.3
3.3 所需资源
3.3.1 天气预报获取
登录聚合数据官网 , 获取天气预报接口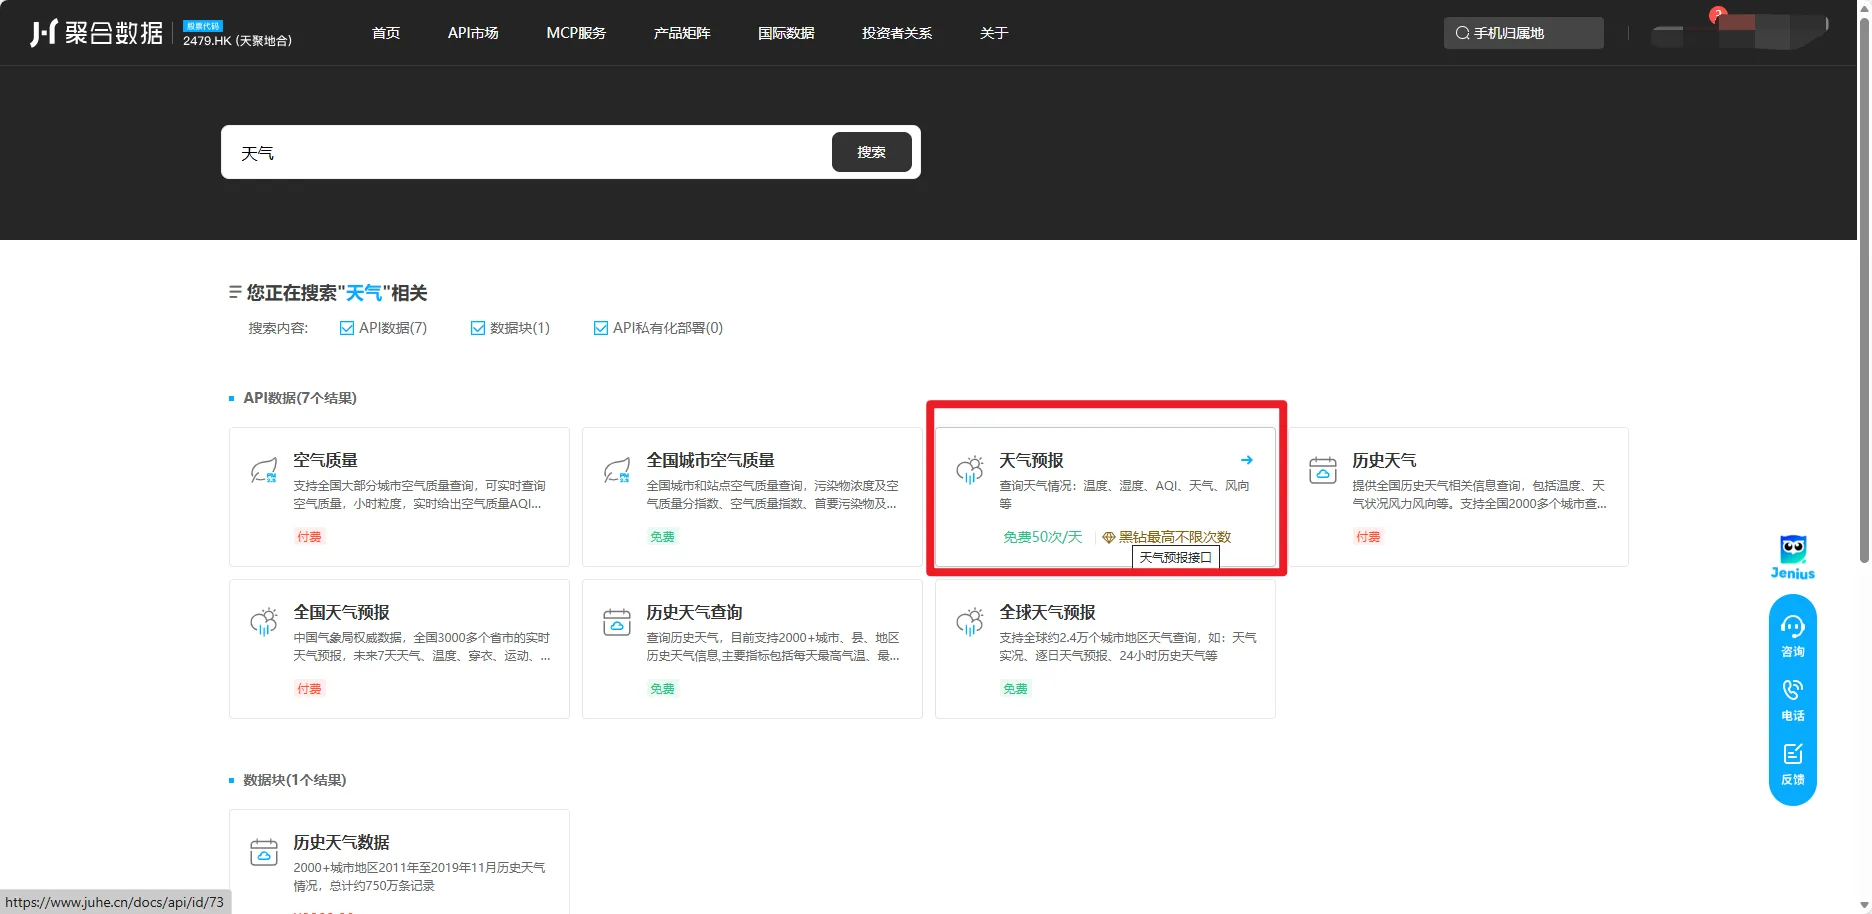
在个人信息页获取天气预报接口AppKey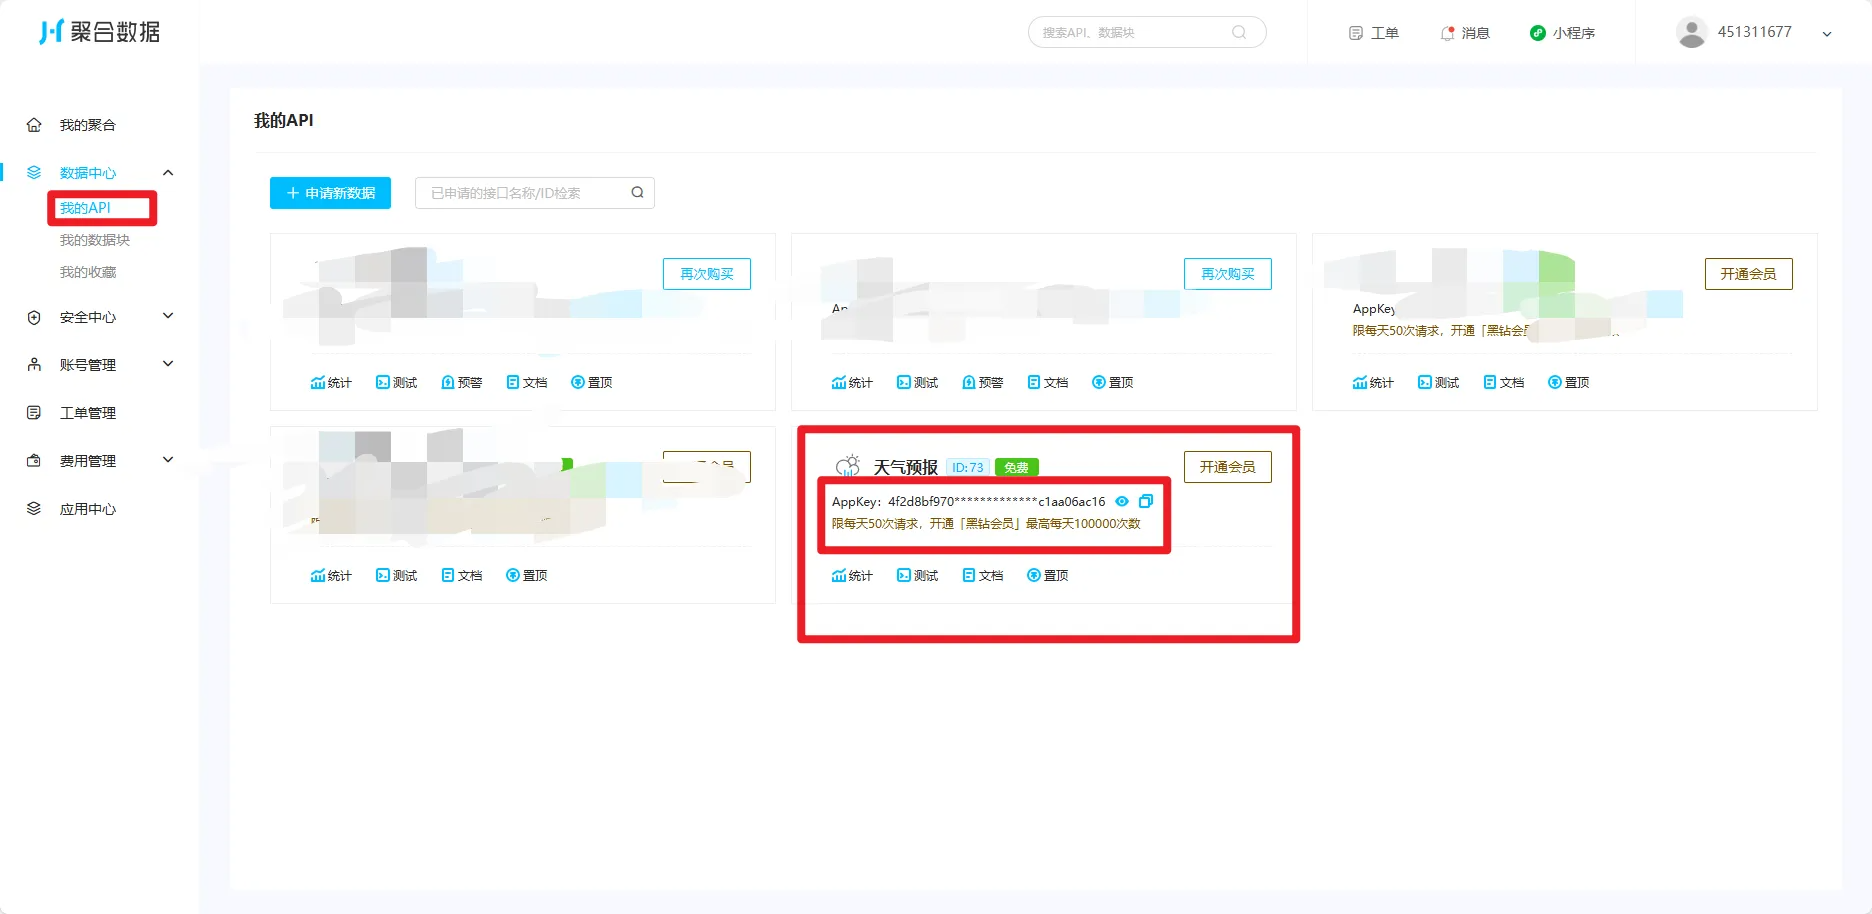
3.3.2 硅基流动大模型调用
登录硅基流动官网, 登录即送14元免费额度,方便测试。
新建API密钥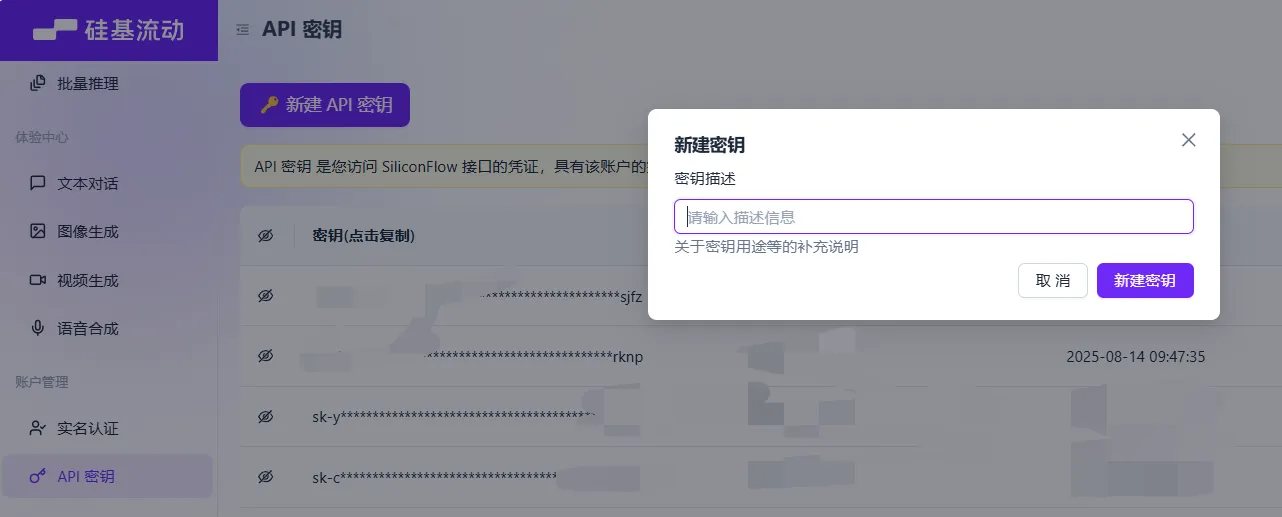
四、MCP服务器开发
4.1 设置MCP服务器
from mcp.server.fastmcp import FastMCP

# Initialize FastMCP server
mcp = FastMCP("weather")

def main():
    mcp.run(transport="stdio")

if __name__ == "__main__":
    main()
4.2 获取天气预报工具
@mcp.tool()
async def get_weather(city: str) -> dict:
    """获取城市的天气信息"""
    apiUrl = 'http://apis.juhe.cn/simpleWeather/query'  # 接口请求URL
    apiKey = '天气预报apiKey'  # 在个人中心->我的数据,接口名称上方查看

    # 接口请求入参配置
    requestParams = {
        'key': apiKey,
        'city': city,
    }

    # 发起接口网络请求
    response = requests.get(apiUrl, params=requestParams)

    # 解析响应结果
    if response.status_code == 200:
        responseResult = response.json()
        # 网络请求成功。可依据业务逻辑和接口文档说明自行处理。
        return responseResult
    else:
        # 网络异常等因素,解析结果异常。可依据业务逻辑自行处理。
        return {'error': '请求异常'}
4.3 朋友圈文案生成
@mcp.tool()
async def get_wechat_article(weather: str) -> str:
    """根据天气信息生成朋友圈文案"""
    prompt = f"""
    你是一个专业的社交媒体文案writer,擅长根据天气信息创作符合情景的朋友圈文案。
    请根据以下天气信息创作一个文案:{weather}
    """
    response = litellm.completion(
        model="openai/deepseek-ai/DeepSeek-V3",
        # custom_llm_provider="openai",
        api_key="硅基流动apiKey",
        api_base="https://api.siliconflow.cn",
        messages=[{"role": "user", "content": prompt}]
    )
    return response.choices[0].message.content
4.4 完整代码
import litellm
import requests
from mcp.server.fastmcp import FastMCP

# Initialize FastMCP server
mcp = FastMCP("weather")


@mcp.tool()
async def get_weather(city: str) -> dict:
    """获取城市的天气信息"""
    apiUrl = 'http://apis.juhe.cn/simpleWeather/query'  # 接口请求URL
    apiKey = '天气预报apiKey'  # 在个人中心->我的数据,接口名称上方查看

    # 接口请求入参配置
    requestParams = {
        'key': apiKey,
        'city': city,
    }

    # 发起接口网络请求
    response = requests.get(apiUrl, params=requestParams)

    # 解析响应结果
    if response.status_code == 200:
        responseResult = response.json()
        # 网络请求成功。可依据业务逻辑和接口文档说明自行处理。
        return responseResult
    else:
        # 网络异常等因素,解析结果异常。可依据业务逻辑自行处理。
        return {'error': '请求异常'}

@mcp.tool()
async def get_wechat_article(weather: str) -> str:
    """根据天气信息生成朋友圈文案"""
    prompt = f"""
    你是一个专业的社交媒体文案writer,擅长根据天气信息创作符合情景的朋友圈文案。
    请根据以下天气信息创作一个文案:{weather}
    """
    response = litellm.completion(
        model="openai/deepseek-ai/DeepSeek-V3",
        # custom_llm_provider="openai",
        api_key="硅基流动apiKey",
        api_base="https://api.siliconflow.cn",
        messages=[{"role": "user", "content": prompt}]
    )
    return response.choices[0].message.content

def main():
    mcp.run(transport="stdio")

if __name__ == "__main__":
    main()
五、Cherry Studio测试MCP
5.1 导入MCP服务器配置

导入下方配置,修改python文件名和路径
{
  "mcpServers": {
    "weather": {
      "command": "uv",
      "args": [
        "--directory",
        "D:\code\python\python-study\mcp",
        "run",
        "weather_article_mcp.py"
      ]
    }
  }
}
导入成功
可以查看到我们创建的两个工具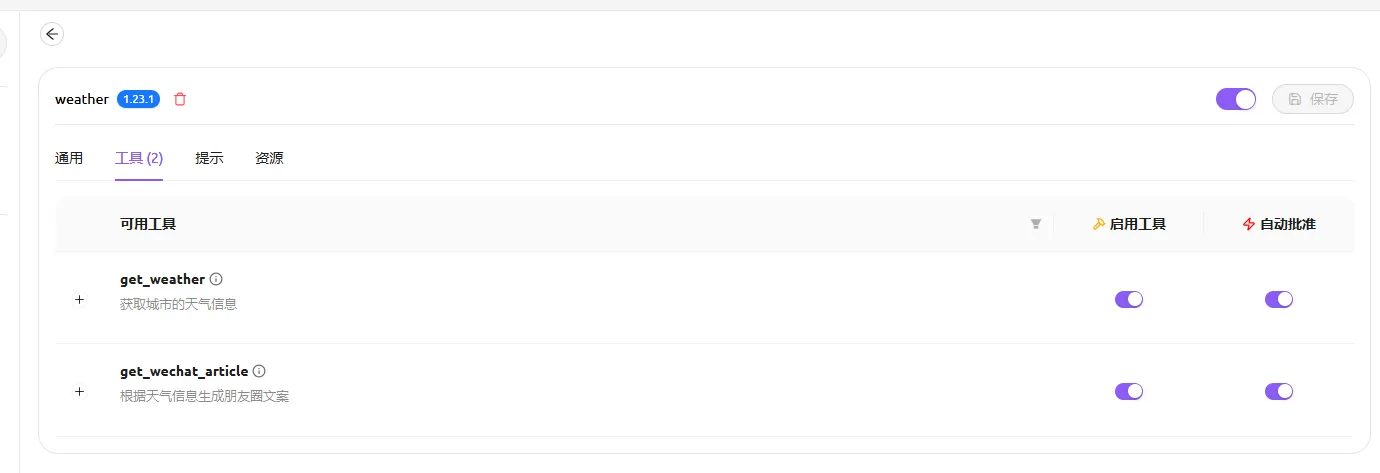
5.2 测试MCP
5.2.1 查询西安天气,并配上朋友圈文案
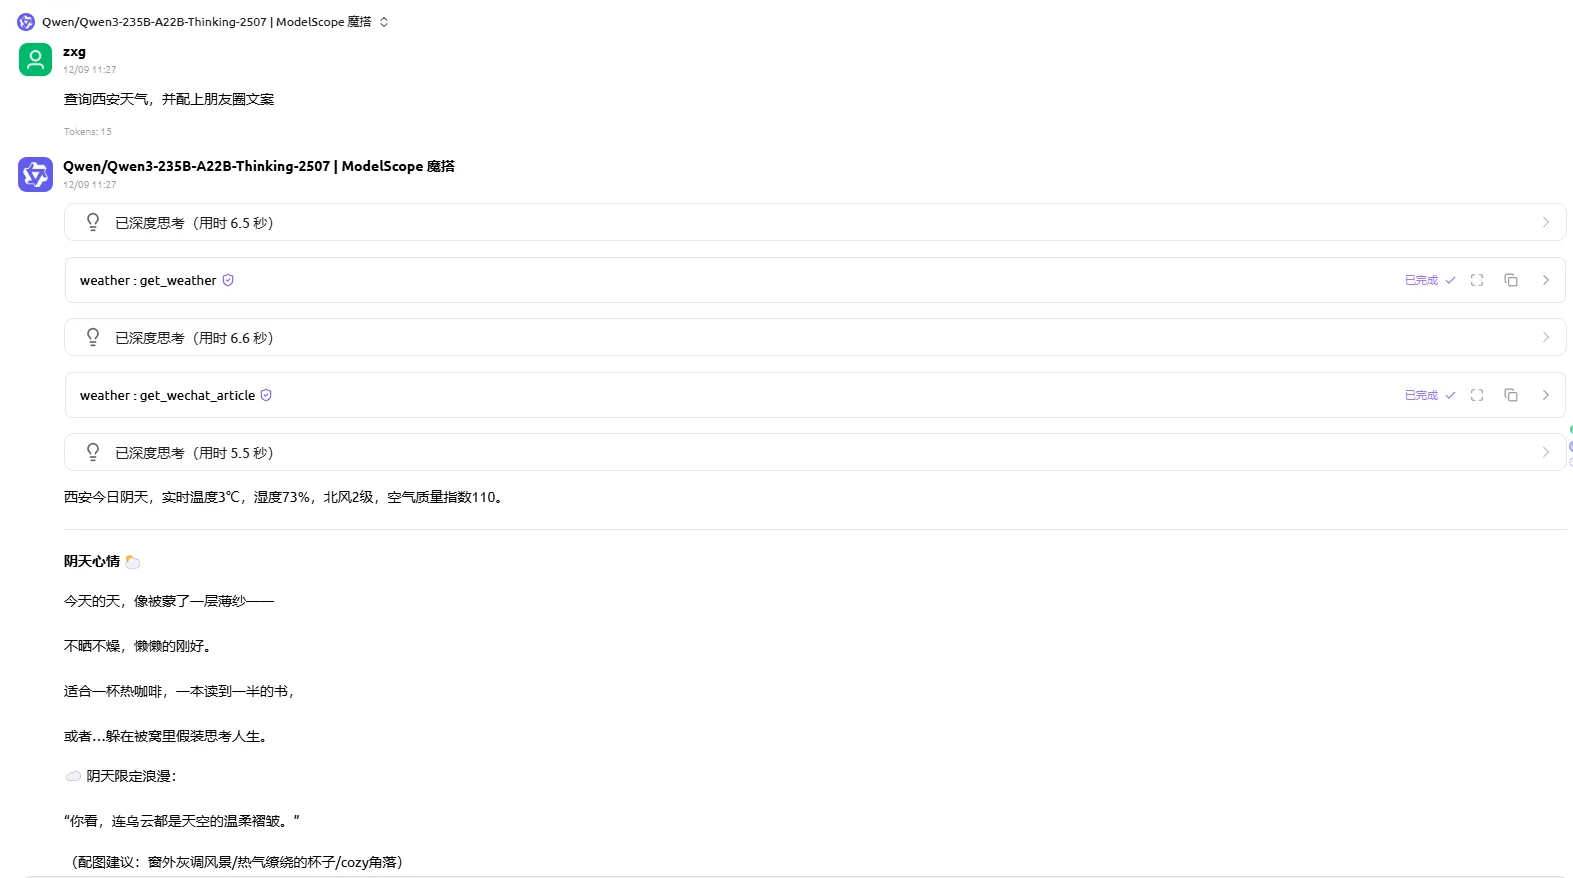
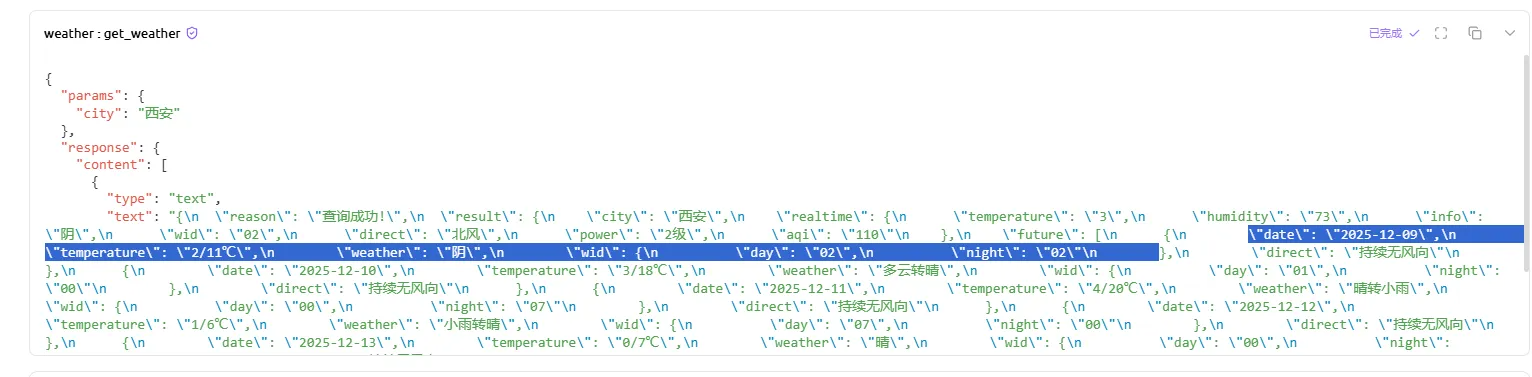
5.2.2 查看工具调用情况
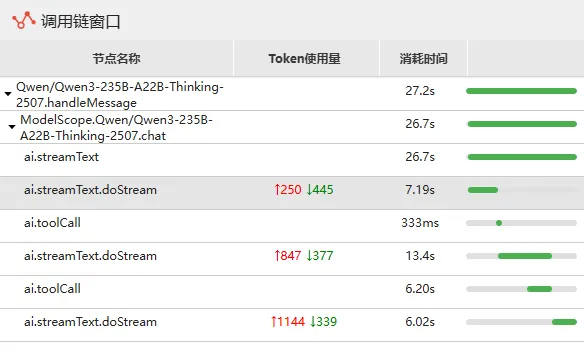
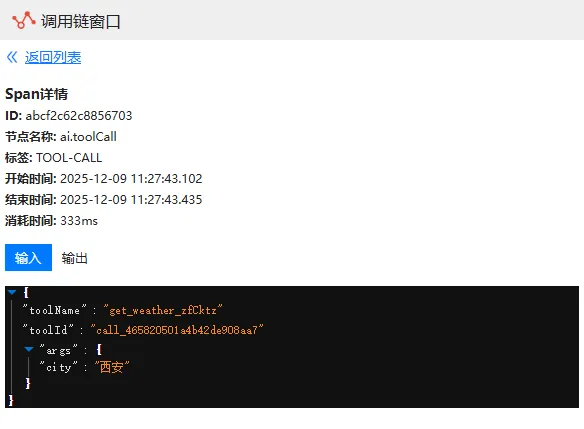
5.2.3 查看调用链
到这里就完成了本教程所有操作~~

中国智能体开发者社区,聚焦智能体与大模型开发,提供前沿资讯、实用工具链、开源项目及行业案例。通过技术沙龙、开发者大赛等活动,促进经验交流与协作,助力开发者快速构建创新智能应用。
更多推荐
 14
14 0
0- 0


 已为社区贡献6条内容

所有评论(0)