Python利用ChromeDriver将微信公众号文章批量保存为 .txt(仅文本)
本项目是在为AI API准备知识库,处理微信公众号数据时产生的。可以批量将多篇文章的文本保存下来,并保证文本的相对高质量。我将本文的所有代码都放到了Github上(喜欢可以点一个星星),有什么问题欢迎和大家讨论。不要跟着教程一步一步来,看懂了在源代码上直接修改即可。
前言
本项目是在为AI API准备知识库,处理微信公众号数据时产生的。可以批量将多篇文章的文本保存下来,并保证文本的相对高质量。我将本文的所有代码都放到了Github上(喜欢可以点一个星星),有什么问题欢迎和大家讨论。不要跟着教程一步一步来,看懂了在源代码上直接修改即可。
Github链接:GitHub - 7bata/WechatAIDataProcess
思路
1. 通过一个微信公众号后台,批量获取目标公众号的文章url,标题,以及更新时间,导出到一个表格文件
2. 利用保存的url, 通过ChromeDriver的自动化,将文章保存为pdf文件
3. 将pdf文件转化成word文件,再过滤掉所有的图片,把文章转化为最终的纯文本文件
准备
1. ChromeDriver
下载链接:http://chromedriver.storage.googleapis.com/index.html
注意这里需要下载和浏览器版本最相近的ChromeDriver,并且ChromeDriver版本需要 ≤ Chrome浏览器版本。(e.g. 浏览器版本 132.0.6834.111 可以匹配 132.0.6834.111版本以下的所有ChromeDriver)
需要把解压chromedriver后的exe文件放到Chrome文件路径下,并设置环境变量
2. 需要的包
json, requests, datetime, pandas, selenium, chromedrivermanager, openpyxl, python-docx, pdf2docx, os
pip install -i https://pypi.tuna.tsinghua.edu.cn/simple json
pip install -i https://pypi.tuna.tsinghua.edu.cn/simple requests
pip install -i https://pypi.tuna.tsinghua.edu.cn/simple datetime
pip install -i https://pypi.tuna.tsinghua.edu.cn/simple pandas
pip install -i https://pypi.tuna.tsinghua.edu.cn/simple selenium
pip install -i https://pypi.tuna.tsinghua.edu.cn/simple chromedrivermanager
pip install -i https://pypi.tuna.tsinghua.edu.cn/simple openpyxl
pip install -i https://pypi.tuna.tsinghua.edu.cn/simple python-docx
pip install -i https://pypi.tuna.tsinghua.edu.cn/simple pdf2docx
pip install -i https://pypi.tuna.tsinghua.edu.cn/simple os

#使用清华镜像源(国内推荐)
注意:pdf2docx 可能会由于版本问题而报错
报错如下:
error: [ERROR] Ignore page 1 due to making page error: invalid literal for int() with base 16: 'x1'
解决方法:
#安装指定关联包的版本

pip install -i https://pypi.tuna.tsinghua.edu.cn/simple PyMuPDF==1.24.14
pip install -i https://pypi.tuna.tsinghua.edu.cn/simple fonttools==4.55.0
3. 一个公众号
在获取文章的url时,我们需要一个公众号的后台来访问数据的接口。
创建公众号教程:https://zhuanlan.zhihu.com/p/394359334
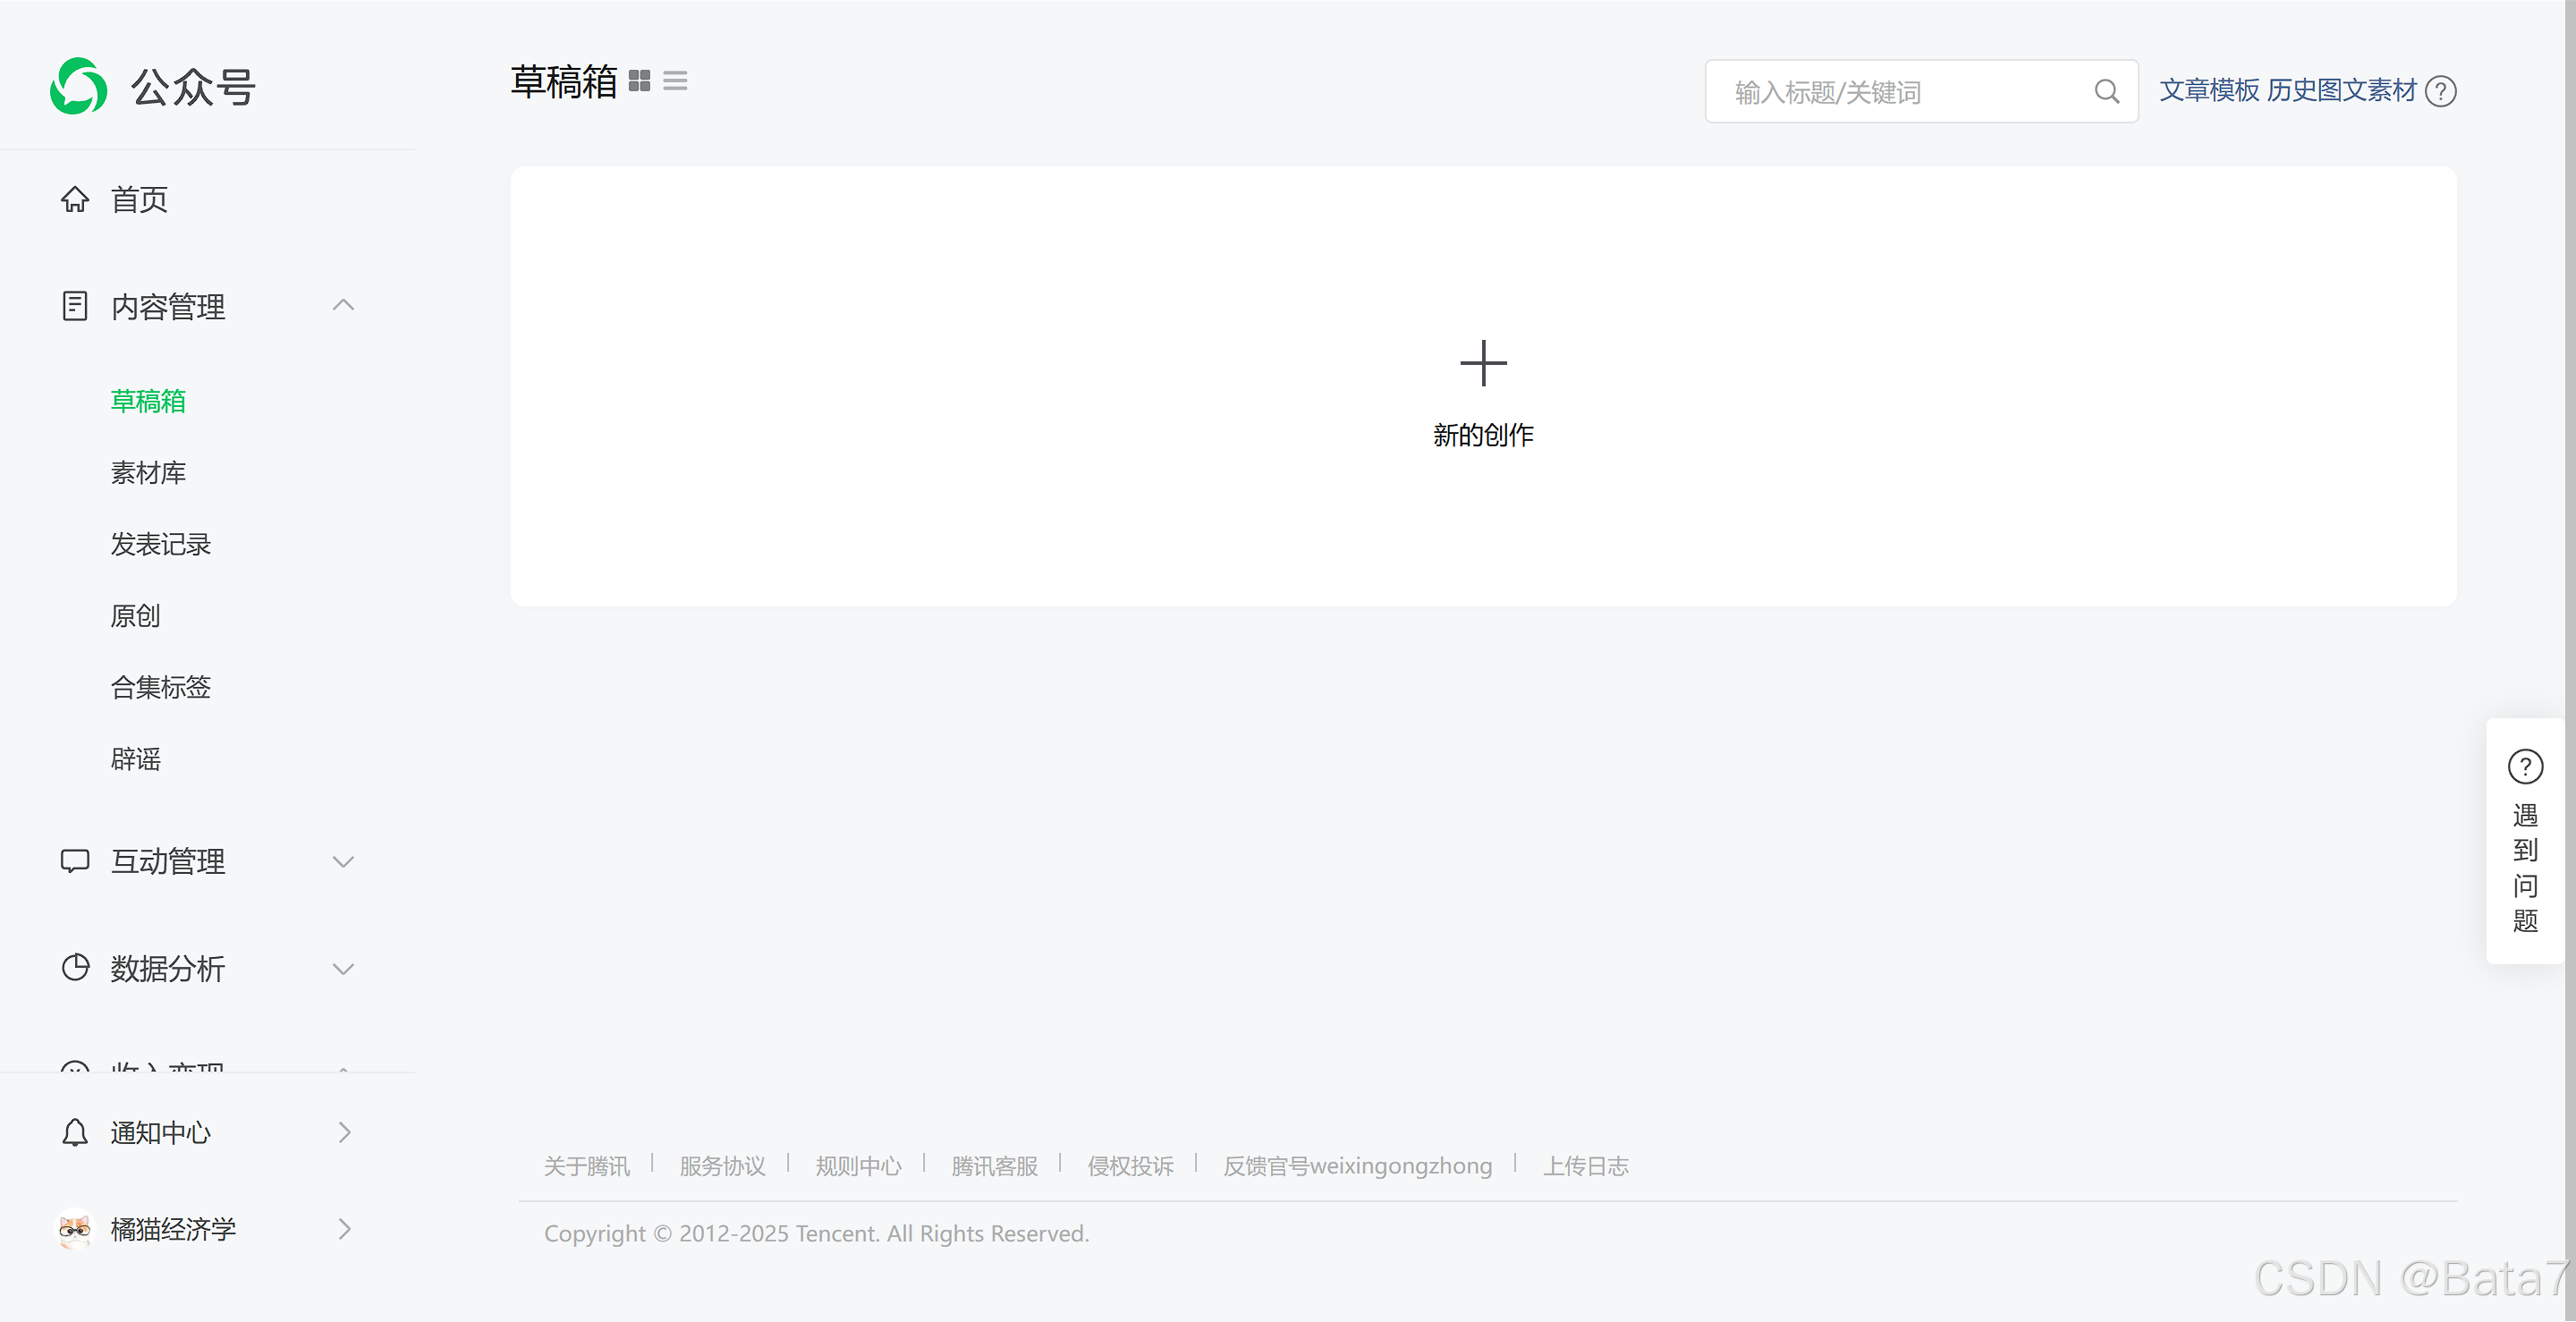
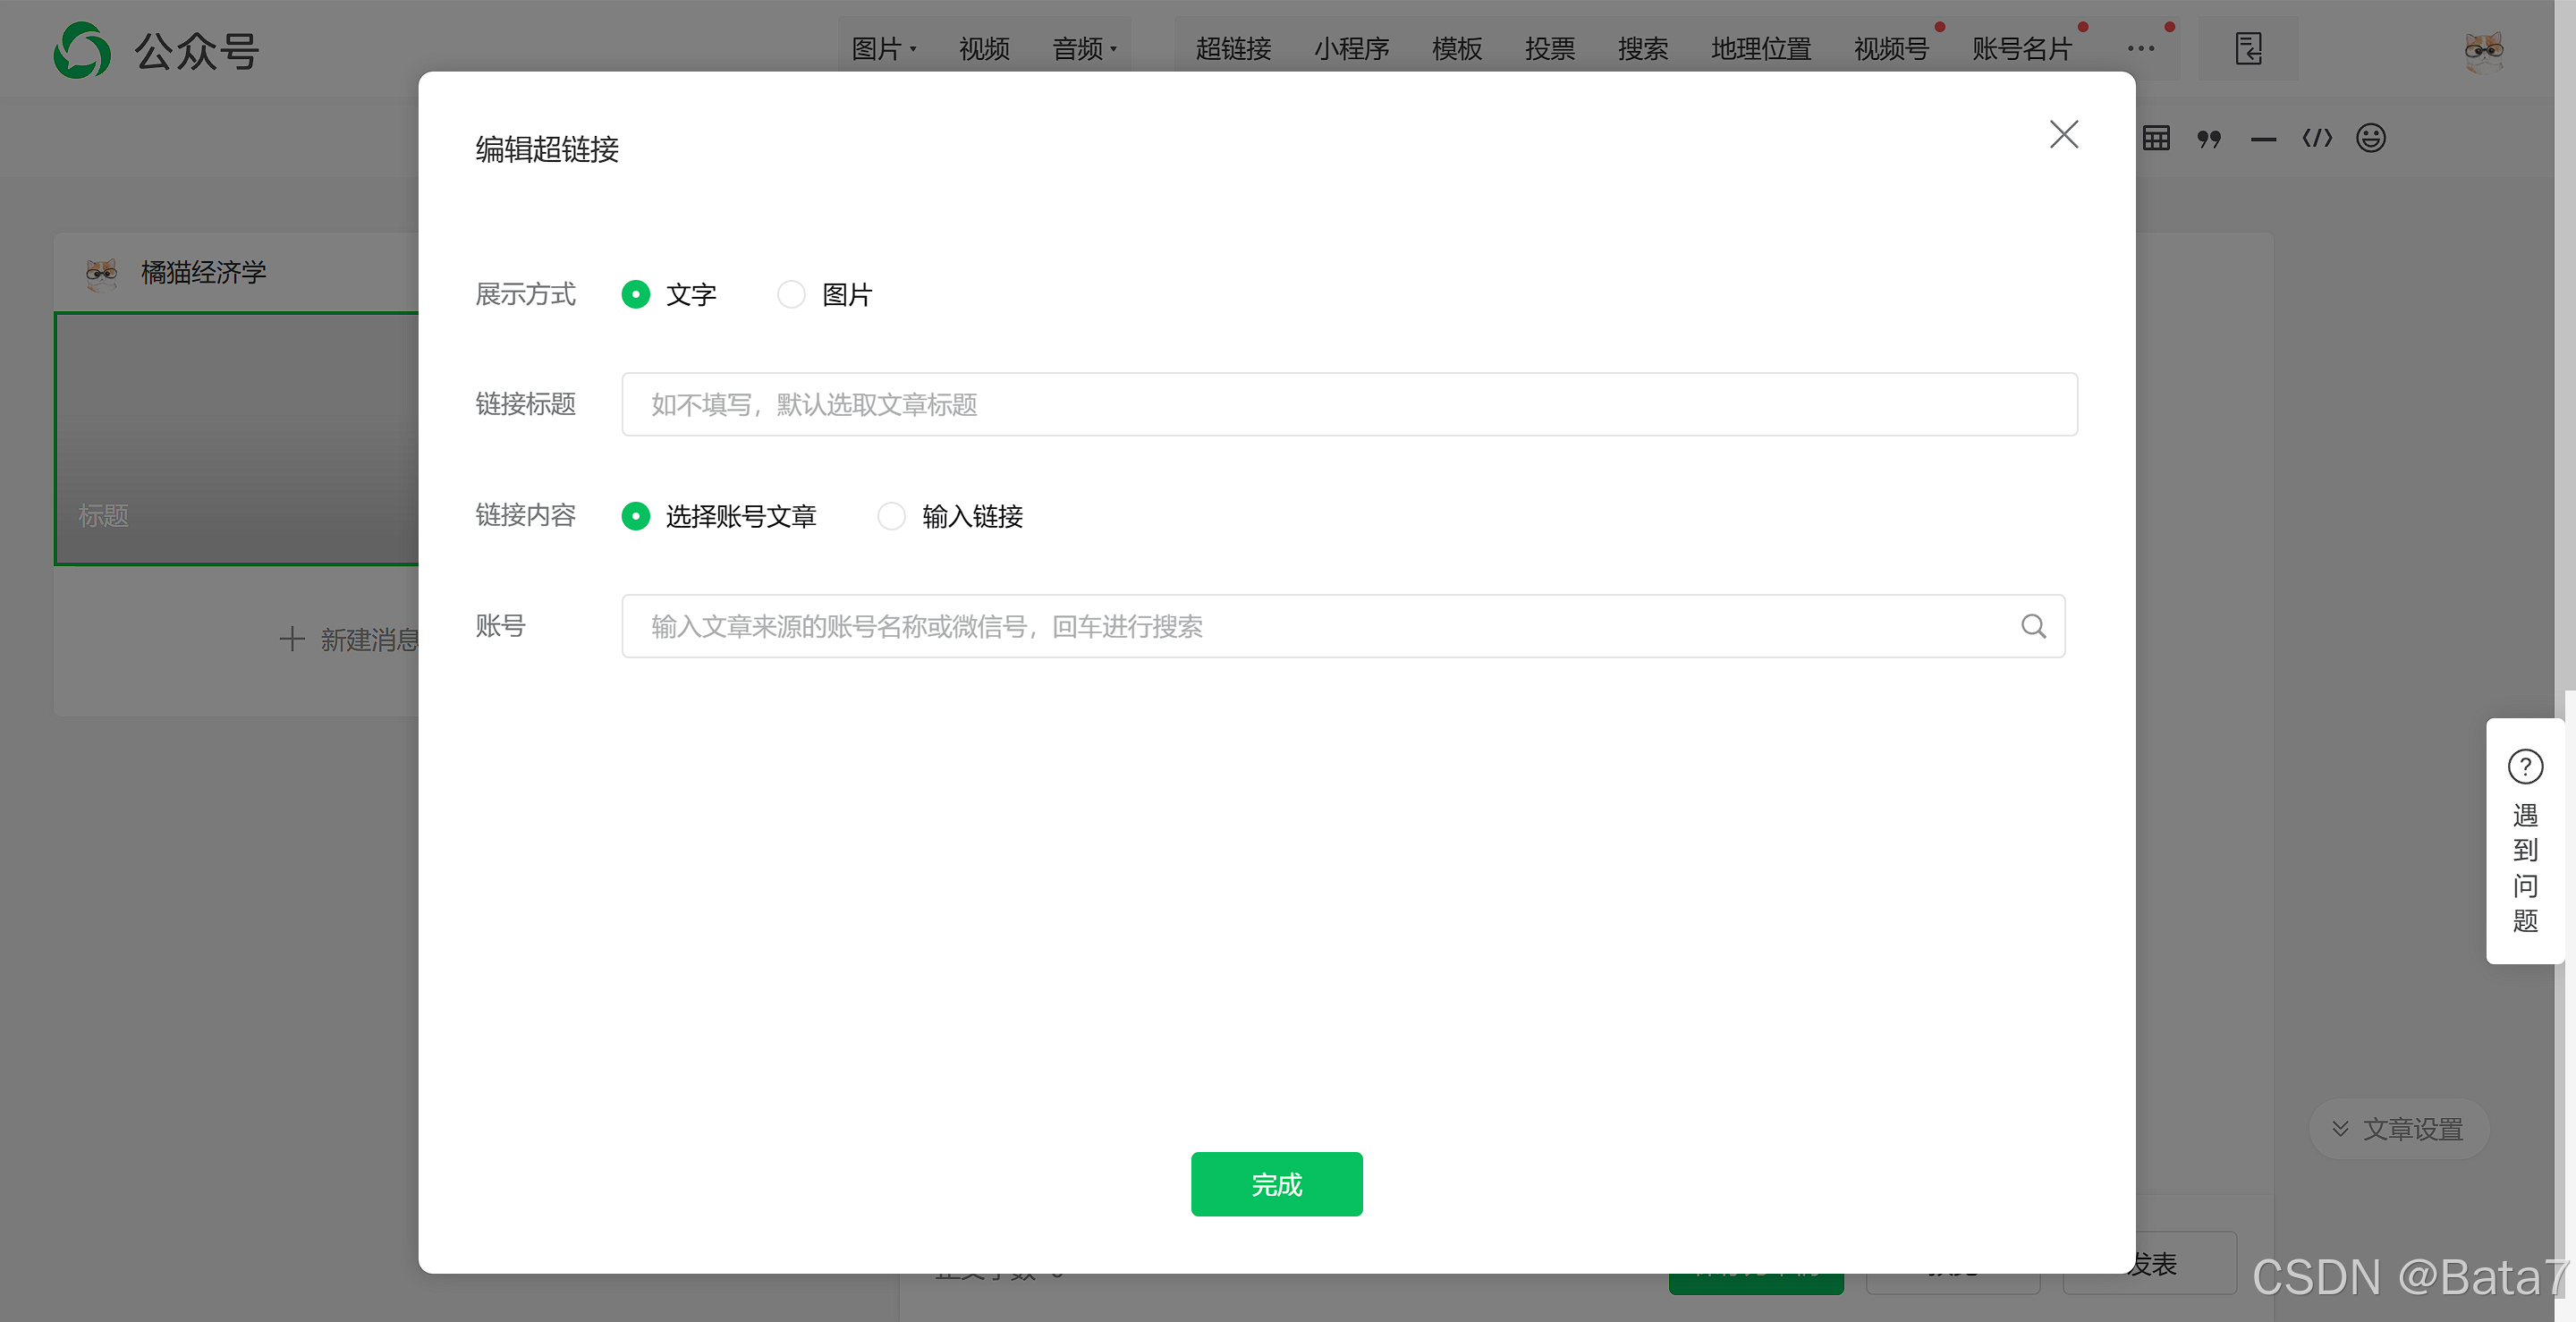
流程:进入后台-内容管理-草稿箱-新的创作-写新图文-超链接
如图:
代码
1. 通过微信公众号后台,获取文章URL

在微信公众号后台的编辑超链接处,按下F12,查看network,我们可以发现一个接口
重要参数:begin, count, fakeid, token
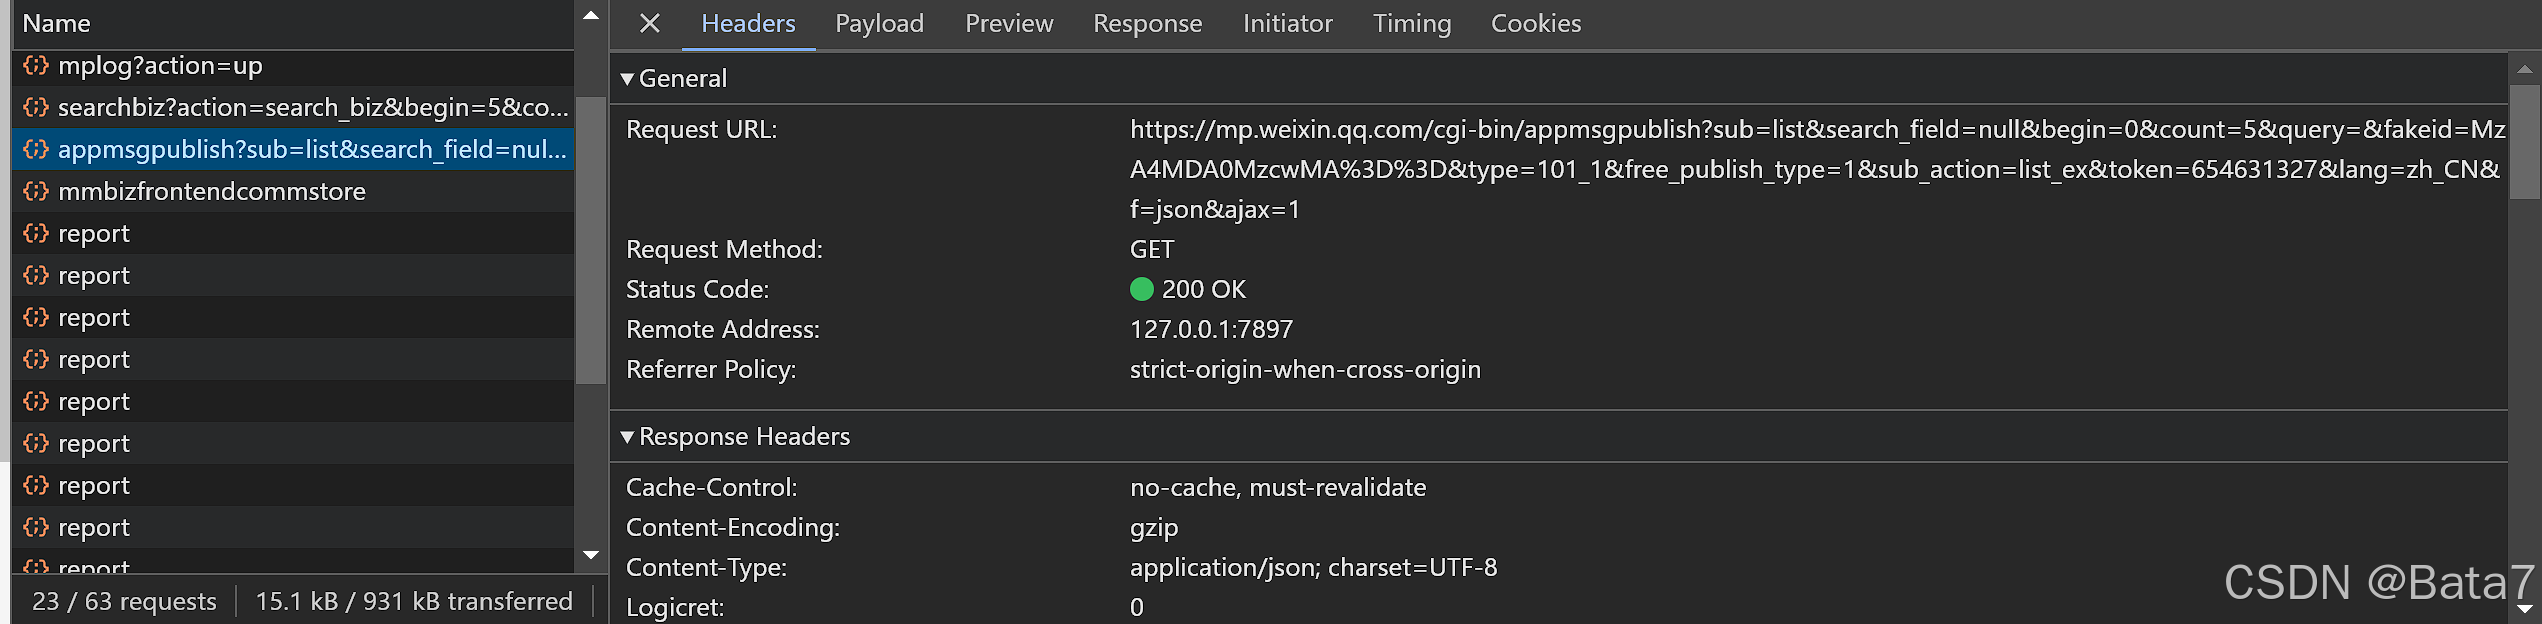
从Header处我们可以发现我们需要的url, cookie等header的信息。
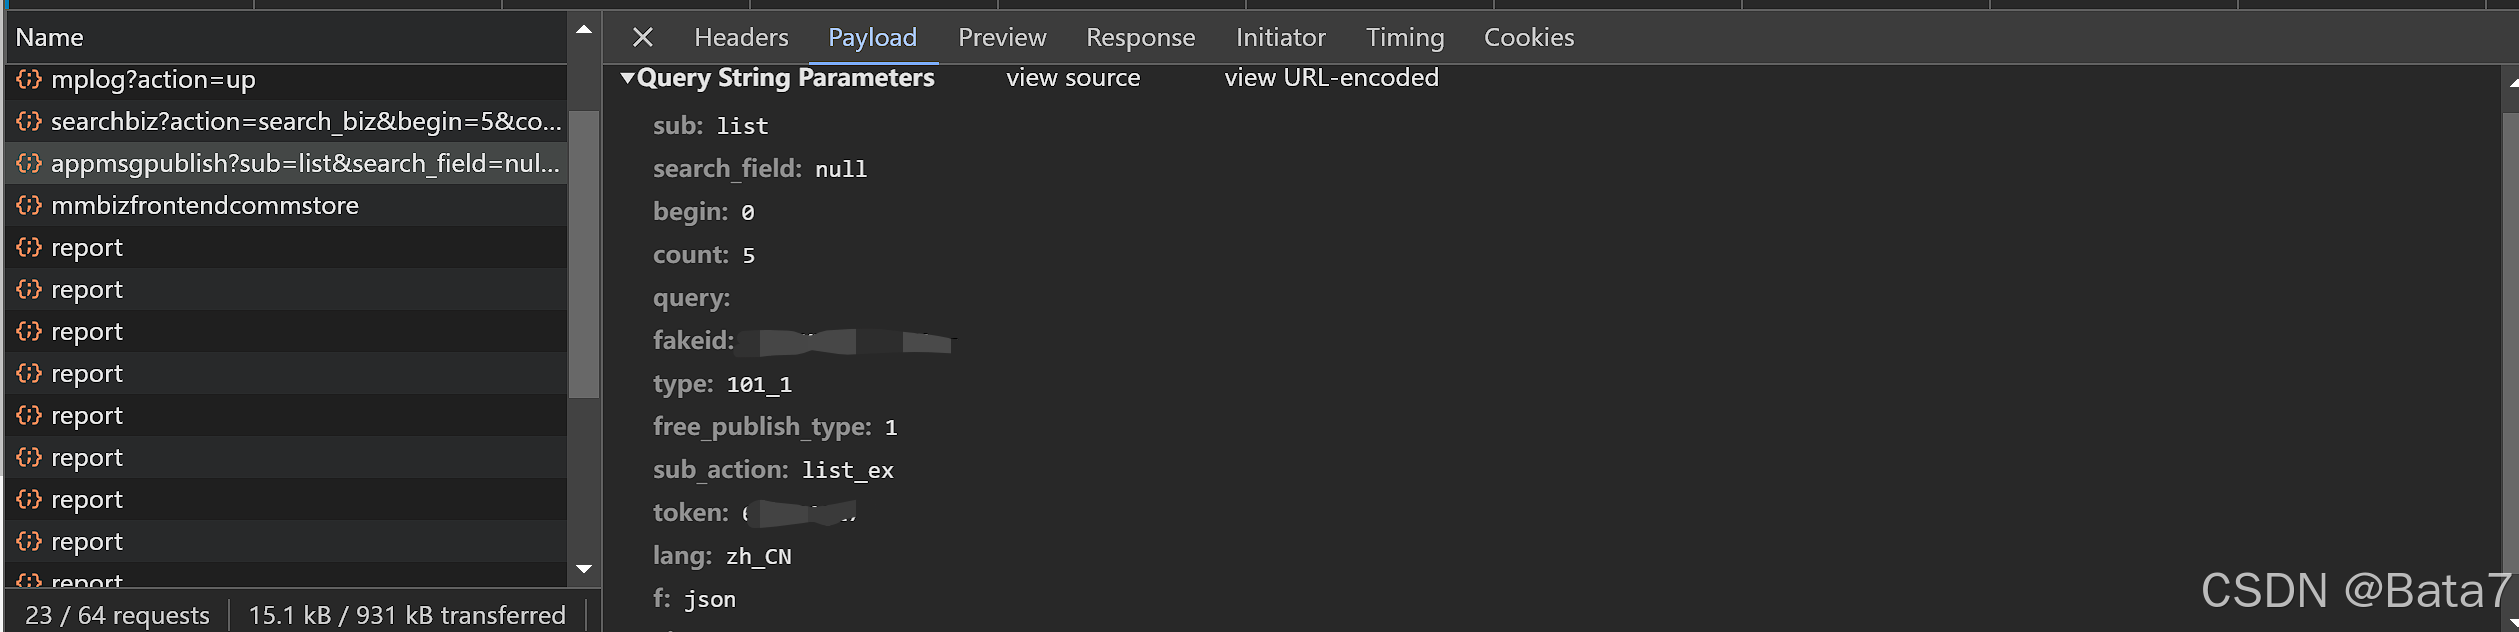
其次,在payload这个词条下面,我们可以找到fakeid(目标账户id), token(自己公众号的id), begin(每页的起始文章index),以及count(每页页数)。
每翻一页,begin的数值增加5
发送请求
for i in range(0, 20):#这里的数量取决于想要多少篇文章 20 = 20篇文章
    i *= 5  # 一页5篇文章
    url = 'https://mp.weixin.qq.com/cgi-bin/appmsgpublish?sub=list&search_field=null&begin={}&count=5&query=&fakeid={}&type=101_1&free_publish_type=1&sub_action=list_ex&token={}&lang=zh_CN&f=json&ajax=1'.format(
                i, fakeid, token) #插入你的信息
    headers = {
                'authority': authority,
                'cookie': cookie,
                'referer': referer,
                'user-agent': user-agent
            }
    res = requests.get(url=url, headers=headers).json()#发送请求
获取信息
得到request结果后,我们通过字典键值对的取值,列表的取值等操作,把需要的信息取出
res = res['publish_page']
res = json.loads(res)
for k in res['publish_list']:# 该页上每一个文章的信息都存在一个单独的列表的元素里
    k = k['publish_info']
    k = json.loads(k)
    k = k['appmsgex'][0]
处理信息
title = k['title']  # 获取标题
timeStamp = k['update_time']  # 获取更新时间
dateArray = datetime.datetime.fromtimestamp(timeStamp)
time = dateArray.strftime('%Y-%m-%d %H:%M:%S')
href = k['link']  # 获得url
dic = {
        'Title': title,
        'Time': time,
        'Link': href
      }
if dic not in result:#把所有结果放到一个列表里
    result.append(dic)
    print(dic)
储存信息
创建一个表格,储存所有获取的url
df = pd.DataFrame(result)
df.to_excel('Article Summary.xlsx', index=False)
第一部分总结
# coding=gbk
# -*- coding:uft-8 -*-
import json
import requests
import datetime
from time import sleep
import pandas as pd
import os
import openpyxl
def main():
# Range depends on the number of pages(e.g. 30 Pages = 0-30)
for i in range(0, 20):
print('Page {}>>>'.format(i + 1))
try:
i *= 5 # Every page there are 5 articles
url = 'https://mp.weixin.qq.com/cgi-bin/appmsgpublish?sub=list&search_field=null&begin={}&count=5&query=&fakeid={}&type=101_1&free_publish_type=1&sub_action=list_ex&token={}&lang=zh_CN&f=json&ajax=1'.format(
i, fakeid, token)
headers = {
'authority': 'mp.weixin.qq.com',
'cookie': cookie,
'referer': 'https://mp.weixin.qq.com/cgi-bin/appmsg?t=media/appmsg_edit_v2&action=edit&isNew=1&type=77&createType=0&token=654631327&lang=zh_CN×tamp=1738059718845',
'user-agent': 'Mozilla/5.0 (Windows NT 10.0; Win64; x64) AppleWebKit/537.36 (KHTML, like Gecko) Chrome/132.0.0.0 Safari/537.36'
}
# 2025/01/29 title+link+updatetime current path publish_page -> publish_list[index] index=0-4-> publish_info -> appmsgex[0]
res = requests.get(url=url, headers=headers).json()
res = res['publish_page']
res = json.loads(res)
for k in res['publish_list']:
k = k['publish_info']
k = json.loads(k)
k = k['appmsgex'][0]
title = k['title'] # Get title
timeStamp = k['update_time'] # Get updatetime
dateArray = datetime.datetime.fromtimestamp(timeStamp) # Convert timeStamp into proper time pattern
time = dateArray.strftime('%Y-%m-%d %H:%M:%S') # Year-month-day, hour-minute-second
href = k['link'] # Get link
dic = {
'Title': title,
'Time': time,
'Link': href
}
# Put dic into a list
if dic not in result:
result.append(dic)
print(dic)
except:
print('error')
break
finally:
if not res['publish_list']:
break
sleep(2)
if __name__ == '__main__':
start = 1
# fakeid, token are in payload; cookie is in header
# update your cookie
fakeid = '' # target account id
token = '' # Your account id
cookie = ''
file = 'Account Summery.xlsx'
result = []
main()
# Create the summary of articles
df = pd.DataFrame(result)
df.to_excel('Article Summary.xlsx', index=False)
2. 利用Chrome自动化,打印文章的PDF
本来思路是找到公众号文章的接口,然后直接把文章爬下来。结果观察了数据结构后发现,很难通过寻找tag来找到文本内容。于是我想了一条曲线救国的道路,用pdf来保存所有文本,再转化成文本文件。
设置打印机
#创建自动打印机
chrome_options = webdriver.ChromeOptions()
# 打印机设置
settings = {"recentDestinations": [{"id": "Save as PDF",
                                    "origin": "local",
                                    "account": ""
                                    }],
            "selectedDestinationId": "Save as PDF",
            "version": 2,
            "isHeaderFooterEnabled": True,
            "isLandscapeEnabled": False,  # landscape横向,portrait纵向,默认是纵向
            "isCssBackgroundEnabled": True,
            "mediaSize": {"height_microns": 297000,
                          "name": "ISO_A4",
                          "width_microns": 210000,
                          "custom_display_name": "A4 210 x 297 mm"
                          },
            }
打印机主函数
def web_print_save_pdf(url, filename):
    driver = webdriver.Chrome(service=Service(ChromeDriverManager().install()), options=chrome_options)
    driver.get(url)
    driver.maximize_window()
    time.sleep(3)
    driver.execute_script('document.title="{}";window.print();'.format(
        filename))
    driver.close()
客制化设定
df = pd.read_excel('Article Summary.xlsx') #读取第一部分保存的文章信息
urls = df.iloc[:, 2] # 获取链接
count = 1
for url in urls:
    print('Processing {}'.format(count))
    web_print_save_pdf(url, 'file_{}'.format(count)) # pdf文件命名
    count += 1
print('Finished')
第二部分总结
import time, json
from selenium import webdriver
from selenium.webdriver.chrome.service import Service
from webdriver_manager.chrome import ChromeDriverManager
import pandas as pd

path = r'D:\WechatAI\WebContent\PDF'  # Path of PDF saved

# chrome option,call the printer,and save as pdf
chrome_options = webdriver.ChromeOptions()
# Printer Setting
settings = {"recentDestinations": [{"id": "Save as PDF",
                                    "origin": "local",
                                    "account": ""
                                    }],
            "selectedDestinationId": "Save as PDF",
            "version": 2,
            "isHeaderFooterEnabled": True,
            "isLandscapeEnabled": False,  # landscape=horizontal,portrait=vertical,default=portrait
            "isCssBackgroundEnabled": True,
            "mediaSize": {"height_microns": 297000,
                          "name": "ISO_A4",
                          "width_microns": 210000,
                          "custom_display_name": "A4 210 x 297 mm"
                          },
            }

#chrome_options.add_argument('--headless') # headless = window invisible
chrome_options.add_argument('--enable-print-browser')
chrome_options.add_argument('--kiosk-printing')  # silent printing, user does not need to press the printing bottom

prefs = {'printing.print_preview_sticky_settings.appState': json.dumps(settings),
         'savefile.default_directory': path  # saving path
         }
chrome_options.add_experimental_option('prefs', prefs)


#  Print function
def web_print_save_pdf(url, filename):
    driver = webdriver.Chrome(service=Service(ChromeDriverManager().install()), options=chrome_options)

    driver.get(url)
    driver.maximize_window()
    time.sleep(3)
    driver.execute_script('document.title="{}";window.print();'.format(
        filename))  # file name
    driver.close()


# Call the function
df = pd.read_excel('Article Summary.xlsx')
urls = df.iloc[:, 2] # read the link column
count = 1
for url in urls:
    print('Processing {}'.format(count))
    web_print_save_pdf(url, 'file_{}'.format(count))
    count += 1
print('Finished')
3. 将文章的PDF转化为Word
from pdf2docx import parse


for i in range(100):
    print('Converting file_{}'.format(i+1))
    # pdf doc
    pdf_document = "D:/WechatAI/WebContent/PDF/file_{}.pdf".format(i+1)#载入文件,修改路径!
    # word doc
    output_word = "D:/WechatAI/WebContent/Word/file_{}.docx".format(i+1)#导出word文件路径
    parse(pdf_document, output_word)#进行转化

print('Finish Converting')
4. Word内容文字提取
from docx import Document

# Load word
for i in range(100):
    document = Document("D:/WechatAI/WebContent/Word/file_{}.docx".format(i+1)) #导入word文件
    # Get the text from doc
    document_text = []#获取word文件内纯文字内容
    for paragraph in document.paragraphs:
        document_text.append(paragraph.text)
    print("Processing file_{}".format(i+1))
    # 保存为txt文档
    with open("D:/WechatAI/WebContent/TXT/file_{}.txt".format(i+1), "w", encoding="utf-8") as file:
        file.write("\n".join(document_text))

print("Finished")
最后的话
以上就是本项目的全部内容了。爬虫其实就是一件见招拆招的事情,只要网页有人维护,有人更新,爬虫代码多多少少一定会改变一点。因此,看爬虫代码,更多是看思路,而不是全盘照搬。若有读者在未来发现代码跑不了,在下面留言,我会尽量更新代码进行维护。各位大佬请多多指点,大家多多讨论。

火山引擎开发者社区是火山引擎打造的AI技术生态平台,聚焦Agent与大模型开发,提供豆包系列模型(图像/视频/视觉)、智能分析与会话工具,并配套评测集、动手实验室及行业案例库。社区通过技术沙龙、挑战赛等活动促进开发者成长,新用户可领50万Tokens权益,助力构建智能应用。
更多推荐
 34
34 0
0- 0


 已为社区贡献2条内容

所有评论(0)