centos7安装elasticSearch
1、更新系统包: sudo yum update -y
2、安装 Java:sudo yum install java-1.8.0-openjdk -y
3、验证 Java 安装:java -version
4、创建 es 用户:sudo useradd es
5、添加用户密码: sudo passwd es
6、创建 Elasticsearch 安装目录:
sudo mkdir -p /opt/elasticsearch
sudo chown -R es:es /opt/elasticsearch
7、设置es用户的权限和root一样:visudo
es ALL=(ALL) ALL

8、切换到 es 用户:sudo su - es
9、下载 Elasticsearch 7.6.1: wget https://artifacts.elastic.co/downloads/elasticsearch/elasticsearch-7.6.1-linux-x86_64.tar.gz
10、解压文件:tar -xzf elasticsearch-7.6.1-linux-x86_64.tar.gz -C /opt/elasticsearch --strip-components=1
11、返回 root 用户:exit
12、编辑 /etc/security/limits.conf 文件:sudo nano /etc/security/limits.conf
13、添加以下行:
* soft nofile 65535
* hard nofile 65535
es soft nofile 65535
es hard nofile 65535
es soft nproc 65535
es hard nproc 65535
14、保存并退出:
按 Ctrl+X,然后按 Y 确认保存,最后按 Enter 退出。
15、编辑 /etc/security/limits.d/20-nproc.conf 文件:
sudo nano /etc/security/limits.d/20-nproc.conf
16、修改或添加以下行:
*          soft    nproc     4096
*          hard    nproc     4096
root       soft    nproc     unlimited
root       hard    nproc     unlimited
es         soft    nofile    65535
es         hard    nofile    65535
17、保存并退出:
按 Ctrl+X,然后按 Y 确认保存,最后按 Enter 退出。
18、编辑 /etc/sysctl.conf 文件: sudo nano /etc/sysctl.conf
19、添加以下行:vm.max_map_count=262144
20、保存并退出: 按 Ctrl+X,然后按 Y 确认保存,最后按 Enter 退出。
21、应用更改: sudo sysctl -p
22、验证更改:sysctl vm.max_map_count
23、编辑 elasticsearch.yml 文件: sudo nano /opt/elasticsearch/config/elasticsearch.yml
24、配置基本设置:
cluster.name: my-application
node.name: node-1
path.data: /opt/elasticsearch/data
path.logs: /opt/elasticsearch/logs
network.host: 0.0.0.0
http.port: 9200
discovery.seed_hosts: ["127.0.0.1"]
cluster.initial_master_nodes: ["node-1"]
25、重启:reboot
26、切换:su es
27、验证配置:ulimit -n、 ulimit -u

28、进入: cd /opt/elasticsearch/
29、启动:nohup bin/elasticsearch 2>&1 &
30、查看日志: tail -f nohup.out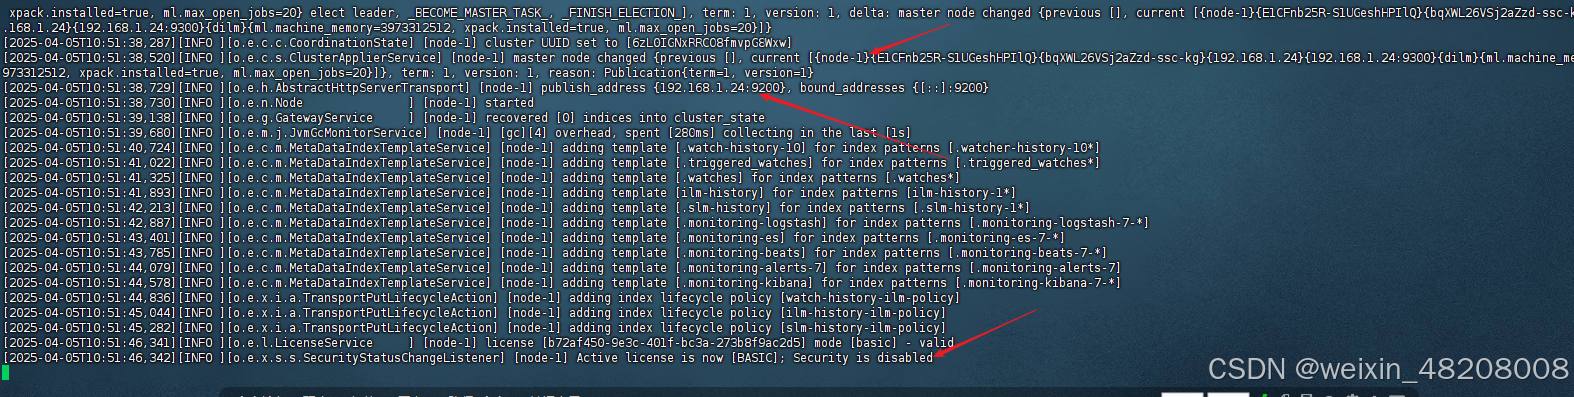
31、查看进程: ps -ef | grep elasticsearch
32、打开新的窗口进入root用户关闭防火墙:
sudo systemctl status firewalld
sudo systemctl stop firewalld
33、访问地址:http://192.168.1.24:9200/?pretty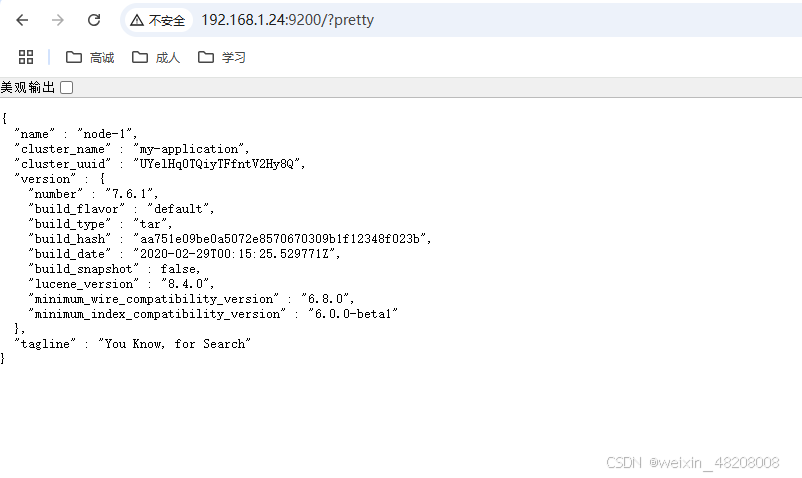
搭建elasticSearch集群
1、准备三台服务器第一台安装上面的单台搭建步骤,二三台安装下面的步骤执行:
2、更新系统包: sudo yum update -y
3、安装 Java:sudo yum install java-1.8.0-openjdk -y
4、验证 Java 安装:java -version
5、创建 es 用户:sudo useradd es
6、添加用户密码: sudo passwd es
7、创建 Elasticsearch 安装目录:
sudo mkdir -p /opt
sudo chown -R es:es /opt/elasticsearch
8、设置es用户的权限和root一样:visudo
es ALL=(ALL) ALL
9、切换到 es 用户:sudo su - es
10、下载 Elasticsearch 7.6.1: wget https://artifacts.elastic.co/downloads/elasticsearch/elasticsearch-7.6.1-linux-x86_64.tar.gz
11、解压文件:tar -xzf elasticsearch-7.6.1-linux-x86_64.tar.gz -C /opt/elasticsearch --strip-components=1
12、返回 root 用户:exit
13、编辑 /etc/security/limits.conf 文件:sudo nano /etc/security/limits.conf
14、添加以下行:
* soft nofile 65535
* hard nofile 65535
es soft nofile 65535
es hard nofile 65535
es soft nproc 65535
es hard nproc 65535
15、保存并退出:
按 Ctrl+X,然后按 Y 确认保存,最后按 Enter 退出。
16、编辑 /etc/security/limits.d/20-nproc.conf 文件:
sudo nano /etc/security/limits.d/20-nproc.conf
17、修改或添加以下行:
*          soft    nproc     4096
*          hard    nproc     4096
root       soft    nproc     unlimited
root       hard    nproc     unlimited
es         soft    nofile    65535
es         hard    nofile    65535
18、保存并退出:
按 Ctrl+X,然后按 Y 确认保存,最后按 Enter 退出。
19、编辑 /etc/sysctl.conf 文件: sudo nano /etc/sysctl.conf
20、添加以下行:vm.max_map_count=262144
21、保存并退出: 按 Ctrl+X,然后按 Y 确认保存,最后按 Enter 退出。
22、应用更改: sudo sysctl -p
23、验证更改:sysctl vm.max_map_count
24、当第一台机器启动好了以后到opt目录执行一下命令,将第一台的包发送给第二台、第三台
scp -r elasticsearch/ root@192.168.1.25:/opt
scp -r elasticsearch/ root@192.168.1.26:/opt
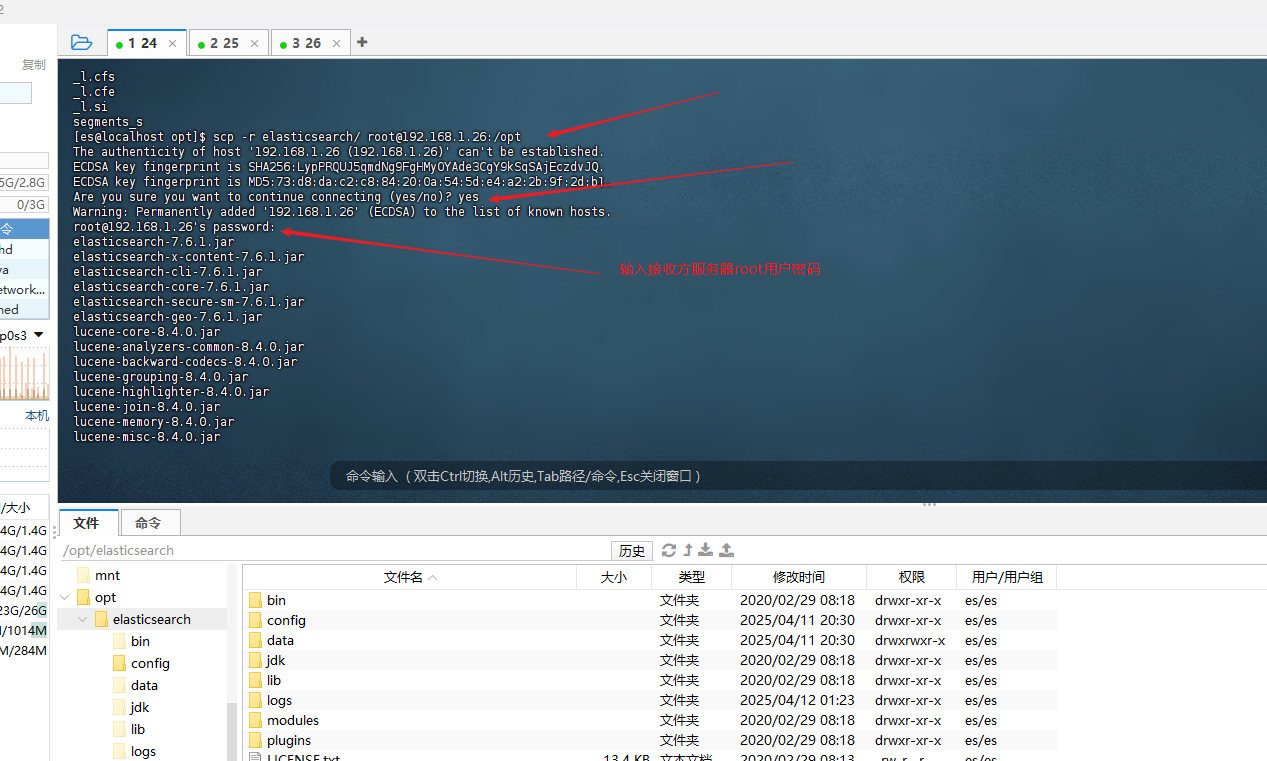
25、到第二、第三台在root用户下执行授权:sudo chown -R es:es /opt/elasticsearch
26、重启:reboot
27、切换:su es
28、验证配置:ulimit -n、 ulimit -u
29、进入: cd /opt/elasticsearch/
30、这里要配置第一台、第二台、第三台的elasticsearch.yml文件
第一台
cluster.name: my-application
node.name: node-1
path.data: /opt/elasticsearch/data
path.logs: /opt/elasticsearch/logs
network.host: 0.0.0.0
http.port: 9200
discovery.seed_hosts: ["192.168.1.24","192.168.1.25","192.168.1.26"]
cluster.initial_master_nodes: ["node-1","node-2","node-3"]
第二台
cluster.name: my-application
node.name: node-2
path.data: /opt/elasticsearch/data
path.logs: /opt/elasticsearch/logs
network.host: 0.0.0.0
http.port: 9200
discovery.seed_hosts: ["192.168.1.24","192.168.1.25","192.168.1.26"]
cluster.initial_master_nodes: ["node-1","node-2","node-3"]
第三台
cluster.name: my-application
node.name: node-3
path.data: /opt/elasticsearch/data
path.logs: /opt/elasticsearch/logs
network.host: 0.0.0.0
http.port: 9200
discovery.seed_hosts: ["192.168.1.24","192.168.1.25","192.168.1.26"]
cluster.initial_master_nodes: ["node-1","node-2","node-3"]
31、重启第一台服务器:
 ps -ef | grep elasticsearch
 kill 10431
 nohup bin/elasticsearch 2>&1 &
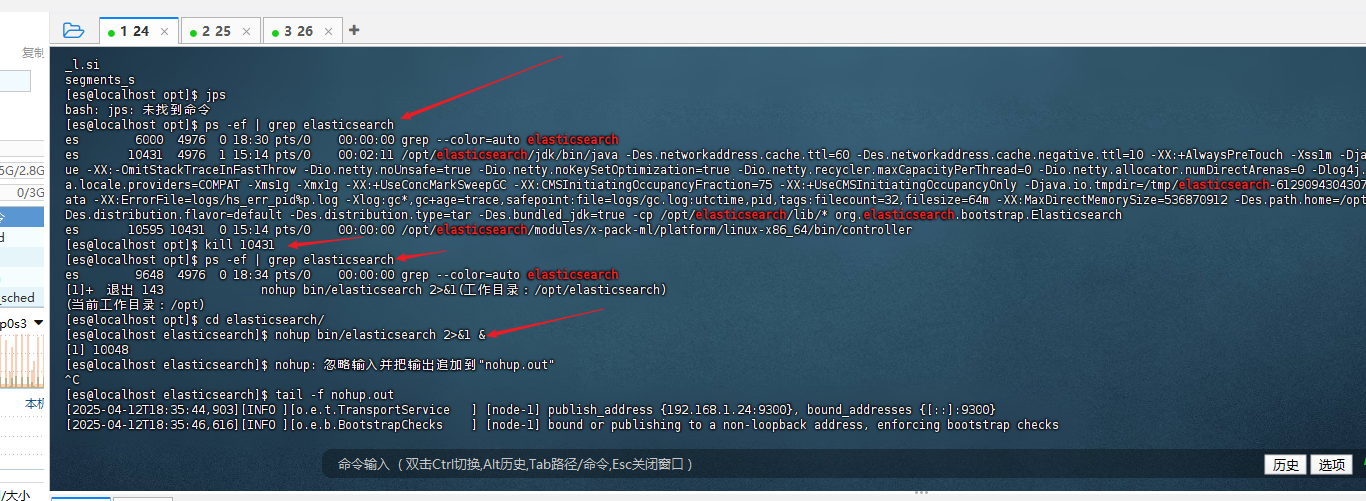
30、启动二、三台服务:nohup bin/elasticsearch 2>&1 &
31、查看日志: tail -f nohup.out
32、查看进程: ps -ef | grep elasticsearch
33、打开新的窗口进入root用户关闭防火墙:
sudo systemctl status firewalld
sudo systemctl stop firewalld
34、访问地址:http://192.168.1.24:9200/?pretty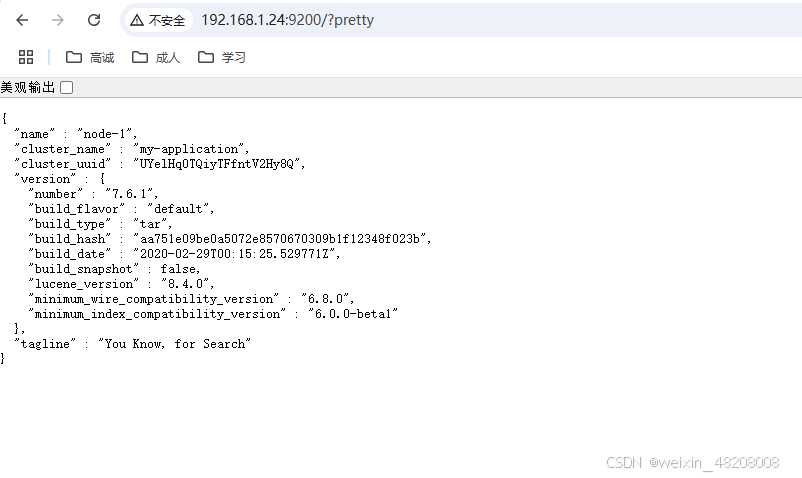

中国智能体开发者社区,聚焦智能体与大模型开发,提供前沿资讯、实用工具链、开源项目及行业案例。通过技术沙龙、开发者大赛等活动,促进经验交流与协作,助力开发者快速构建创新智能应用。
更多推荐

 6
6 0
0- 0


 已为社区贡献1条内容

所有评论(0)