DeepSeek-R1本地微调指南(unsloth)
·
1. 环境配置
(1)Pytorch
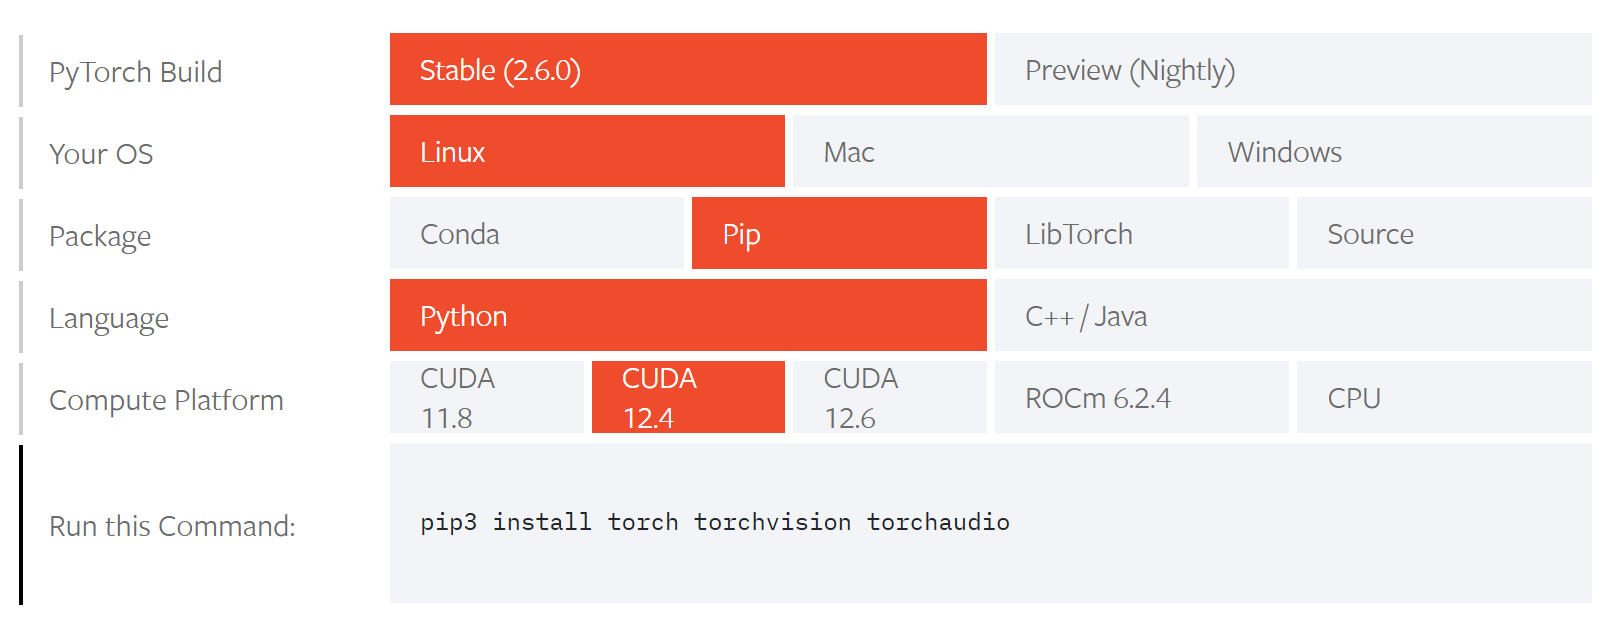
复制指令
pip3 install torch torchvision torchaudio
(2)unsloth
pip install unsloth==2025.3.19
(3)更新transformers
可能会遇到transformers版本问题,如果遇到请更新版本到4.50.1。没有请忽略
pip install transformers==4.50.1(4)jupyter
pip install jupyter如果是在远程服务器上配置,请按照一下配置。
1. 安装ipykernel
conda install ipykernel

2. 生成 Jupyter Notebook 的配置文件:
jupyter notebook --generate-config

3. 设置密码,以便远程访问时使用
jupyter notebook password

4. 输入的密码会保存到 .jupyter/jupyter_notebook_config.json 文件中。此外,需要在 jupyter_notebook_config.py 文件中设置允许所有 IP 访问的权限,并关闭自动打开浏览器的选项,还要指定一个端口,例如 8888:

(1)打开jupyter_notebook_config.py
    nano jupyter_notebook_config.py

(2)写入一下内容
    c.NotebookApp.ip = '*' # 允许所有ip访问
    c.NotebookApp.open_browser = False # 不打开浏览器
    c.NotebookApp.port = 8888 # 端口为8888
(5)Wandb(可以不安装)
pip install wandb2. 下载模型
(1)新建一个文件夹,如DS
(2)从魔搭上下载预训练模型
本文下载的是:DeepSeek-R1-Distill-Llama-8B
下载地址:DeepSeek-R1-Distill-Llama-8B · 模型库
或者执行指令:
modelscope download --model unsloth/DeepSeek-R1-Distill-Llama-8B --local_dir ./
3. 数据集准备
下载地址:medical-o1-reasoning-SFT · 数据集
或者执行指令:
modelscope download --dataset AI-ModelScope/medical-o1-reasoning-SFT --local_dir ./
4. Wandb配置(可选)
参考官方文档完成配置即可
W&B Quickstart | Weights & Biases Documentation
5. 开始微调
(1)打开jupyter
jupyter notebook --no-browser --port=8888 --ip=0.0.0.0
(2)添加jupyter环境
python -m ipykernel install --user --name=内核真名 --display-name 在内核选择时显示的内核假名(3)打开对应的jupyter文件,执行即可
(4)jupyter文件内容
#cell 1

"""
Fine-tuning DeepSeek-R1-8B 模型,基于xx数据进行微调,使用 Unsloth 和 WandB 进行训练和监控。
"""

import os
import torch
import wandb
from unsloth import FastLanguageModel, is_bfloat16_supported
from datasets import load_dataset
from transformers import TrainingArguments
from trl import SFTTrainer
from tqdm import tqdm

# ===========================
# 1. 配置参数
# ===========================
MODEL_PATH = "/……/DS" # 修改为本地模型路径
DATASET_PATH = "/……"  # 本地数据集路径
NEW_MODEL_LOCAL = "/……"  # 训练后模型保存路径
WANDB_PROJECT = "xxxx"  # WandB 项目名称
WANDB_KEY = "……"  # WandB API Key
# 示例问题
test_question = "……"

MAX_SEQ_LENGTH = 2048  # 最大序列长度
LOAD_IN_4BIT = True  # 是否使用 8bit 量化加载模型
DTYPE = None  # 自动检测数据类型


# ===========================
# 3. 初始化 WandB 进行日志监控
# ===========================

def init_wandb():
    """初始化 WandB 进行实验追踪"""
    wandb.login(key=WANDB_KEY)
    run = wandb.init(
        project=WANDB_PROJECT,
        job_type="training",
        anonymous="allow"
    )
    return run


def infer_before_training(model, tokenizer, question):
    """在微调前测试模型推理能力"""
    prompt_style = """Below is an instruction that describes a task, paired with an input that provides further context.
    Write a response that appropriately completes the request.
    Before answering, think carefully about the question and create a step-by-step chain of thoughts to ensure a logical and accurate response.

    #(可以修改)
    ### Instruction:
    You are a medical expert with advanced knowledge in clinical reasoning, diagnostics, and treatment planning.
    Please answer the following medical question.

    ### Question:
    {}

    ### Response:
    <think>{}"""

    FastLanguageModel.for_inference(model)  # 启用推理模式,提高推理速度
    inputs = tokenizer([prompt_style.format(question, "")], return_tensors="pt").to("cuda")

    # 使用 tqdm 显示进度条
    output_tokens = []
    for token in tqdm(model.generate(input_ids=inputs.input_ids, attention_mask=inputs.attention_mask,
                                     max_new_tokens=1200, use_cache=True), desc="Generating Response"):
        output_tokens.append(token)

    # 解码生成的输出
    response = tokenizer.batch_decode(output_tokens)

    return response[0].split("### Response:")[1]
#cell 2
# 2. 初始化wandb
wandb_run = init_wandb()#cell 3
# 3. 加载模型和 Tokenizer
# ===========================
print("正在加载模型...")
# 使用 tqdm 显示加载模型的进度
model, tokenizer = FastLanguageModel.from_pretrained(
model_name=MODEL_PATH, # 确保是正确的本地路径
max_seq_length=MAX_SEQ_LENGTH,
dtype=DTYPE,
load_in_4bit=LOAD_IN_4BIT
)
#cell 4

# 4. 配置 LoRA 适配层进行微调
# ===========================

print("正在配置 LoRA 进行模型微调...")

model = FastLanguageModel.get_peft_model(
    model,
    r=16,  # LoRA 低秩矩阵的秩
    target_modules=[
        "q_proj", "k_proj", "v_proj", "o_proj",
        "gate_proj", "up_proj", "down_proj",
    ],
    lora_alpha=16,
    lora_dropout=0,
    bias="none",
    use_gradient_checkpointing="unsloth",  # 用于支持长序列训练
    random_state=3407,
    use_rslora=False,
    loftq_config=None,
)
#cell 5
# 5. 加载和预处理数据集
# ===========================
print("正在加载和预处理数据集...")
EOS_TOKEN = tokenizer.eos_token # 需要添加 EOS 终止符
def format_dataset(examples):
"""格式化数据集,使其符合训练格式"""
texts = [
f"### Question:\n{q}\n\n### Response:\n<think>\n{cot}\n</think>\n{ans}{EOS_TOKEN}"
for q, cot, ans in zip(examples["Question"], examples["Complex_CoT"], examples["Response"])
]
return {"text": texts}
# 注意一个文件夹内只能放一个数据集
dataset = load_dataset(DATASET_PATH, "default", split="train[0:500]") # 加载本地数据集
dataset = dataset.map(format_dataset, batched=True)
print("数据示例:")
print(dataset["text"][0])#cell 6
# 6. 配置训练参数并进行训练
# ===========================
print("正在配置训练参数...")
# 打印模型所在的设备
print(f"模型的设备:{next(model.parameters()).device}")
trainer = SFTTrainer(
model=model,
tokenizer=tokenizer,
train_dataset=dataset,
dataset_text_field="text",
max_seq_length=MAX_SEQ_LENGTH,
dataset_num_proc=2,
args=TrainingArguments(
per_device_train_batch_size=2,
gradient_accumulation_steps=4,
warmup_steps=5,
max_steps=60, # 训练步数
learning_rate=2e-4,
fp16=not is_bfloat16_supported(),
bf16=is_bfloat16_supported(),
logging_steps=10,
optim="adamw_8bit",
weight_decay=0.01,
lr_scheduler_type="linear",
seed=3407,
output_dir="outputs",
),
)
print("开始训练模型...")
trainer.train()#cell 7
# 7. 训练后推理测试
# ===========================
print("微调后推理测试:")
print(infer_before_training(model, tokenizer, test_question))
#cell 8

# 8. 保存和上传模型
# ===========================

print("正在保存模型...")

model.save_pretrained(NEW_MODEL_LOCAL)  # 本地保存模型
tokenizer.save_pretrained(NEW_MODEL_LOCAL)

# 结束 WandB 记录
wandb.finish()

print("训练完成,模型已保存!")
中国智能体开发者社区,聚焦智能体与大模型开发,提供前沿资讯、实用工具链、开源项目及行业案例。通过技术沙龙、开发者大赛等活动,促进经验交流与协作,助力开发者快速构建创新智能应用。
更多推荐


 3
3 0
0- 0


 已为社区贡献2条内容

所有评论(0)