【RAG全栈课程】Task03:索引构建
·
前言
在检索增强生成(RAG)系统中,索引构建是连接文本分块与高效检索的核心桥梁。如果说数据加载是原料的筛选,文本分块是结构的切割,那么索引构建便是将这些“语义单元”组织成可快速查询、精准匹配的知识图谱。一个设计精良的索引不仅决定了检索的速度与召回率,更直接影响大语言模型(LLM)在推理阶段所能获取的信息质量与相关性。
然而,索引并非简单的向量存储——它涉及嵌入模型的选择、索引结构的设计(如倒排索引、向量索引、图索引等)、维度压缩与量化策略,以及与下游检索任务的对齐优化。忽视这些细节,即便拥有高质量的分块文本,也可能因索引低效而导致“好料难寻”,最终拖累整个RAG系统的响应能力与准确性。
正所谓“巧妇难为无米之炊”,而有了米,还需有高效的炊具与合理的烹饪流程。本章将深入探讨索引构建的关键技术路径、主流实现方案与性能优化策略,帮助你在RAG系统中打造一个既快又准的“知识引擎”,为后续的检索与生成环节提供坚实支撑。
一、向量嵌入
1. 向量嵌入基础
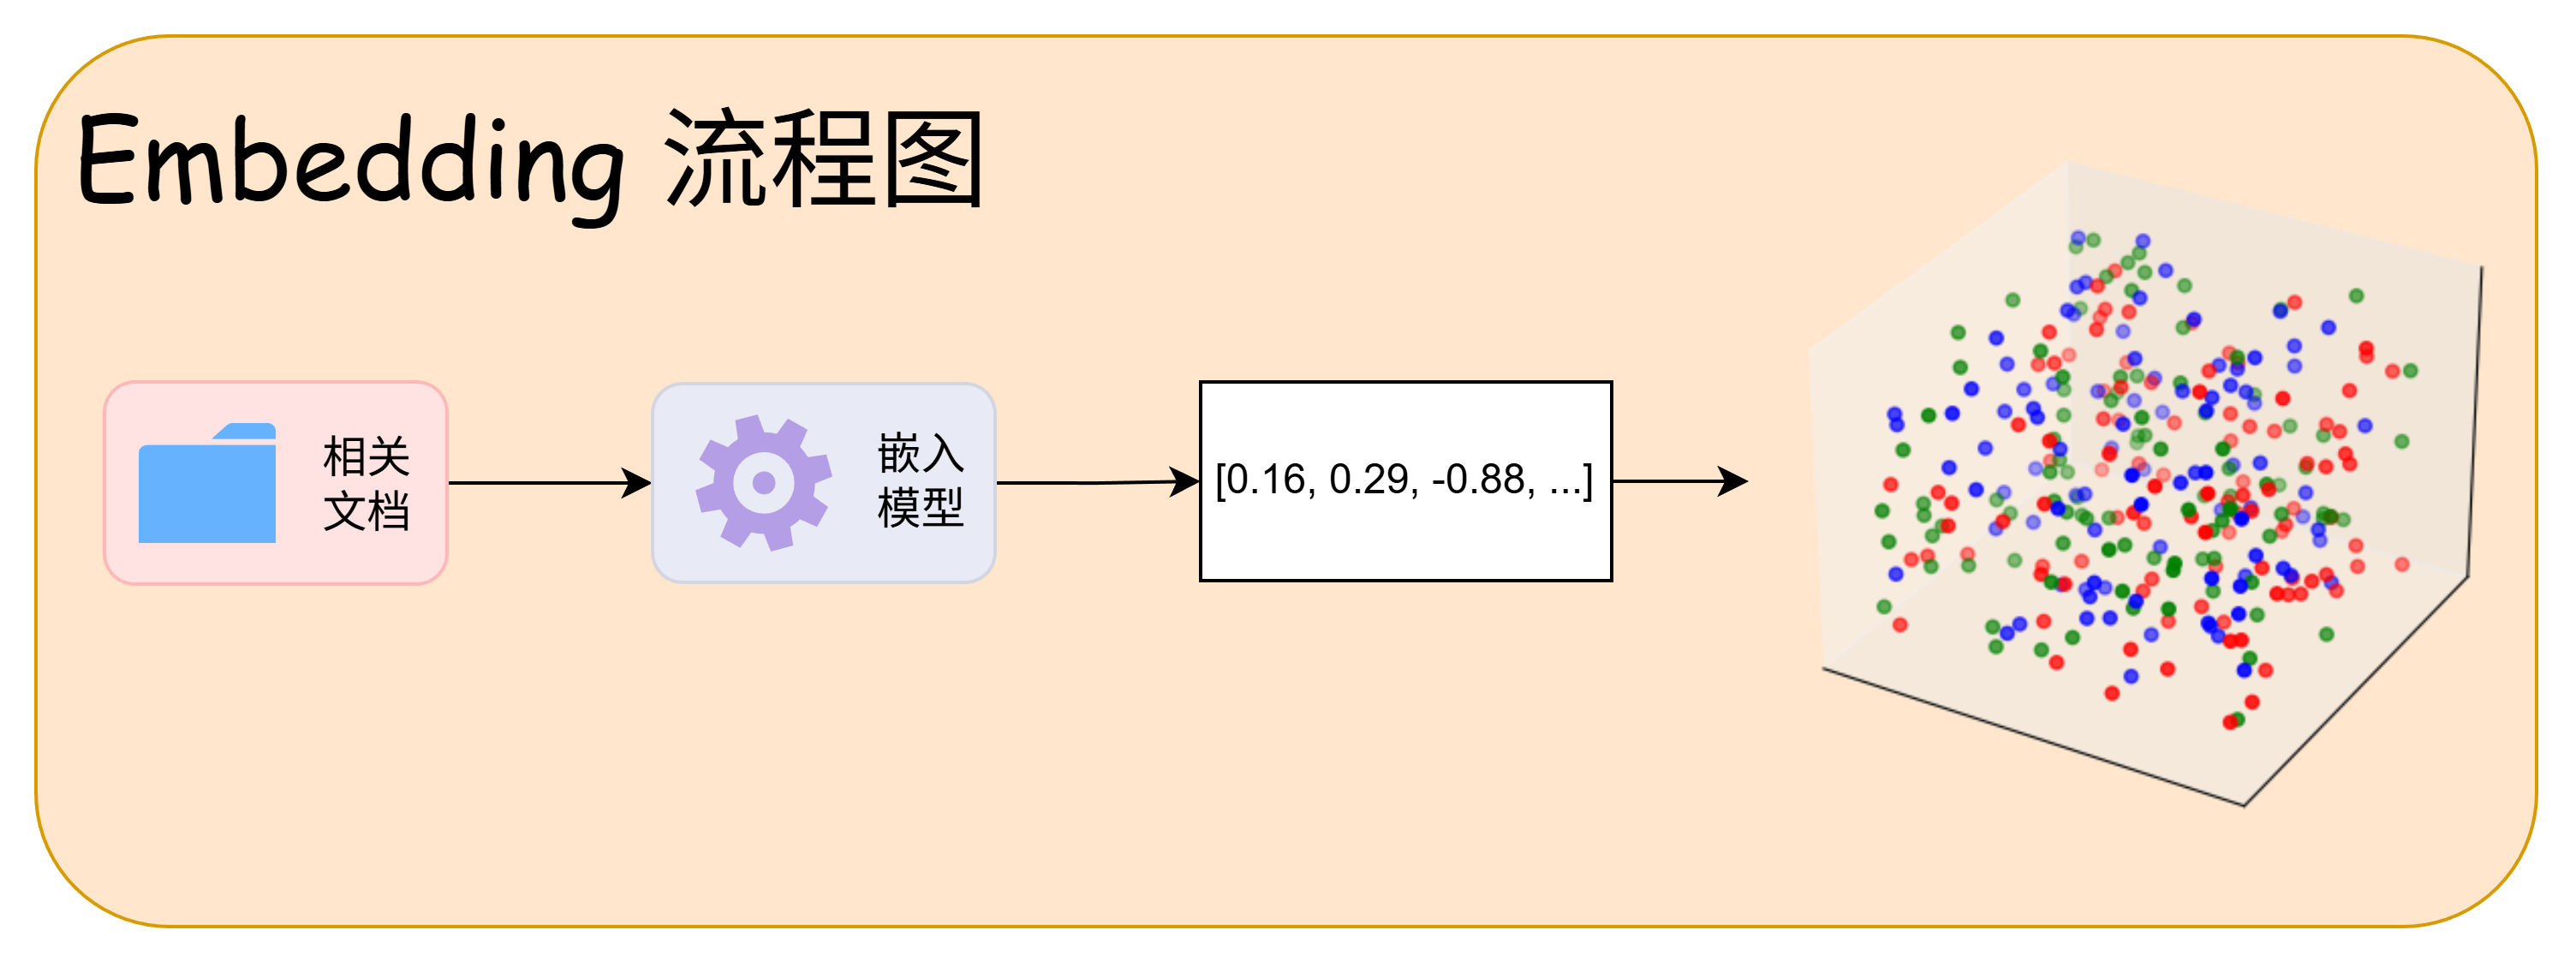
向量嵌入(Embedding)是一种将真实世界中复杂、高维的数据对象(如文本、图像、音频、视频等)转换为数学上易于处理的、低维、稠密的连续数值向量的技术。
2. Embedding 技术发展
3. 嵌入模型训练原理
4. 嵌入模型选型指南
二、多模态嵌入
三、向量数据库
import warnings
warnings.filterwarnings("ignore", message=".*Importing from timm.models.layers.*")

import torch
from visual_bge.visual_bge.modeling import Visualized_BGE

model = Visualized_BGE(
    model_name_bge="../../models/bge-base-en-v1.5",
    model_weight="../../models/bge/Visualized_base_en_v1.5.pth"
)
model.eval()

with torch.no_grad():
    text_emb = model.encode(text="datawhale开源组织的logo")    # blue whale/datawhale开源组织的logo
    img_emb_1 = model.encode(image="../../data/C3/imgs/datawhale01.png")
    multi_emb_1 = model.encode(image="../../data/C3/imgs/datawhale01.png", text="datawhale开源组织的logo")    # blue whale/datawhale开源组织的logo
    img_emb_2 = model.encode(image="../../data/C3/imgs/datawhale02.png")
    multi_emb_2 = model.encode(image="../../data/C3/imgs/datawhale02.png", text="datawhale开源组织的logo")    # blue whale/datawhale开源组织的logo

# 计算相似度
sim_1 = img_emb_1 @ img_emb_2.T # type: ignore
sim_2 = img_emb_1 @ multi_emb_1.T # type: ignore # type: ignore
sim_3 = text_emb @ multi_emb_1.T # type: ignore
sim_4 = multi_emb_1 @ multi_emb_2.T # type: ignore

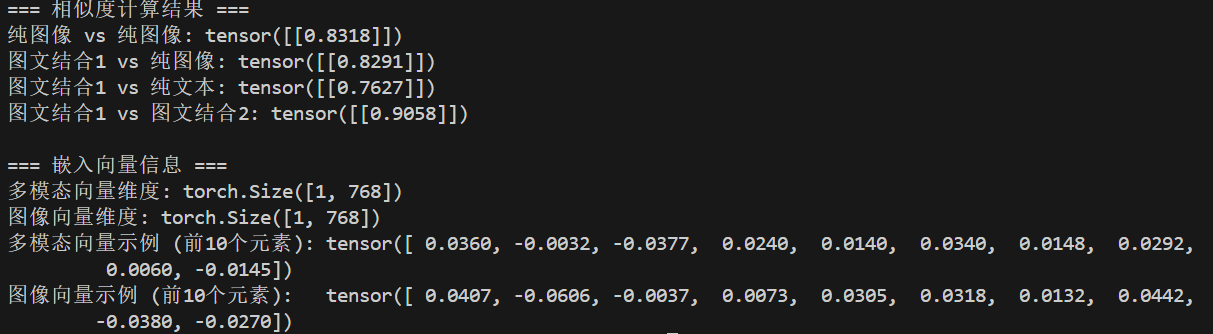
print("=== 相似度计算结果 ===")
print(f"纯图像 vs 纯图像: {sim_1}")
print(f"图文结合1 vs 纯图像: {sim_2}")
print(f"图文结合1 vs 纯文本: {sim_3}")
print(f"图文结合1 vs 图文结合2: {sim_4}")

# 向量信息分析
print("\n=== 嵌入向量信息 ===")
print(f"多模态向量维度: {multi_emb_1.shape}") # type: ignore
print(f"图像向量维度: {img_emb_1.shape}") # type: ignore
print(f"多模态向量示例 (前10个元素): {multi_emb_1[0][:10]}") # type: ignore
print(f"图像向量示例 (前10个元素):   {img_emb_1[0][:10]}") # type: ignore
from langchain_community.vectorstores import FAISS
from langchain_huggingface import HuggingFaceEmbeddings
from langchain_core.documents import Document

# 1. 示例文本和嵌入模型
texts = [
    "张三是法外狂徒",
    "FAISS是一个用于高效相似性搜索和密集向量聚类的库。",
    "LangChain是一个用于开发由语言模型驱动的应用程序的框架。"
]
docs = [Document(page_content=t) for t in texts]

# 使用本地模型路径
embeddings = HuggingFaceEmbeddings(model_name="../../models/bge-small-zh-v1.5")

# 2. 创建向量存储并保存到本地
vectorstore = FAISS.from_documents(docs, embeddings)

local_faiss_path = "./faiss_index_store"
vectorstore.save_local(local_faiss_path)

print(f"FAISS index has been saved to {local_faiss_path}")

# 3. 加载索引并执行查询
loaded_vectorstore = FAISS.load_local(
    local_faiss_path,
    embeddings,
    allow_dangerous_deserialization=True
)

# 执行相似性搜索
query = "FAISS是做什么的?"
results = loaded_vectorstore.similarity_search(query, k=1)

print(f"\n查询: '{query}'")
print("相似度最高的文档:")
for doc in results:
    print(f"- {doc.page_content}")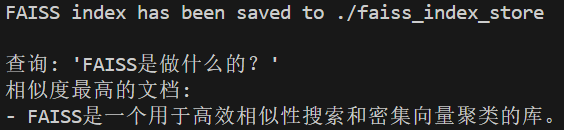
import warnings
warnings.filterwarnings("ignore", message=".*validate_default.*Field.*", category=UserWarning)

from llama_index.core import VectorStoreIndex, Document, Settings
from llama_index.embeddings.huggingface import HuggingFaceEmbedding

# 1. 配置全局嵌入模型
Settings.embed_model = HuggingFaceEmbedding(
    model_name="../../models/bge-small-zh-v1.5",
    device="cpu",
    normalize=True
)

# 2. 创建示例文档
texts = [
    "张三是法外狂徒",
    "LlamaIndex是一个用于构建和查询私有或领域特定数据的框架。",
    "它提供了数据连接、索引和查询接口等工具。"
]
docs = [Document(text=t) for t in texts]

# 3. 创建索引并持久化到本地
index = VectorStoreIndex.from_documents(docs)
persist_path = "./llamaindex_index_store"
index.storage_context.persist(persist_dir=persist_path)
print(f"LlamaIndex 索引已保存至: {persist_path}")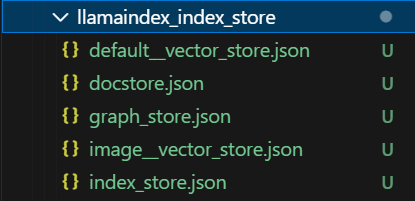
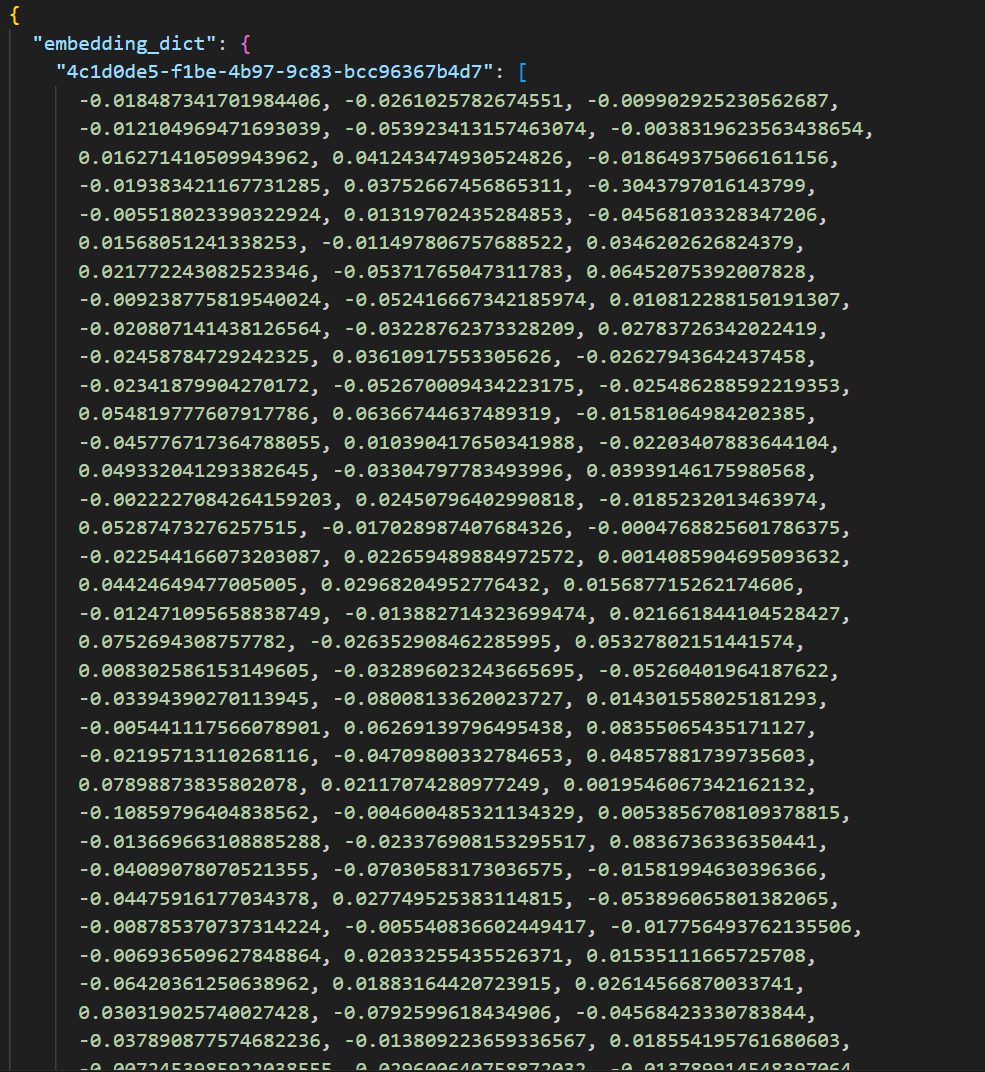
四、Milvus实践
import os
from tqdm import tqdm
from glob import glob
import torch
from visual_bge.visual_bge.modeling import Visualized_BGE
from pymilvus import MilvusClient, FieldSchema, CollectionSchema, DataType
import numpy as np
import cv2
from PIL import Image

# 1. 初始化设置
MODEL_NAME = "../../models/bge-base-en-v1.5"
MODEL_PATH = "../../models/bge/Visualized_base_en_v1.5.pth"
DATA_DIR = "../../data/C3"
COLLECTION_NAME = "multimodal_demo"
MILVUS_URI = "http://localhost:19530"

# 2. 定义工具 (编码器和可视化函数)
class Encoder:
    """编码器类,用于将图像和文本编码为向量。"""
    def __init__(self, model_name: str, model_path: str):
        self.model = Visualized_BGE(model_name_bge=model_name, model_weight=model_path)
        self.model.eval()

    def encode_query(self, image_path: str, text: str) -> list[float]:
        with torch.no_grad():
            query_emb = self.model.encode(image=image_path, text=text)
        return query_emb.tolist()[0] # type: ignore

    def encode_image(self, image_path: str) -> list[float]:
        with torch.no_grad():
            query_emb = self.model.encode(image=image_path)
        return query_emb.tolist()[0] # type: ignore

def visualize_results(query_image_path: str, retrieved_images: list, img_height: int = 300, img_width: int = 300, row_count: int = 3) -> np.ndarray:
    """从检索到的图像列表创建一个全景图用于可视化。"""
    panoramic_width = img_width * row_count
    panoramic_height = img_height * row_count
    panoramic_image = np.full((panoramic_height, panoramic_width, 3), 255, dtype=np.uint8)
    query_display_area = np.full((panoramic_height, img_width, 3), 255, dtype=np.uint8)

    # 处理查询图像
    query_pil = Image.open(query_image_path).convert("RGB")
    query_cv = np.array(query_pil)[:, :, ::-1]
    resized_query = cv2.resize(query_cv, (img_width, img_height))
    bordered_query = cv2.copyMakeBorder(resized_query, 10, 10, 10, 10, cv2.BORDER_CONSTANT, value=(255, 0, 0))
    query_display_area[img_height * (row_count - 1):, :] = cv2.resize(bordered_query, (img_width, img_height))
    cv2.putText(query_display_area, "Query", (10, panoramic_height - 20), cv2.FONT_HERSHEY_SIMPLEX, 1, (255, 0, 0), 2)

    # 处理检索到的图像
    for i, img_path in enumerate(retrieved_images):
        row, col = i // row_count, i % row_count
        start_row, start_col = row * img_height, col * img_width

        retrieved_pil = Image.open(img_path).convert("RGB")
        retrieved_cv = np.array(retrieved_pil)[:, :, ::-1]
        resized_retrieved = cv2.resize(retrieved_cv, (img_width - 4, img_height - 4))
        bordered_retrieved = cv2.copyMakeBorder(resized_retrieved, 2, 2, 2, 2, cv2.BORDER_CONSTANT, value=(0, 0, 0))
        panoramic_image[start_row:start_row + img_height, start_col:start_col + img_width] = bordered_retrieved

        # 添加索引号
        cv2.putText(panoramic_image, str(i), (start_col + 10, start_row + 30), cv2.FONT_HERSHEY_SIMPLEX, 1, (0, 0, 255), 2)

    return np.hstack([query_display_area, panoramic_image])

# 3. 初始化客户端
print("--> 正在初始化编码器和Milvus客户端...")
encoder = Encoder(MODEL_NAME, MODEL_PATH)
milvus_client = MilvusClient(uri=MILVUS_URI)

# 4. 创建 Milvus Collection
print(f"\n--> 正在创建 Collection '{COLLECTION_NAME}'")
if milvus_client.has_collection(COLLECTION_NAME):
    milvus_client.drop_collection(COLLECTION_NAME)
    print(f"已删除已存在的 Collection: '{COLLECTION_NAME}'")

image_list = glob(os.path.join(DATA_DIR, "dragon", "*.png"))
if not image_list:
    raise FileNotFoundError(f"在 {DATA_DIR}/dragon/ 中未找到任何 .png 图像。")
dim = len(encoder.encode_image(image_list[0]))

fields = [
    FieldSchema(name="id", dtype=DataType.INT64, is_primary=True, auto_id=True),
    FieldSchema(name="vector", dtype=DataType.FLOAT_VECTOR, dim=dim),
    FieldSchema(name="image_path", dtype=DataType.VARCHAR, max_length=512),
]

# 创建集合 Schema
schema = CollectionSchema(fields, description="多模态图文检索")
print("Schema 结构:")
print(schema)

# 创建集合
milvus_client.create_collection(collection_name=COLLECTION_NAME, schema=schema)
print(f"成功创建 Collection: '{COLLECTION_NAME}'")
print("Collection 结构:")
print(milvus_client.describe_collection(collection_name=COLLECTION_NAME))

# 5. 准备并插入数据
print(f"\n--> 正在向 '{COLLECTION_NAME}' 插入数据")
data_to_insert = []
for image_path in tqdm(image_list, desc="生成图像嵌入"):
    vector = encoder.encode_image(image_path)
    data_to_insert.append({"vector": vector, "image_path": image_path})

if data_to_insert:
    result = milvus_client.insert(collection_name=COLLECTION_NAME, data=data_to_insert)
    print(f"成功插入 {result['insert_count']} 条数据。")

# 6. 创建索引
print(f"\n--> 正在为 '{COLLECTION_NAME}' 创建索引")
index_params = milvus_client.prepare_index_params()
index_params.add_index(
    field_name="vector",
    index_type="HNSW",
    metric_type="COSINE",
    params={"M": 16, "efConstruction": 256}
)
milvus_client.create_index(collection_name=COLLECTION_NAME, index_params=index_params)
print("成功为向量字段创建 HNSW 索引。")
print("索引详情:")
print(milvus_client.describe_index(collection_name=COLLECTION_NAME, index_name="vector"))
milvus_client.load_collection(collection_name=COLLECTION_NAME)
print("已加载 Collection 到内存中。")

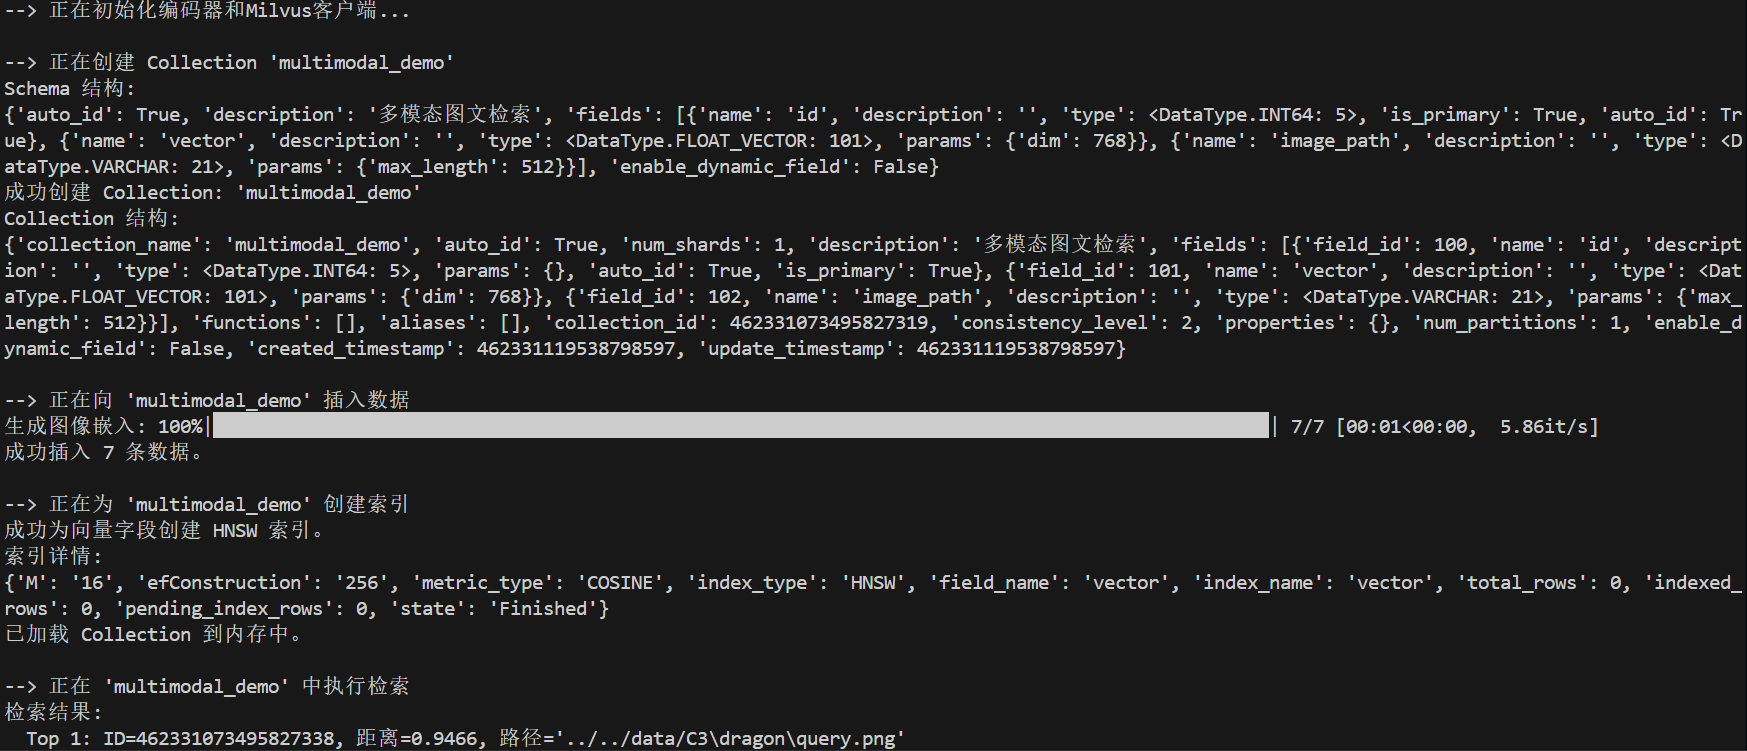
# 7. 执行多模态检索
print(f"\n--> 正在 '{COLLECTION_NAME}' 中执行检索")
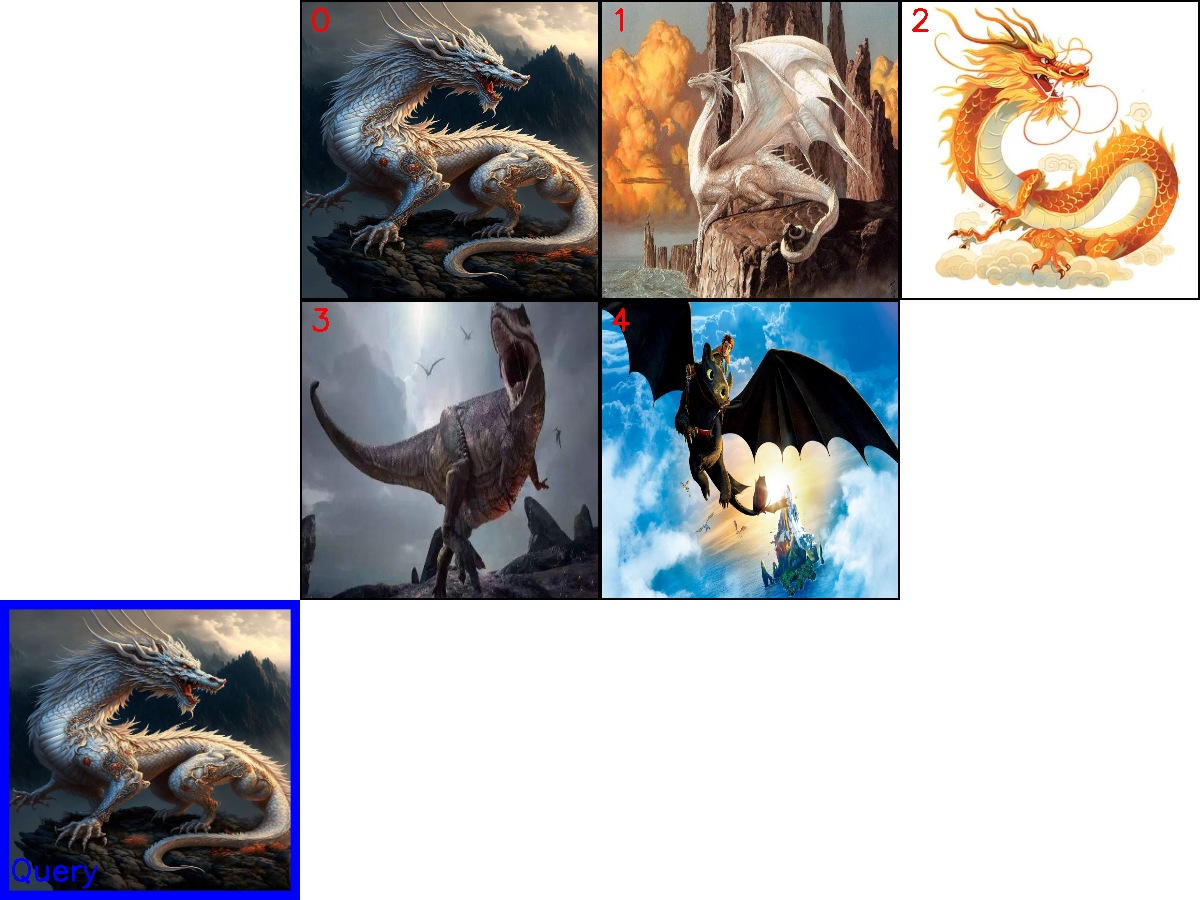
query_image_path = os.path.join(DATA_DIR, "dragon", "query.png")
query_text = "一条龙"
query_vector = encoder.encode_query(image_path=query_image_path, text=query_text)

search_results = milvus_client.search(
    collection_name=COLLECTION_NAME,
    data=[query_vector],
    output_fields=["image_path"],
    limit=5,
    search_params={"metric_type": "COSINE", "params": {"ef": 128}}
)[0]

retrieved_images = []
print("检索结果:")
for i, hit in enumerate(search_results):
    print(f"  Top {i+1}: ID={hit['id']}, 距离={hit['distance']:.4f}, 路径='{hit['entity']['image_path']}'")
    retrieved_images.append(hit['entity']['image_path'])

# 8. 可视化与清理
print(f"\n--> 正在可视化结果并清理资源")
if not retrieved_images:
    print("没有检索到任何图像。")
else:
    panoramic_image = visualize_results(query_image_path, retrieved_images)
    combined_image_path = os.path.join(DATA_DIR, "search_result.png")
    cv2.imwrite(combined_image_path, panoramic_image)
    print(f"结果图像已保存到: {combined_image_path}")
    Image.open(combined_image_path).show()

milvus_client.release_collection(collection_name=COLLECTION_NAME)
print(f"已从内存中释放 Collection: '{COLLECTION_NAME}'")
milvus_client.drop_collection(COLLECTION_NAME)
print(f"已删除 Collection: '{COLLECTION_NAME}'")
import warnings
from pydantic.warnings import UnsupportedFieldAttributeWarning
warnings.filterwarnings("ignore", category=UnsupportedFieldAttributeWarning)

import os
from dotenv import load_dotenv
from llama_index.core.node_parser import SentenceWindowNodeParser, SentenceSplitter
from llama_index.core import VectorStoreIndex, SimpleDirectoryReader, Settings
# from llama_index.llms.deepseek import DeepSeek
from llama_index.llms.openai_like import OpenAILike
from llama_index.embeddings.huggingface import HuggingFaceEmbedding
from llama_index.core.postprocessor import MetadataReplacementPostProcessor

load_dotenv()

# 1. 配置模型
Settings.llm = OpenAILike(
    model="deepseek-ai/DeepSeek-R1",
    temperature=0.1,
    api_base="https://api.siliconflow.cn/v1",
    api_key=os.getenv("SILICONFLOW_API_KEY"),
)
Settings.embed_model = HuggingFaceEmbedding(model_name="../../models/bge-base-en-v1.5")

# 2. 加载文档
documents = SimpleDirectoryReader(
    input_files=["../../data/C3/pdf/IPCC_AR6_WGII_Chapter03.pdf"]
).load_data()

# 3. 创建节点与构建索引
# 3.1 句子窗口索引
node_parser = SentenceWindowNodeParser.from_defaults(
    window_size=3,
    window_metadata_key="window",
    original_text_metadata_key="original_text",
)
sentence_nodes = node_parser.get_nodes_from_documents(documents)
sentence_index = VectorStoreIndex(sentence_nodes)

# 3.2 常规分块索引 (基准)
base_parser = SentenceSplitter(chunk_size=512)
base_nodes = base_parser.get_nodes_from_documents(documents)
base_index = VectorStoreIndex(base_nodes)

# 4. 构建查询引擎
sentence_query_engine = sentence_index.as_query_engine(
    similarity_top_k=2,
    node_postprocessors=[
        MetadataReplacementPostProcessor(target_metadata_key="window")
    ],
)
base_query_engine = base_index.as_query_engine(similarity_top_k=2)

# 5. 执行查询并对比结果
query = "What are the concerns surrounding the AMOC?"
print(f"查询: {query}\n")

print("--- 句子窗口检索结果 ---")
window_response = sentence_query_engine.query(query)
print(f"回答: {window_response}\n")

print("--- 常规检索结果 ---")
base_response = base_query_engine.query(query)
print(f"回答: {base_response}\n")

总结
等后续更新~
参考文献
《All-in-RAG 第三章 索引构建》 https://datawhalechina.github.io/all-in-rag/

中国智能体开发者社区,聚焦智能体与大模型开发,提供前沿资讯、实用工具链、开源项目及行业案例。通过技术沙龙、开发者大赛等活动,促进经验交流与协作,助力开发者快速构建创新智能应用。
更多推荐


 5
5 0
0- 0



 已为社区贡献2条内容

所有评论(0)