基于本地部署Qwen3模型调用MCP中的遇到的问题记录1
解决问题:关于本地部署Qwen3使用transfomers调用,使用MCP工具时提示词底层逻辑解析。
之前使用langgraph实现了一个简单的AI调用工具并输出结果的功能,其中让AI选择工具使用的系统提示词,处于好奇探究了一下Qwen3不需要系统提示词是怎么做的。本测试基于transfomers调用本地模型。
部分环境:torch==2.7.0+cu128;python==3.12
直接上结论:模型根据chat_template模板来进行内容回答。
chat_template模板这是段jinja2写的脚本,在模型的tokenizer_config.json文件中可以找到。
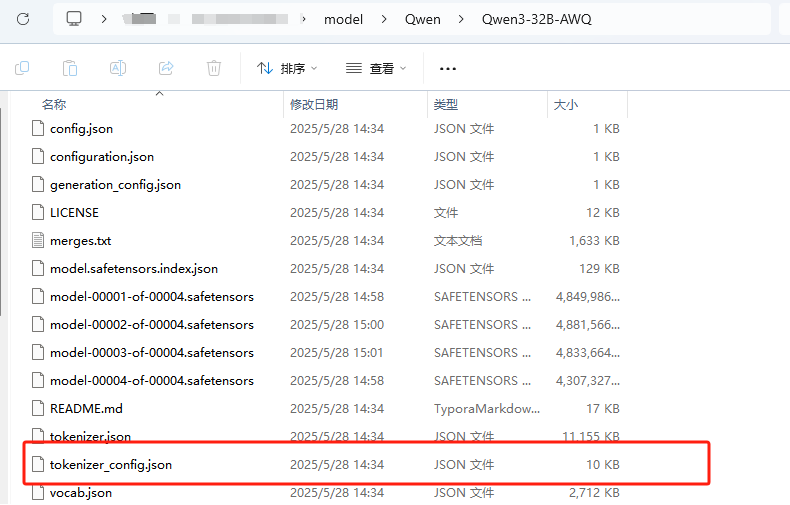
用kimi把其中的内容格式化可以得到如下:
{% if tools %}
    {{ '<|im_start|>system\n' }}
    {% if messages[0].role == 'system' %}
        {{ messages[0].content + '\n\n' }}
    {% endif %}
    {{ "# Tools\n\nYou may call one or more functions to assist with the user query.\n\nYou are provided with function signatures within <tools></tools> XML tags:\n<tools>" }}
    {% for tool in tools %}
        \n
        {{ tool | tojson }}
    {% endfor %}
    {{ "\n</tools>\\nnFor each function call, return a json object with function name and arguments within <tool_call></tool_call> XML tags:\n<tool_call>\n{\"name\": <function-name>, \"arguments\": <args-json-object>}\n</tool_call><|im_end|>\n" }}
{% else %}
    {% if messages[0].role == 'system' %}
        {{ '<|im_start|>system\n' + messages[0].content + '<|im_end|>\n' }}
    {% endif %}
{% endif %}

{% set ns = namespace(multi_step_tool=True, last_query_index=messages|length - 1) %}
{% for message in messages[::-1] %}
    {% set index = (messages|length - 1) - loop.index0 %}
    {% if ns.multi_step_tool and message.role == "user" and message.content is string and not(message.content.startswith('<tool_response>') and message.content.endswith('</tool_response>')) %}
        {% set ns.multi_step_tool = false %}
        {% set ns.last_query_index = index %}
    {% endif %}
{% endfor %}

{% for message in messages %}
    {% if message.content is string %}
        {% set content = message.content %}
    {% else %}
        {% set content = '' %}
    {% endif %}

    {% if message.role == "user" or (message.role == "system" and not loop.first) %}
        {{ '<|im_start|>' + message.role + '\n' + content + '<|im_end|>' + '\n' }}
    {% elif message.role == "assistant" %}
        {% set reasoning_content = '' %}
        {% if message.reasoning_content is string %}
            {% set reasoning_content = message.reasoning_content %}
        {% else %}
            {% if '</think>' in content %}
                {% set reasoning_content = content.split('</think>')[].0rstrip('\n').split('<think>')[-1].lstrip('\n') %}
                {% set content = content.split('</think>')[-1].lstrip('\n') %}
            {% endif %}
        {% endif %}

        {% if loop.index0 > ns.last_query_index %}
            {% if loop.last or (not loop.last and reasoning_content) %}
                {{ '<|im_start|>' + message.role + '\n<think>\n' + reasoning_content.strip('\n') + '\n</think>\n\n' + content.lstrip('\n') }}
            {% else %}
                {{ '<|im_start|>' + message.role + '\n' content + }}
            {% endif %}
        {% else %}
            {{ '<|im_start|>' + message.role + '\n' + content }}
        {% endif %}

        {% if message.tool_calls %}
            {% for tool_call in message.tool_calls %}
                {% if loop.first and content or not loop.first %}
                    \n
                {% endif %}
                {% if tool_call.function %}
                    {% set tool_call = tool_call.function %}
                {% endif %}
                {{ '<tool_call>\n{\"name\": \"' }}
                {{ tool_call.name }}
                {{ '\", \"arguments\": ' }}
                {% if tool_call.arguments is string %}
                    {{ tool_call.arguments }}
                {% else %}
                    {{ tool_call.arguments | tojson }}
                {% endif %}
                {{ '}\n</tool_call>' }}
            {% endfor %}
        {% endif %}

        {{ '<|im_end|>\n' }}
    {% elif message.role == "tool" %}
        {% if loop.first or (messages[loop.index0 - 1].role != "tool") %}
            {{ '<|im_start|>user' }}
        {% endif %}
        \n
        {{ '<tool_response>\n' }}
        {{ content }}
        {{ '\n</tool_response>' }}
        {% if loop.last or (messages[loop.index0 + 1].role != "tool") %}
            {{ '<|im_end|>\n' }}
        {% endif %}
    {% endif %}
{% endfor %}

{% if add_generation_prompt %}
    {{ '<|im_start|>assistant\n' }}
    {% if enable_thinking is defined and enable_thinking is false %}
        {{ '<think>\n\n</think>\n\n' }}
    {% endif %}
{% endif %}
由于本人也是第一次了解这语言,也只是对部分进行了验证,简单的来说,它会将用户的输入按照模板来解析。
1.模型选择工具
以下是模拟muc中模型选择工具的部分代码:
text = self.tokenizer.apply_chat_template(
    messages,
    tools=tools,
    tokenize=False,
    add_generation_prompt=True
)
tools = [
    {
        'name': 'get_alerts',
        'description': '获取指定州的天气信息(使用两字母州代码如CA/NY)',
        'input_schema': {
            'properties': {
                'state': {
                    'title': 'State',
                    'type': 'string'
                }
            },
            'required': ['state'],
            'title': 'get_alertsArguments',
            'type': 'object'
        }
    },
    {
        'name': 'get_forecast',
        'description': '获取位置的天气预报。\n\n    Args:\n        latitude: 位置的纬度\n        longitude: 位置的经度\n    ',
        'input_schema': {
            'properties': {
                'latitude': {
                    'title': 'Latitude',
                    'type': 'number'
                },
                'longitude': {
                    'title': 'Longitude',
                    'type': 'number'
                }
            },
            'required': ['latitude', 'longitude'],
            'title': 'get_forecastArguments',
            'type': 'object'
        }
    }
]
toolresult =[
    {
        'get_alerts': {
                'State': 'CA',
                'temperature' : '25°C',
                'humidity' : '60%',
                'wind_speed' : '10m/s',
                'wind_direction' : '东北风',
                'visibility' : '10km'},
    }
]
print(f"Input Text: {text}")
toolresult_str = json.dumps(toolresult, ensure_ascii=False)
messages = [{"role": "user", "content": user_input}]
打印输出可以看到:
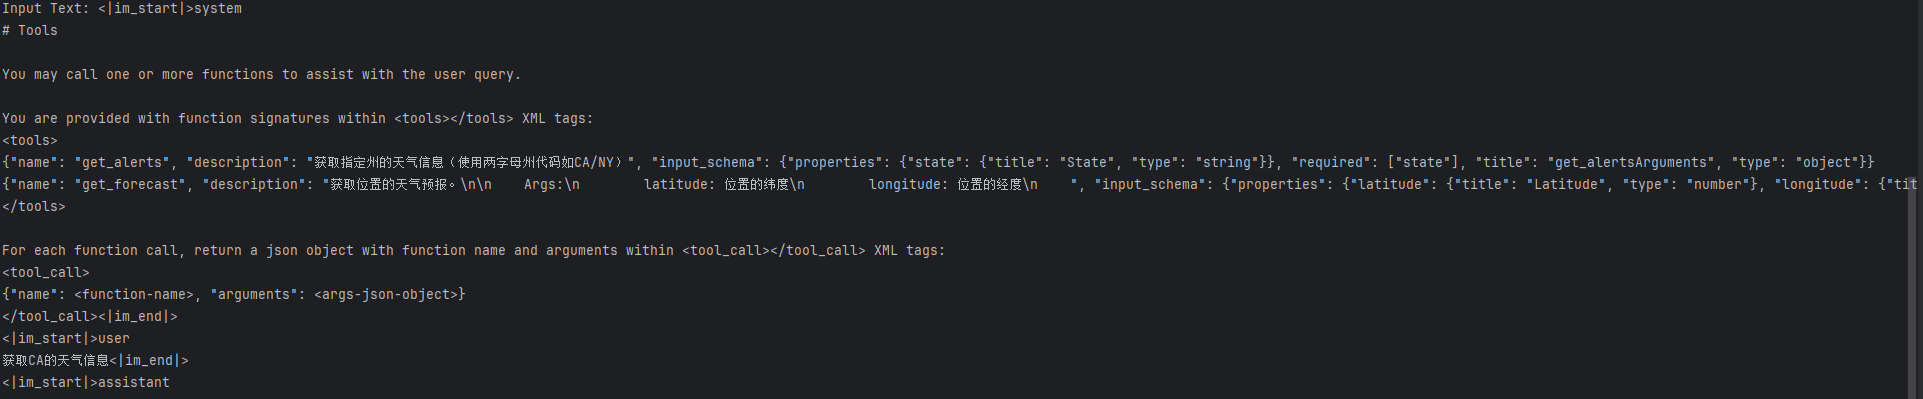
工具信息被解析到:按照之前的解析脚本我们工具信息被放在了<tools></tools>标签中间,按照脚本的功能由于我们输入了tools,所以也给出了输出了工具的输出模板格式。
For each function call, return a json object with function name and arguments within <tool_call></tool_call> XML tags:
<tool_call>
{"name": <function-name>, "arguments": <args-json-object>}
</tool_call><|im_end|>
<|im_start|>user
获取CA的天气信息<|im_end|>
<|im_start|>assistant
可以看模型的响应:
也是按照模板格式将模型选择的信息加在了<tool_call>标签之间。
2.模型结合工具结果进行输出。
按照第一步既然模型可以输出选择的工具信息,那么是怎么不用系统提示词来总结输出的呢。还是回到那一段jinja2脚本。其中有一段:
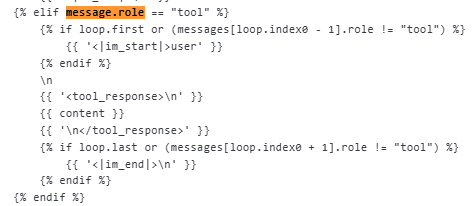
根据猜想如果最后一条输出给模型的字段role为tool,是不是就会按照这个来总结结果。
将输入改成:
messages = [{"role": "user", "content": user_input},
            {"role": "tool", "content": toolresult_str}]
再次运行可以看到
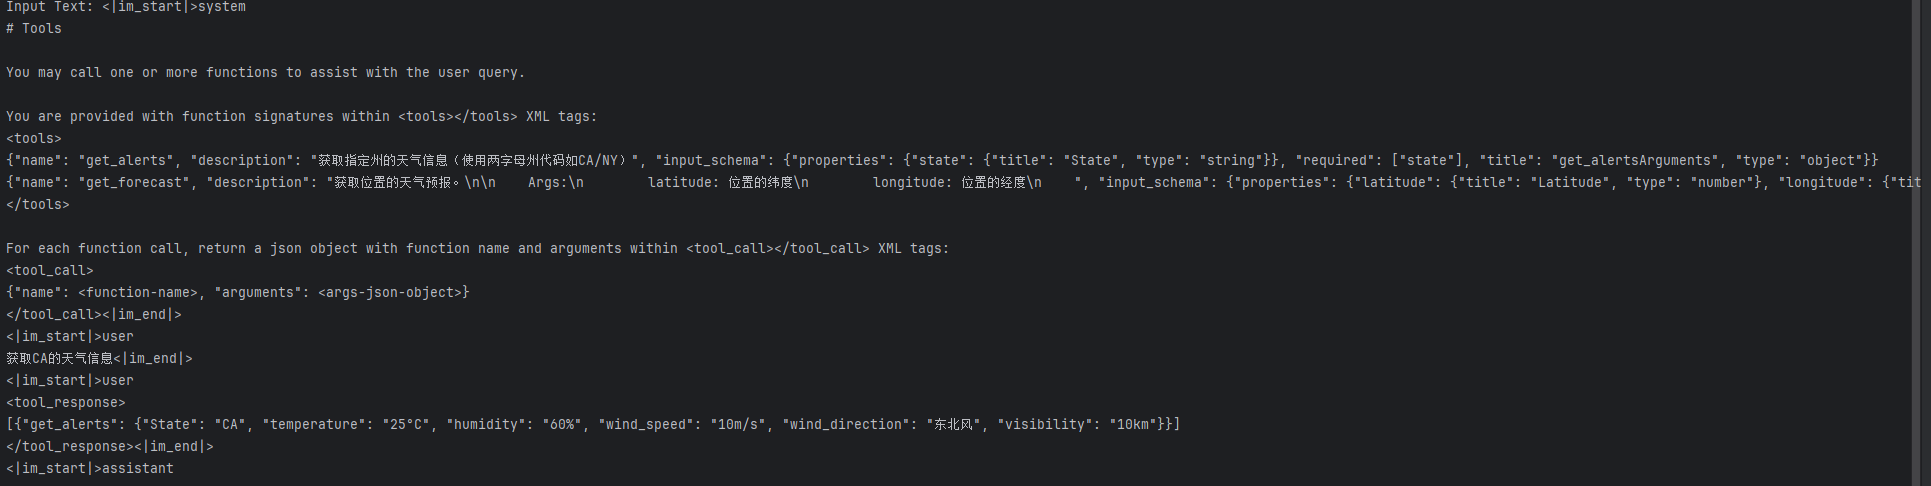
模板信息中多了一个<tool_response>标签中的信息,然后这个信息刚好为我们虚构的工具返回的信息。
模型输出: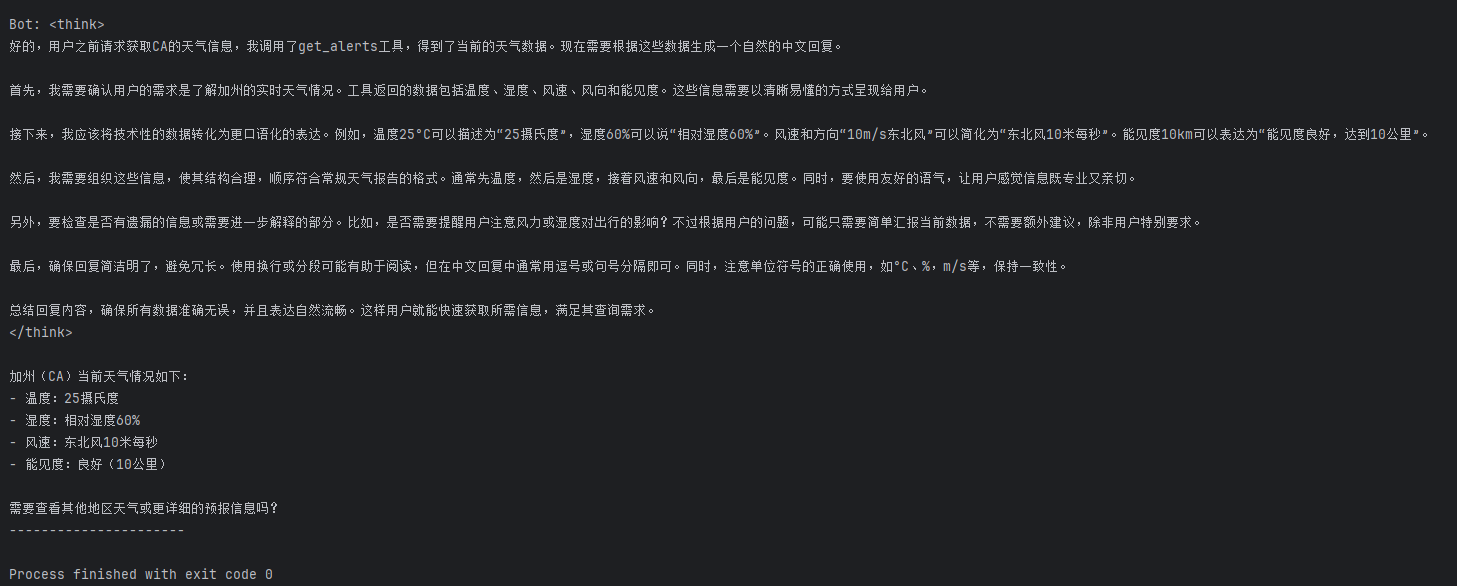
小结:
- Qwen3通过tokenizer_config.json中的聊天模板来进行信息的交互,从而选择工具以及总结信息,高级进阶玩法自定义自己的聊天模板。
- 传入tool信息,模型返回在<tool_call>标签中输出选择的工具。
- 在输入信息最后的一条加入
"role": "tool", "content": toolresult_str
注意工具输出要转成字符串。Qwen3就会按照模板进行总结输出。

中国智能体开发者社区,聚焦智能体与大模型开发,提供前沿资讯、实用工具链、开源项目及行业案例。通过技术沙龙、开发者大赛等活动,促进经验交流与协作,助力开发者快速构建创新智能应用。
更多推荐

 19
19 0
0- 0


 已为社区贡献2条内容

所有评论(0)