使用AutoGen调用本地Qwen2.5推理模型
·
Qwen2.5推理模型本地部署
1、下载Qwen2.5-1.5B
从魔塔社区下载 Qwen/Qwen2.5-1.5B-Instruct
SDK的方式
#模型下载
from modelscope import snapshot_download

snapshot_download('Qwen/Qwen2.5-1.5B-Instruct', cache_dir='/root/autodl-tmp/LLMs/models')
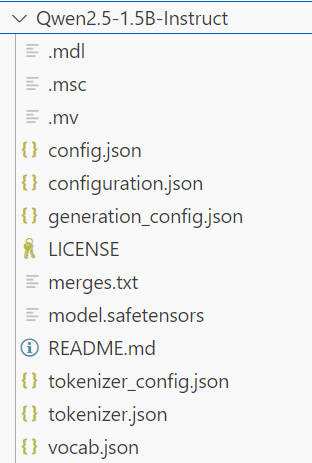
下载完成之后的目录结构:
2、使用LMDeploy部署模型
2.1 安装
pip install lmdeploy -i https://mirrors.aliyun.com/pypi/simple/2.2 构建模型服务
LLM 模型服务
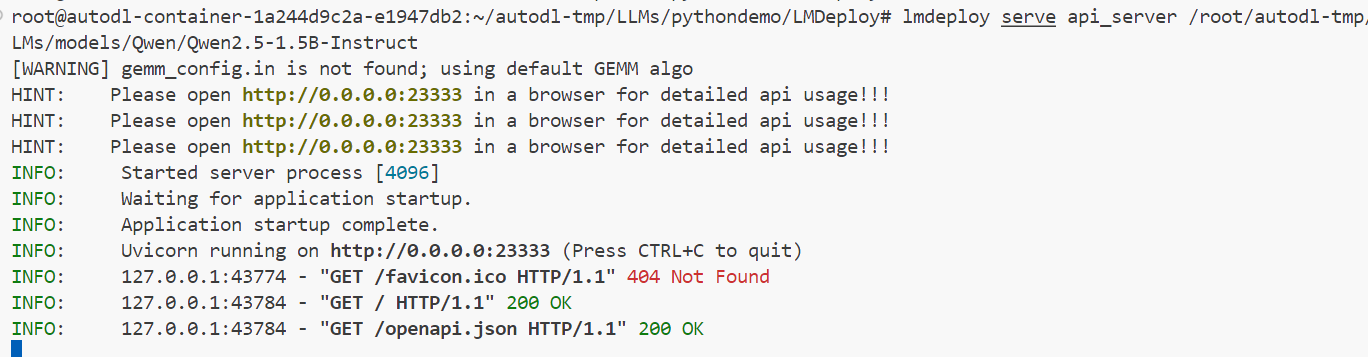
lmdeploy serve api_server /root/autodl-tmp/LLMs/models/Qwen/Qwen2.5-1.5B-Instruct如果报错:ModuleNotFoundError: No module named 'partial_json_parser'
解决方法:
pip install partial-json-parser -i https://mirrors.aliyun.com/pypi/simple/如下图所示启动的模型服务:
2.3 测试:客户端调用
from openai import OpenAI
client = OpenAI(
    api_key='YOUR_API_KEY',
    base_url="http://127.0.0.1:23333/v1"
)
# 获取第一个模型
model_name = client.models.list().data[0].id
print("model_name:", model_name)
response = client.chat.completions.create(
  model=model_name,
  messages=[
    {"role": "system", "content": "你是一个AI智能助手"},
    {"role": "user", "content": " 写一首关于春天的诗句"},
  ],
    temperature=0.8,
    top_p=0.8
)
print(response)
3、使用AutoGen调用本地模型
3.1 安装
pip install autogen-agentchat -i https://mirrors.aliyun.com/pypi/simple/3.2 快速开始
import asyncio

from autogen_agentchat.agents import AssistantAgent
from autogen_agentchat.ui import Console
from autogen_ext.models.openai import OpenAIChatCompletionClient

# 模型客户端
model_client = OpenAIChatCompletionClient(
    model="/root/autodl-tmp/LLMs/models/Qwen/Qwen2.5-1.5B-Instruct",
    base_url="http://127.0.0.1:23333/v1",
    api_key="NULL",
    model_info={
            "vision": False,
            "function_calling": True,
            "json_output": True,
            "family": "unknown",
        },
)

# 定义 AssistantAgent。
agent = AssistantAgent(
    name="my_agent",
    model_client=model_client,
    system_message="你是一个乐于助人的AI智能助手",
    reflect_on_tool_use=True,
    model_client_stream=True,  # 从模型客户端启用流式令牌。
)

# 运行代理并将消息流式传输到控制台。
async def main() -> None:
    await Console(agent.run_stream(task="写一首关于下雨的诗句"))

asyncio.run(main())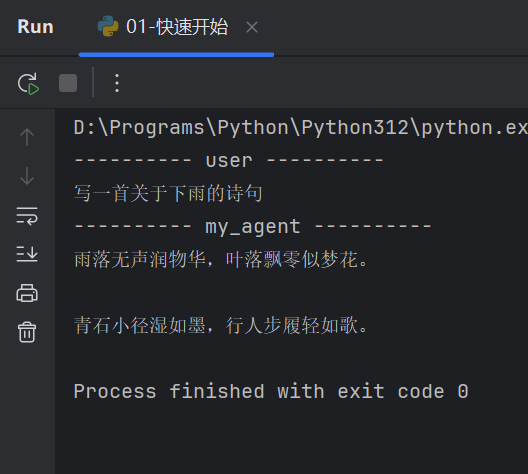
注:关于LMDeply、AutoGen 的更多详细使用方法请参考官方文档
LMDeploy 帮助文档: 欢迎来到 LMDeploy 的中文教程! — lmdeploy
AutoGen 帮助文档:AutoGen — AutoGen

中国智能体开发者社区,聚焦智能体与大模型开发,提供前沿资讯、实用工具链、开源项目及行业案例。通过技术沙龙、开发者大赛等活动,促进经验交流与协作,助力开发者快速构建创新智能应用。
更多推荐

 5
5 0
0- 0


 已为社区贡献4条内容

所有评论(0)