手把手教学从下载开始实现微调huggingface上的模型
从头开始教学如何从huggingface上下载大模型与数据集,并且根据数据集去微调大模型,满足当前的任务需求
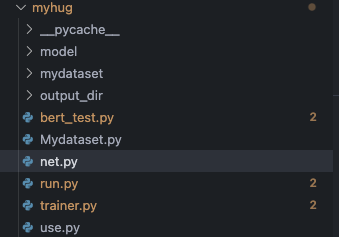
整个文件的目录如下
下载模型与数据集
首先先下载模型,为了避免科学上网,这里直接从镜像网站上面进行下载
1.export HF_ENDPOINT=https://hf-mirror.com
2.huggingface-cli download --repo-type model --resume-download google/bert-base-chinese --local-dir /home/huangxh/myhug/model

需要下载的模型名称一般就是它的名字
这里踩了一个坑,之前因为下载数据集 --repo-type由于下载数据集这里设置为dataset
所以一直找不到模型,后来发现这里需要修改成model
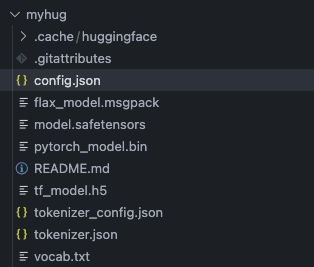
成功下载好模型,路径如上图所示
BertModel(
  (embeddings): BertEmbeddings(
    (word_embeddings): Embedding(21128, 768, padding_idx=0)
    (position_embeddings): Embedding(512, 768)
    (token_type_embeddings): Embedding(2, 768)
    (LayerNorm): LayerNorm((768,), eps=1e-12, elementwise_affine=True)
    (dropout): Dropout(p=0.1, inplace=False)
  )
  (encoder): BertEncoder(
    (layer): ModuleList(
      (0-11): 12 x BertLayer(
        (attention): BertAttention(
          (self): BertSdpaSelfAttention(
            (query): Linear(in_features=768, out_features=768, bias=True)
            (key): Linear(in_features=768, out_features=768, bias=True)
            (value): Linear(in_features=768, out_features=768, bias=True)
            (dropout): Dropout(p=0.1, inplace=False)
          )
          (output): BertSelfOutput(
            (dense): Linear(in_features=768, out_features=768, bias=True)
            (LayerNorm): LayerNorm((768,), eps=1e-12, elementwise_affine=True)
            (dropout): Dropout(p=0.1, inplace=False)
          )
        )
        (intermediate): BertIntermediate(
          (dense): Linear(in_features=768, out_features=3072, bias=True)
          (intermediate_act_fn): GELUActivation()
        )
        (output): BertOutput(
          (dense): Linear(in_features=3072, out_features=768, bias=True)
          (LayerNorm): LayerNorm((768,), eps=1e-12, elementwise_affine=True)
          (dropout): Dropout(p=0.1, inplace=False)
        )
      )
    )
  )
  (pooler): BertPooler(
    (dense): Linear(in_features=768, out_features=768, bias=True)
    (activation): Tanh()
  )
)
接着下载数据集
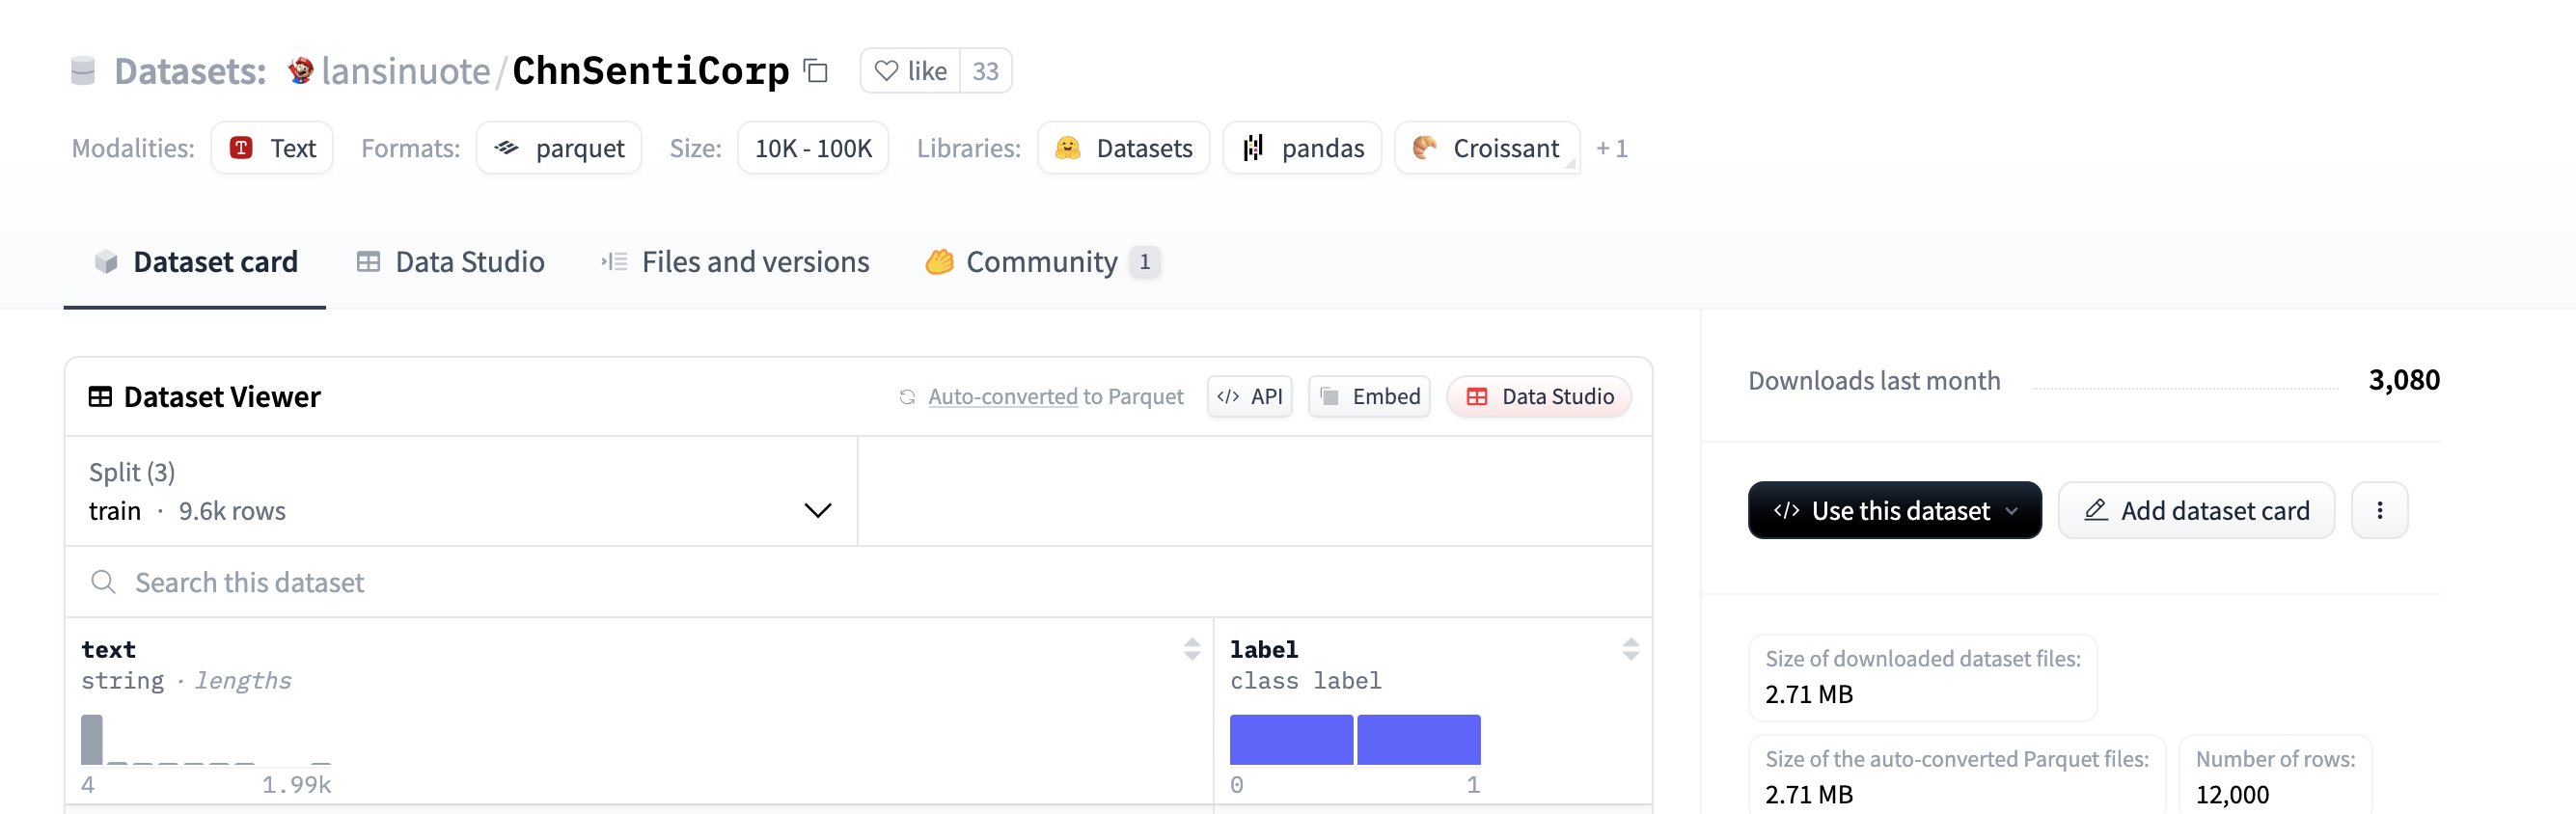
同理找到一个数据集,得到它的名字
huggingface-cli download --repo-type dataset --resume-download lansinuote/ChnSentiCorp --local-dir /home/huangxh/myhug/mydataset
定义自己的数据集与模型
首先先读取下载好的数据集
根据输入的类型去获取对应的数据集
from torch.utils.data import Dataset
from datasets import load_dataset

class Mydataset(Dataset):
    def __init__(self,split):
        super().__init__()
        self.dataset = load_dataset("/home/huangxh/myhug/mydataset/data")
        if split == "train":
            self.dataset = self.dataset["train"]
        elif split == "validation":
            self.dataset = self.dataset["validation"]
        elif split == "test":
            self.dataset = self.dataset["test"]
        else:
            print("数据集名称输入有错")

    def __len__(self):
        return len(self.dataset)

    def __getitem__(self, item):
        text = self.dataset[item]["text"]
        label = self.dataset[item]["label"]
        return text, label

if __name__ == "__main__":
    dataset = Mydataset("validation")
    print(dataset[0])
运行一下,可以得到数据集,前面是文本,后面是标签

其次定义网络
这里主体是使用了bert,这里是之前下载下来的
然后在bert的输出后面把每个batch的第一个输出当作cls用于分类
bert输出的维度是[batch_size,seq_len,hidden_size]
接一个二分类的线性层得到最后答案
并且由于我们并不训练bert网络
只训练二分类层,所以在bert前向传播的过程中禁用
from transformers import BertModel, BertTokenizer
import torch
DEVICE = torch.device("cuda" if torch.cuda.is_available() else "cpu")
pretained = BertModel.from_pretrained("/home/huangxh/myhug/model").to(DEVICE)
#print(pretained.forward)
class Model(torch.nn.Module):
def __init__(self):
super().__init__()
print("Model initialized")
self.fc = torch.nn.Linear(768, 2)
def forward(self, input_ids, attention_mask,token_type_ids):
with torch.no_grad():
out = pretained(input_ids=input_ids, attention_mask=attention_mask,token_type_ids=token_type_ids)
out = out.last_hidden_state[:,0,:]
out = self.fc(out)
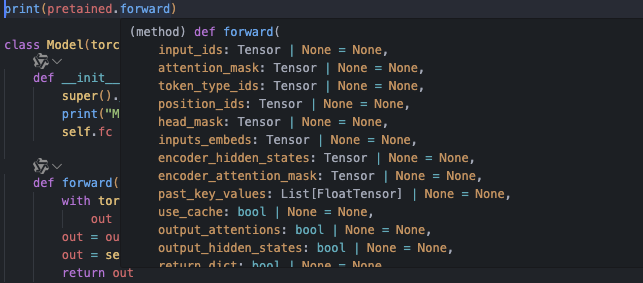
return out再解释一下这里的forward部分为什么需要传入这些参数
这些是由分词器传入的,想要知道需要哪些参数,可以直接看pretained.forward部分
训练部分
整体的逻辑是如何近一步处理准备好的数据集与模型
由于数据集进来的是文本加标签的格式

所以需要先使用tokenizer进行处理
这里就需要导入原先下载的模型对应的分词器
并且用dataloader来处理训练数据集变成需要的格式
from transformers import BertTokenizer
from torch.utils.data import DataLoader

#这里是使用同一目录下的Mydataset.py文件
from Mydataset import Mydataset

DEVICE = torch.device("cuda" if torch.cuda.is_available else "cpu")
#获取分词器
token = BertTokenizer.from_pretained("/home/huangxh/myhug/model")

#获取训练数据集
train_dataset = Mydataset("train")

#自定义对数据的处理
def collate_fn(data):
    #先把数据集中的数据分开提取
    sentes = [i[0] for i in data]
    labels = [i[1] for i in data]

    #用分词器处理语句
    data = token.batch_encode_plus(
        batch_text_or_text_pairs = sentes,
        max_length = 256,
        padding = "max_length",
        truncation = True,
        return_tensors = "pt",
        return_length = True
    )
    #获得输入bert的参数
    input_ids = data["input_ids"]
    attention_mask = data["attention_mask"]
    token_type_ids = data["token_type_ids"]
    #把标签也转化为tensor格式
    labels = torch.LongTensor(labels)

    return input_ids,attention_mask,token_type_ids,labels

#转化为DataLoader
train_dataloader = DataLoader(
    dataset = train_dataset,
    batch_size = 32,
    #是否需要打乱数据集
    shuffle = True,
    #自定义如何处理数据集中的数据
    collate_fn = collate_fn
)
做好上面的准备就可以正式开始训练了
下面的代码跟上面的代码是在一个文件里的,为了讲述的逻辑清晰把它分开
from transformers import AdamW
from torch.utils.data import DataLoader
import torch

#定义训练模型的checkpoint,记录中间的模型参数
save_path = "/home/huangxh/myhug/output_dir"

EPOCH = 10


if __name__ == "__main__":
    print(DEVICE)
    #定义模型,优化器,损失函数
    model = Model().to(DEVICE)
    optimizer = AdamW(model.parameters(),lr = 1e-5)
    loss_func = torch.nn.EntropyLoss()

    model.train()

    for epoch in range(EPOCH):
        for i,(input_ids,attention_mask,token_type_ids,labels) in enumerate(train_dataloader):
            #由于模型都是在cuda上,所以对应的要把数据也放到cuda上
            input_ids = input_ids.to(DEVICE)
            attention_mask = attention_mask.to(DEVICE)
            token_type_ids = token_type_ids.to(DEVICE)
            labels = labels.to(DEVICE)

            out = model(input_ids,attention_mask,token_type_ids)

            loss = loss_func(out,labels)

            optimizer.zero_grad()
            loss.backward()
            optimizer.step()

            #隔一段时间记录一下
            if i % 10 == 0:
                print(f"Epoch: {epoch}, Step: {i}, Loss: {loss.item()}")

        #每轮epoch做完把模型的参数给存起来
        torch.save(model.state_dict(), f"{save_path}/model_epoch_{epoch}.pth")
        print(f"Model saved for epoch {epoch}")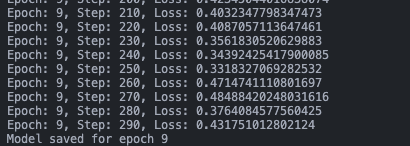
测试阶段
这里我们去使用我们之前训练好的参数,来更新我们的模型
并且看看准确率
前面的准备工作相同
import torch
from Mydataset import Mydataset
from net import Model
from transformers import BertTokenizer
from transformers import AdamW
from torch.utils.data import DataLoader

DEVICE = torch.device("cuda" if torch.cuda.is_available() else "cpu")

token = BertTokenizer.from_pretrained("/home/huangxh/myhug/model")

def collate_fn(data):
    sentes = [i[0] for i in data]
    labels = [i[1] for i in data]

    data = token.batch_encode_plus(
        batch_text_or_text_pairs=sentes,
        max_length=256,
        padding="max_length",
        truncation=True,
        return_tensors="pt",
        return_length = True
    )
    input_ids = data["input_ids"]
    attention_mask = data["attention_mask"]
    token_type_ids = data["token_type_ids"]
    labels = torch.LongTensor(labels)

    return input_ids, attention_mask, token_type_ids, labels
然后取出测试数据集并变成dataloader,进行测试
test_dataset = Mydataset("test")
test_dataloader = DataLoader(
    dataset = test_dataset,
    batch_size = 32,
    shuffle = True,
    collate_fn = collate_fn
)

if __name__ == "__main__":
    acc = 0
    total = 0

    model = Model().to(DEVICE)
    #更新模型的参数,读入最后一轮训练的参数
    model.load_state_dict(torch.load("/home/huangxh/myhug/output_dir/model_epoch_9.pth"))

    model.eval()

    for i,(input_ids, attention_mask, token_type_ids, labels) in enumerate(test_dataloader):
        input_ids = input_ids.to(DEVICE)
        attention_mask = attention_mask.to(DEVICE)
        token_type_ids = token_type_ids.to(DEVICE)
        labels = labels.to(DEVICE)

        out = model(input_ids, attention_mask, token_type_ids)

        out = model(input_ids, attention_mask, token_type_ids)#[32,2]

        #返回预测的索引
        out = out.argmax(dim=1)

        acc += (out == labels).sum().item()
        total += len(labels)

    print("acc:", acc / total)
    print("total:", total)
本地部署使用
这里其实跟test阶段比较像,唯一的区别就是这里的数据并不是原来的文本标签对
而是单一的文本,所以在collate_fn那里的处理稍微有些不同
然后就是针对输入文本,把它放到模型里面去使用即可
import torch
from Mydataset import Mydataset
from net import Model
from transformers import BertTokenizer

DEVICE = torch.device("cuda" if torch.cuda.is_available() else "cpu")
names = ["负向评价", "正向评价"]
print(DEVICE)
model = Model().to(DEVICE)

token = BertTokenizer.from_pretrained("/home/huangxh/myhug/model")

def collate_fn(data):
    sentes = []
    sentes.append(data)

    data = token.batch_encode_plus(
        batch_text_or_text_pairs=sentes,
        max_length=256,
        padding="max_length",
        truncation=True,
        return_tensors="pt",
        return_length = True
    )
    input_ids = data["input_ids"]
    attention_mask = data["attention_mask"]
    token_type_ids = data["token_type_ids"]

    return input_ids, attention_mask, token_type_ids

def test():
    model.load_state_dict(torch.load("/home/huangxh/myhug/output_dir/model_epoch_9.pth"))
    model.eval()

    while True:
        data = input("请输入句子(输入q退出):")
        if data == "q":
            print("退出")
            break

        input_ids, attention_mask, token_type_ids = collate_fn(data)
        input_ids = input_ids.to(DEVICE)
        attention_mask = attention_mask.to(DEVICE)
        token_type_ids = token_type_ids.to(DEVICE)

        with torch.no_grad():
            out = model(input_ids, attention_mask, token_type_ids)

            print("模型判断:",names[out.argmax(1).item()],"\n")

if __name__ == "__main__":
    test()
最后的实操结果如下:
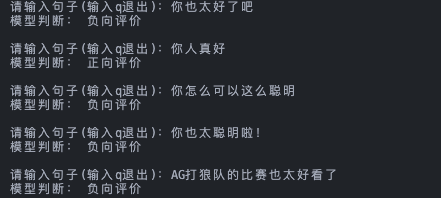
这里好像加入太,就会被理解成阴阳怪气,所以这个数据集还是可能需要改进的

火山引擎开发者社区是火山引擎打造的AI技术生态平台,聚焦Agent与大模型开发,提供豆包系列模型(图像/视频/视觉)、智能分析与会话工具,并配套评测集、动手实验室及行业案例库。社区通过技术沙龙、挑战赛等活动促进开发者成长,新用户可领50万Tokens权益,助力构建智能应用。
更多推荐
 13
13 0
0- 0


 已为社区贡献1条内容

所有评论(0)